Project Burbank Development
This post is going to go fairly in-depth to my entire experience on Project Burbank. I had a blast working on this game and I want to showcase what went into it in a blog-style format.
During the development of Project Burbank, we had a teamwide philosophy of 80/20. Whether it was a gameplay feature or an asset, we needed it in game as quickly as possible so we could focus on iteration. This meant we brought everything to about 80% and moved on leaving the last 20% for later or not at all. This philosophy allowed us to focus on a large breadth of content without getting caught up in details that won’t have much impact on the player experience.
Creative Direction Alignment
Aligning with Jake, our Creative Director, was the first step in the character pipeline. The art team needed to understand the vision he had in his head about what our characters should look like, and because terms like “stylized” mean different things to different people, we had to develop a shared visual language for what he was after. I held a meeting to set the visual guardrails to help determine the level of stylization we could pursue. Kevin, the Principal Animator, and I spent a few hours collecting reference on a Figma board and during the meeting we put those collected images on a line to determine what was too realistic vs. too stylized for Project Burbank. We did this for nearly every aspect of our characters.
The images toward the center of the line are the examples that align with Jake’s vision for the character. Stylized forms with naturalistic proportions and slightly exaggerated features.
Character Briefs
After the alignment phase and the and the development of our shared visual language, briefs were created and presentations were given to communicate the visual trends to our external partners at Dardo Studios and kickoff the look development phase of the project. The folks at Dardo were amazing collaborators during this initial concept development process and I can’t recommend them highly enough.
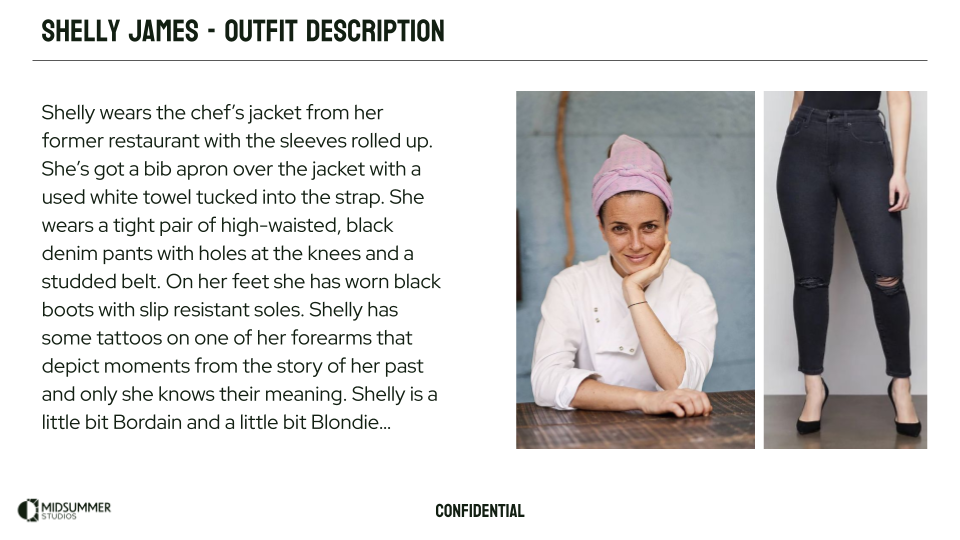
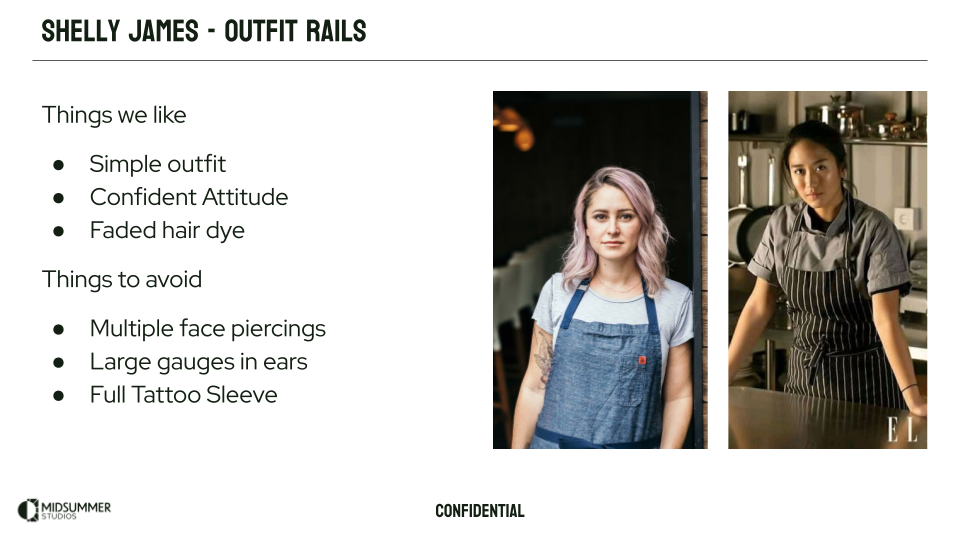
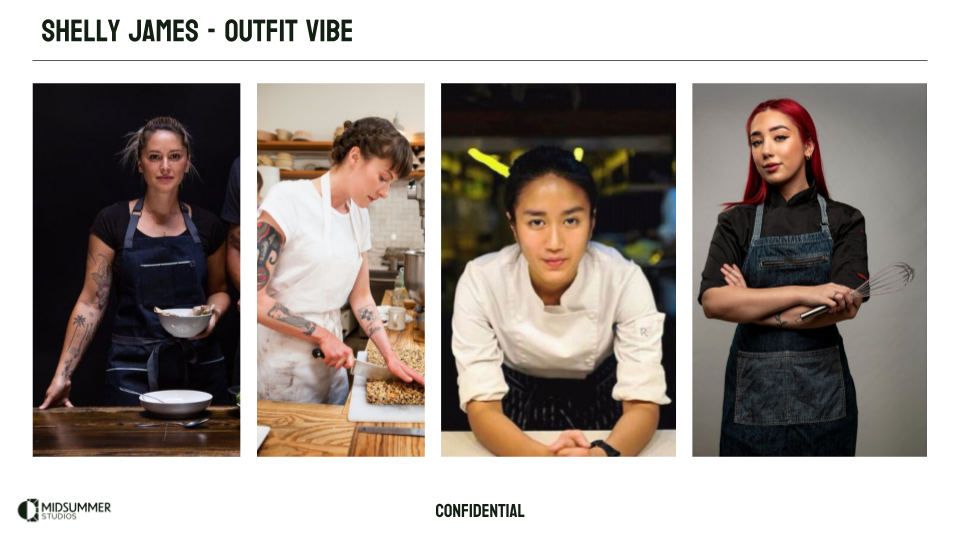
On the left is a section from our vis dev brief and on the right is a section of one of our character briefs. These were used to help guide our external partners in the development of our initial concepts.

Character Look Development
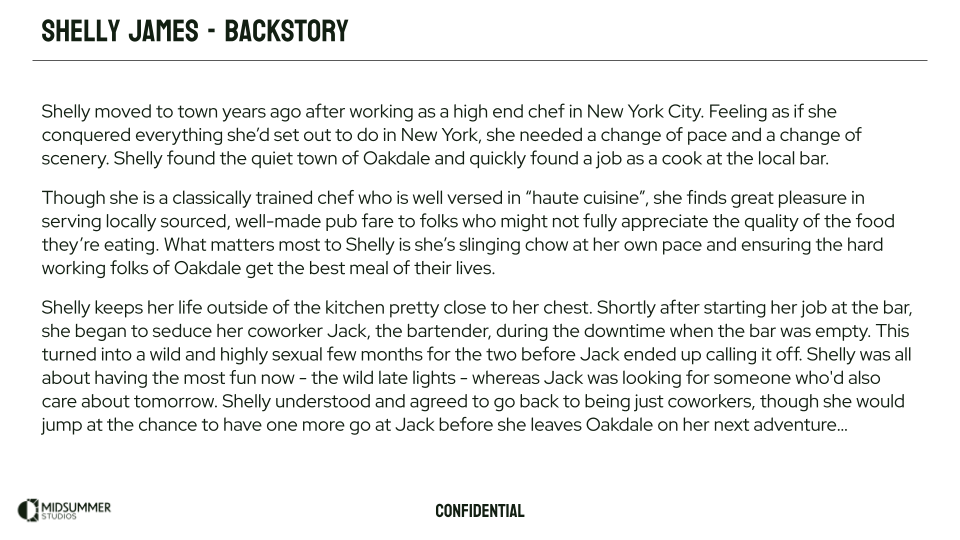
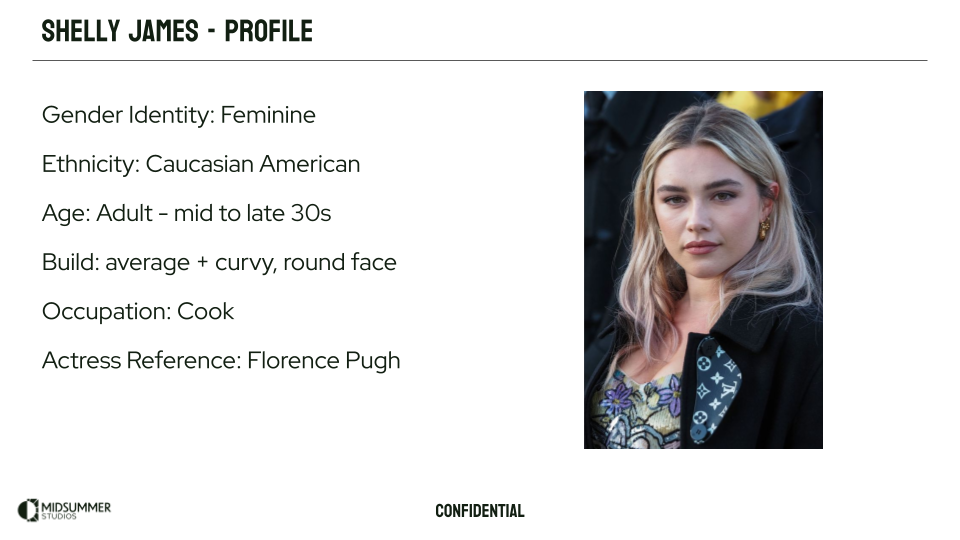
Through Dardo, we worked with a fantastic character concept artist named Cristina Cid who took our briefs and ran with them. We asked her to create concepts for three main characters, Shelly James, Melinda Dante, and Jack Sullivan. The three characters had their own history with the town and each other, as described in the briefs. Cris cranked through a ton of iterations of our main characters and their costumes as I was blocking in assets and testing them out in game with our Principal Animator, Kevin Bradley. Below are some shots of our character paint overs, block-ins, and various tests. The end result of this process was the near completion of one target character, Shelly James, who would act as our pipeline development character and set the tone for the rest of the cast.
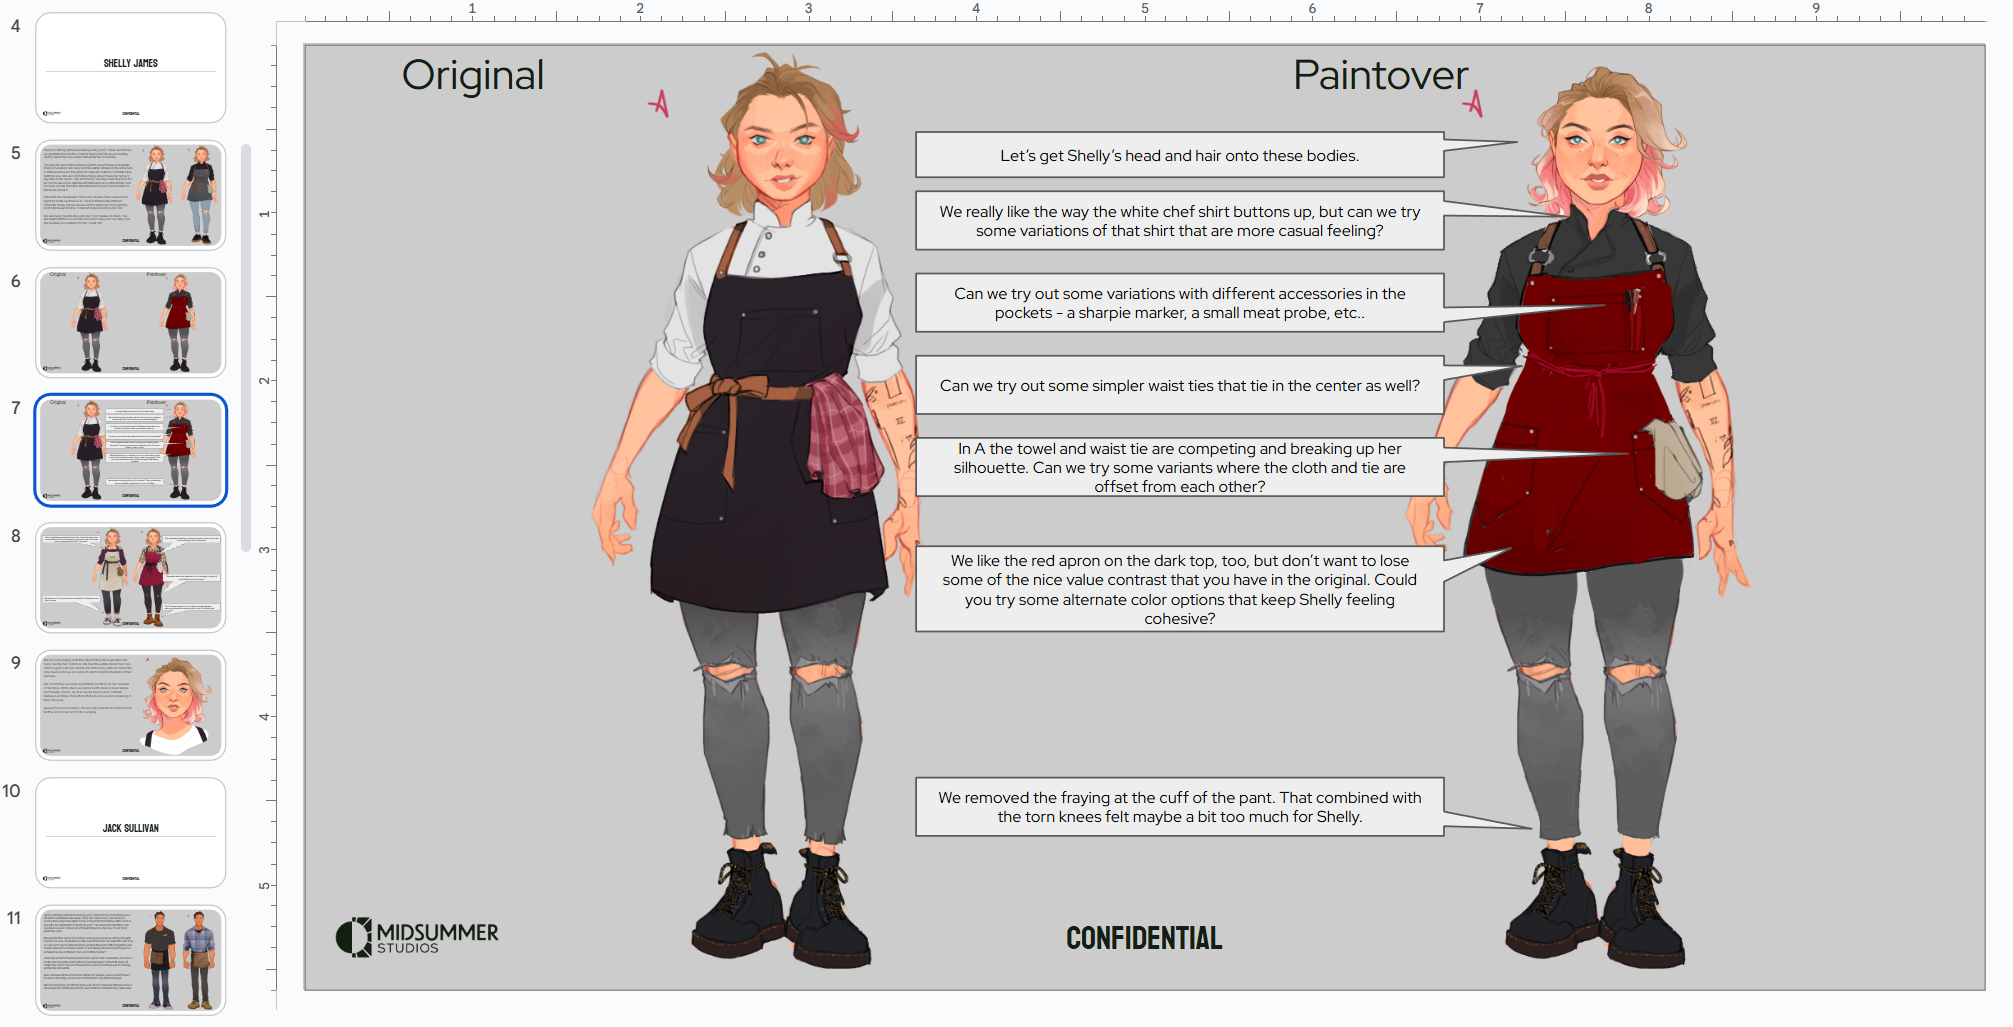
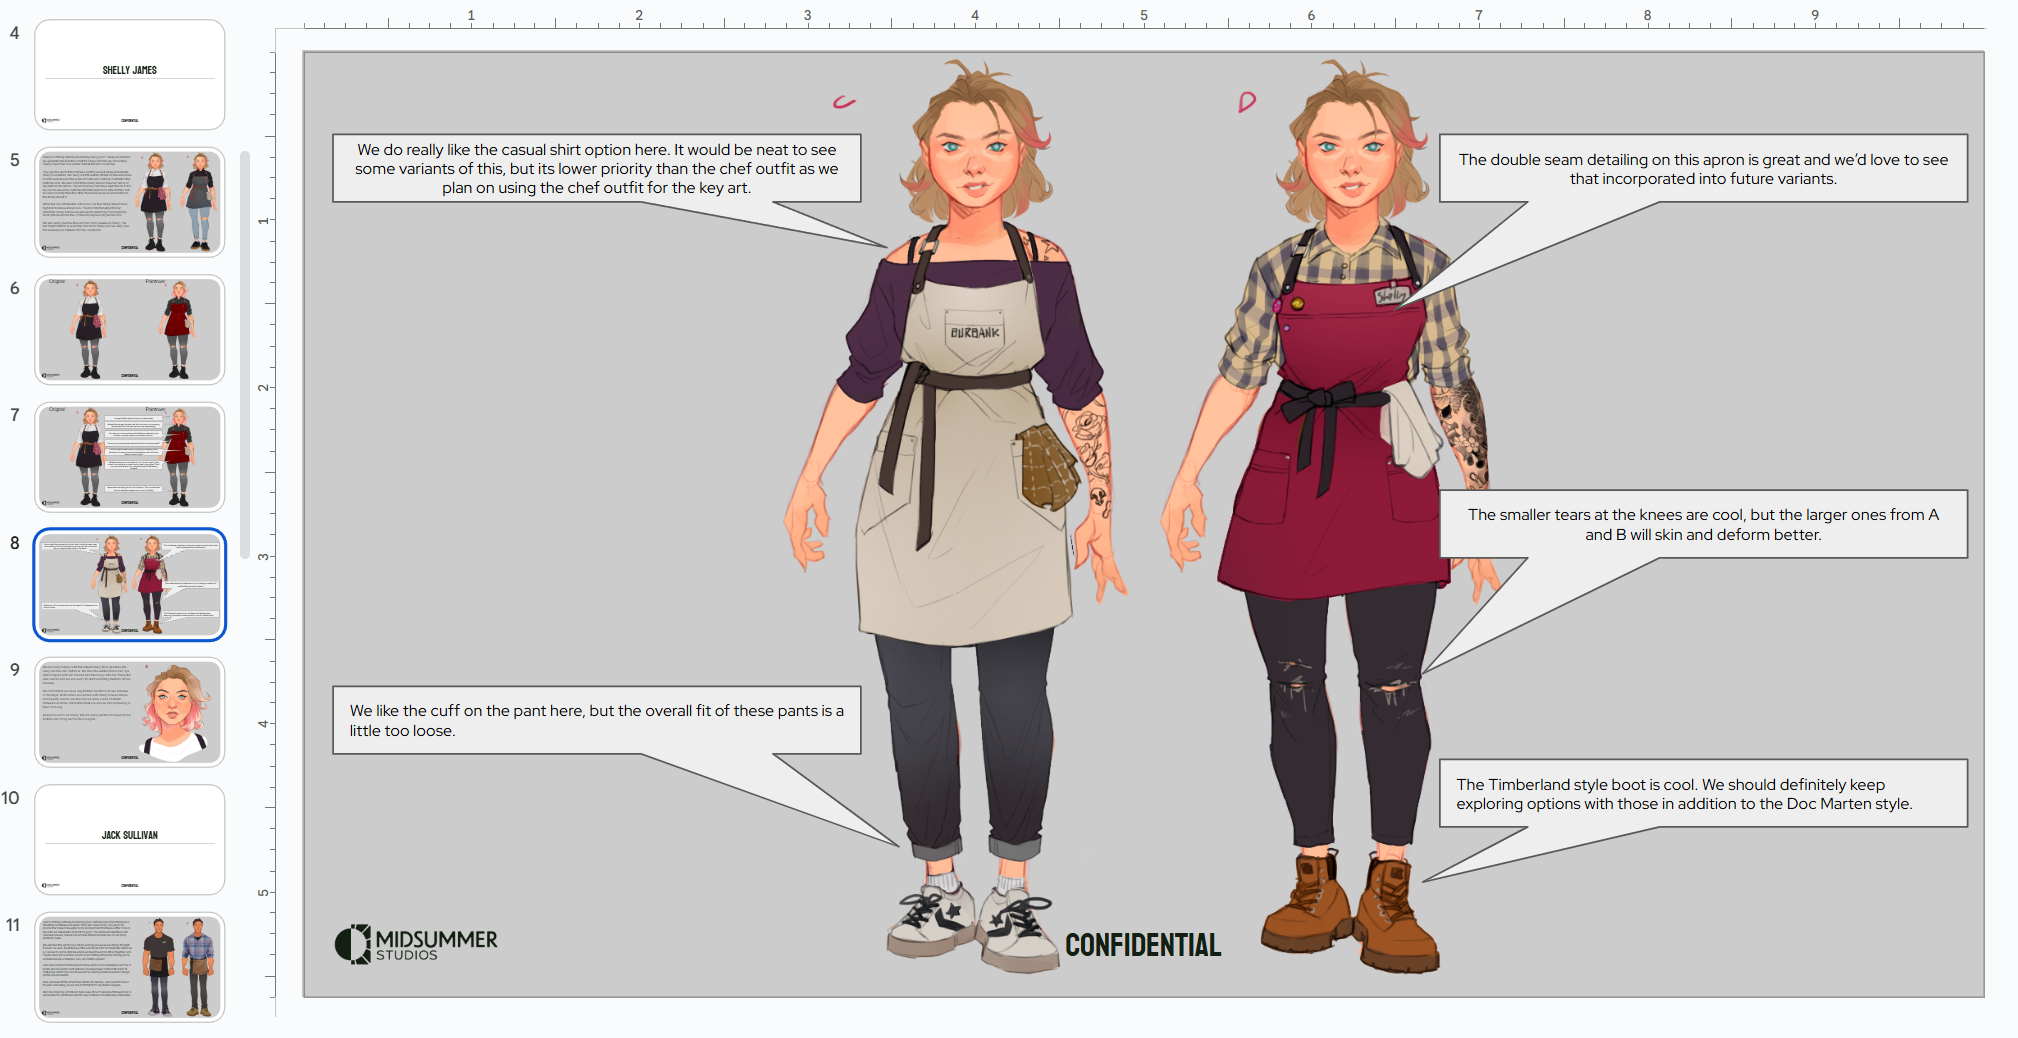


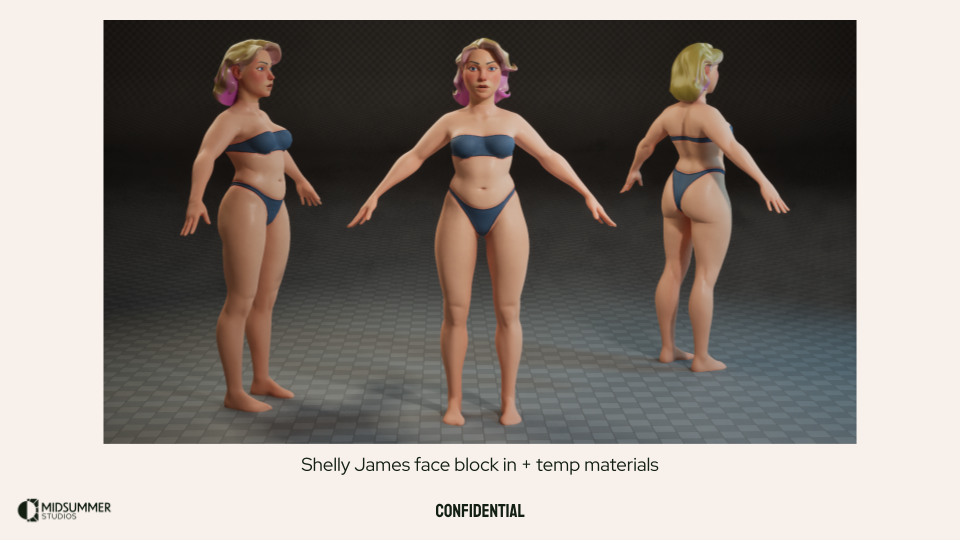
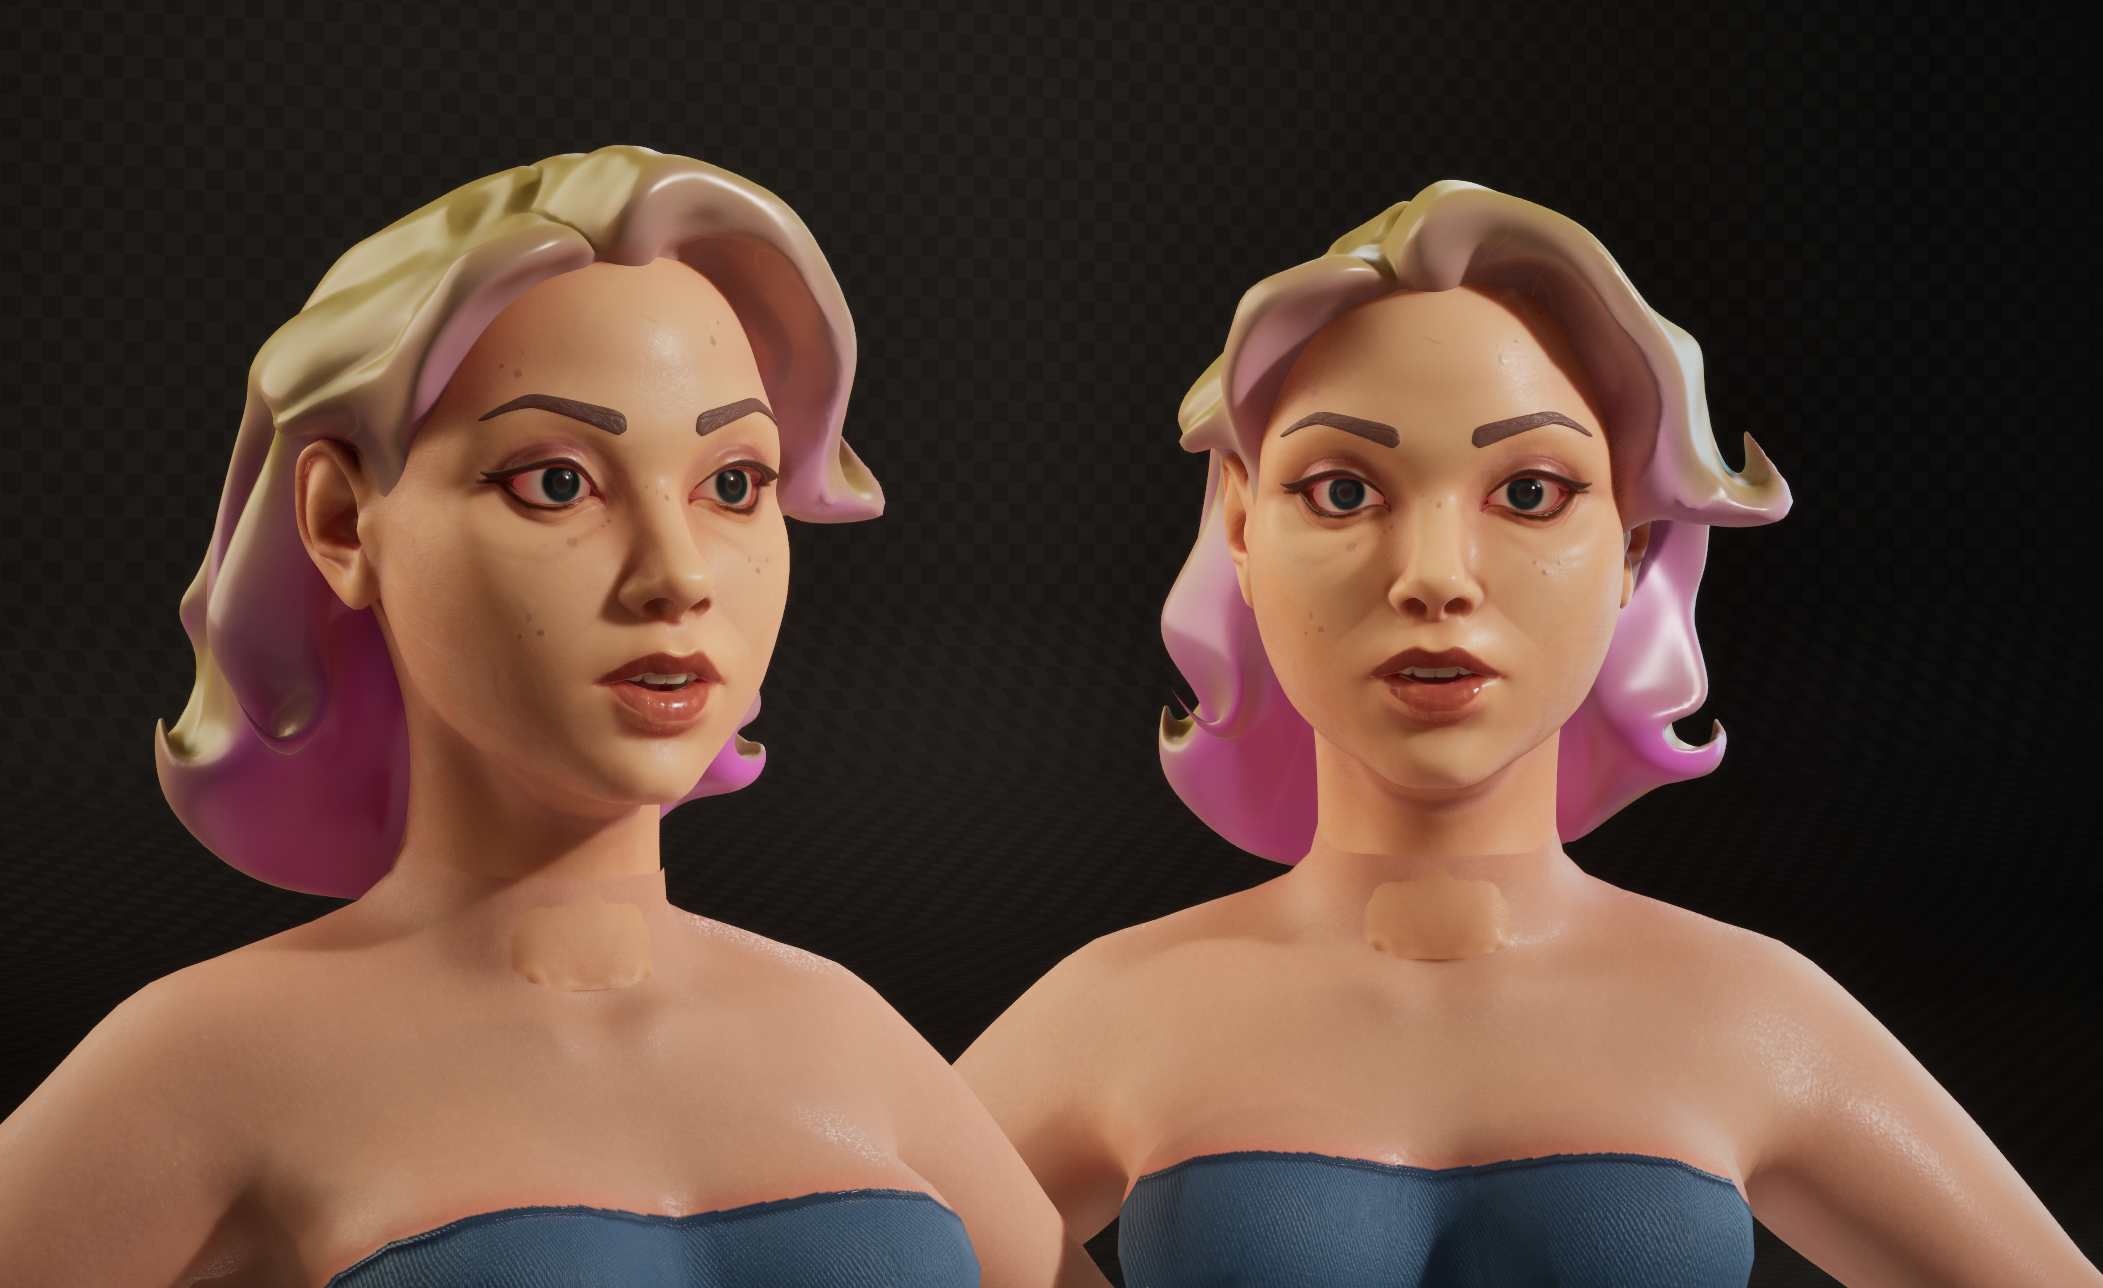
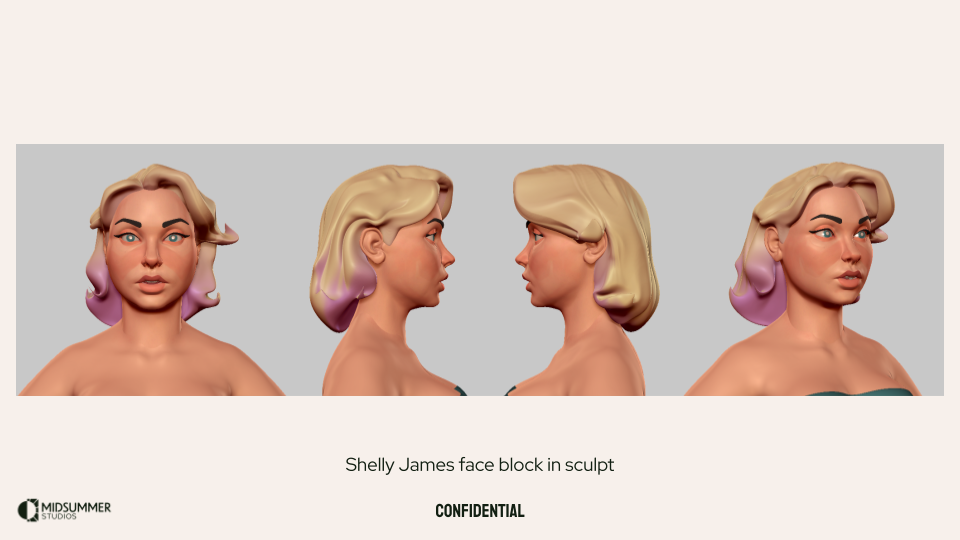
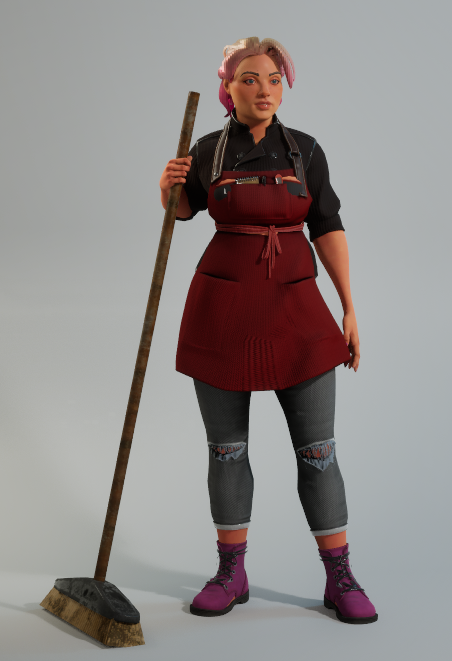
This was the version of Shelly that resulted from the look development process.
First Pass Characters
The characters in Burbank went through multiple phases of their development. The First Pass was completed as quickly as possible to flesh out the entire cast as needed for the game. From there, we evaluated the entire lineup and started to generate asset lists and determine what pieces would be unique vs. what pieces would be shared across the character set. From here, the production modeling briefs and content packages were made so that we could work with an external partner to help model everything we needed for the game.
These are images that I used in a meeting to align with Creative Direction and Production to ensure that we were all on the same page with what was left to do with the cast before our deadline. This also acted as a good list to generate tasks from to ensure we were tracking all that we needed to.
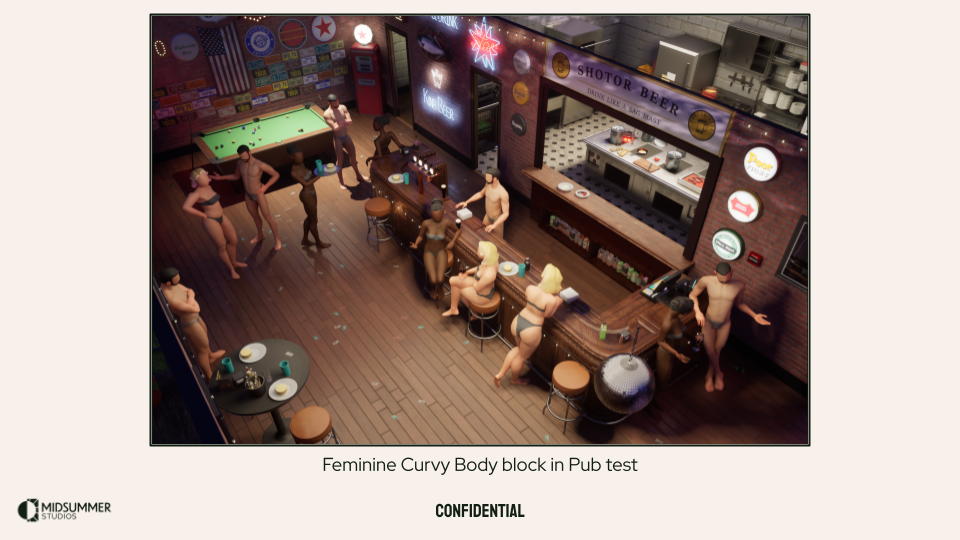
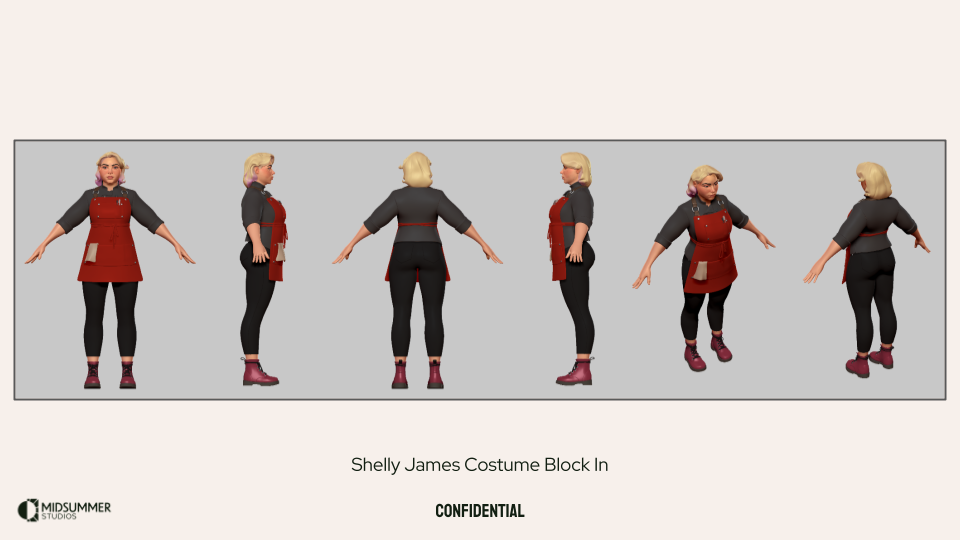
These are examples of block ins that were created and included with the briefs for production. Both of these block-ins were completed and in-game within a work week.
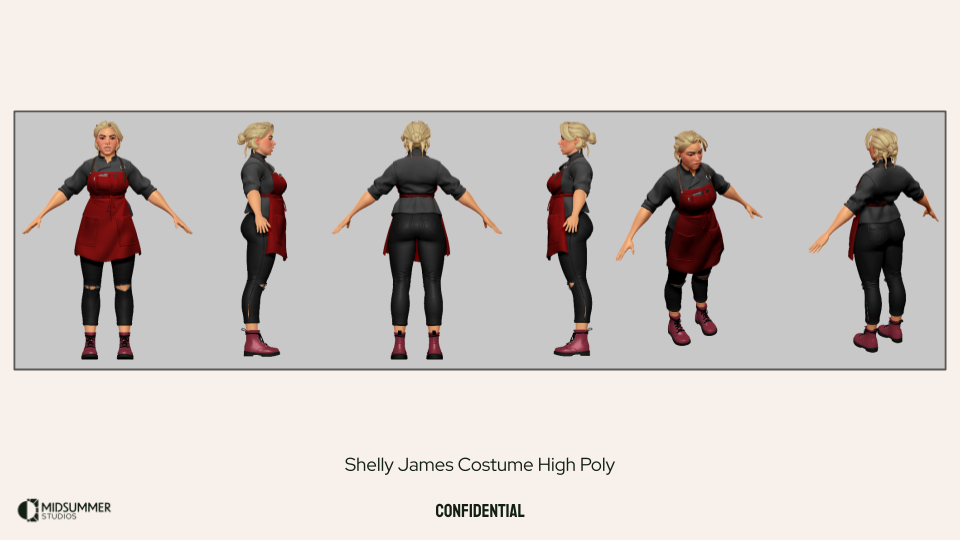
Production Modeling
Now that we had a look and feel direction for our key character Shelly and a set of rough characters, it was time to start going wider with more character and costume production. We worked with Dardo again to find an amazing character artist named Kirill Senzu who did a fantastic job translating some of our character clothing and hair briefs into character assets for our first demo. I created a production modeling brief outlining our modeling, UV, and texturing requirements and some clothing and hair asset creation briefs. Kirill crushed these tasks and was a true pleasure to work with.
On the left is the costume construction brief that covers modeling, UVs, and texture creation for Burbank characters and on the right are examples of costume briefs.
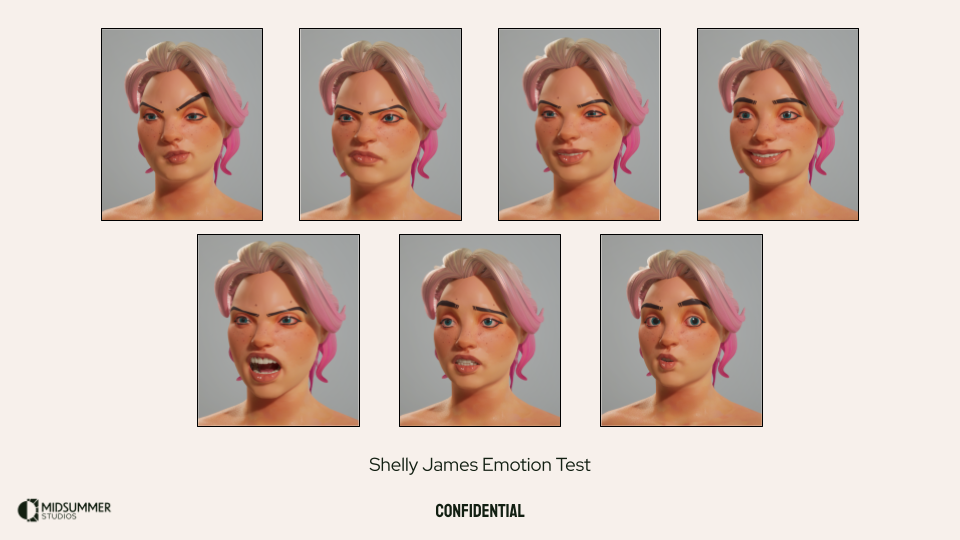
Face Development
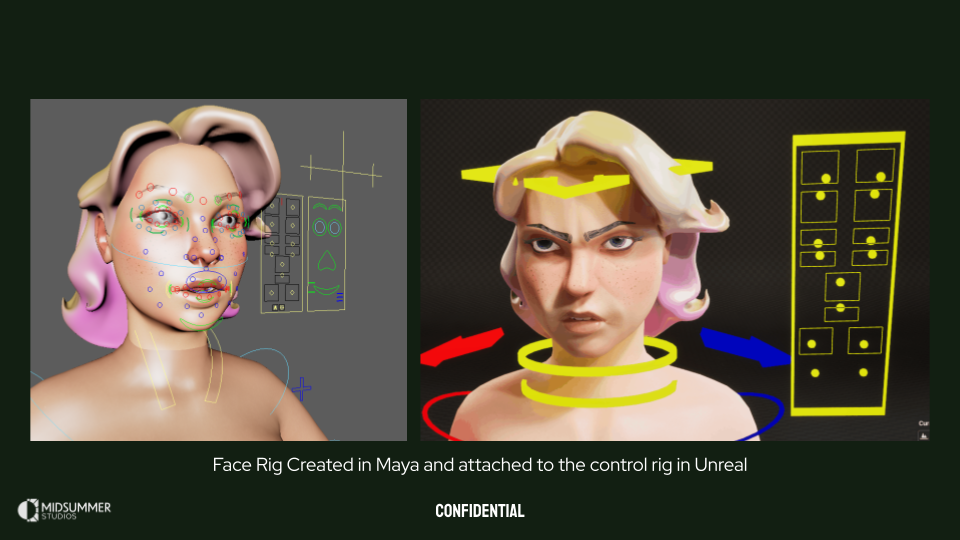
We utilized a tool called Advanced Skeleton for body and facial rigging. This was a great out of the box solution for us to quickly spin up and iterate on a wide variety of faces. Our Principal Animator, Kevin, created a level sequence in Unreal that has our shared facial animation library retargeted to all of our target heads. This was incredibly helpful as we were iterating on head sculpts and topology to get consistent expressions from a shared library with minimal post processing per head. If the faces looked good in these two scenes, they’ll look good in game.
Below you can see examples of the validation scenes with the final cast of heads.
Costume Development
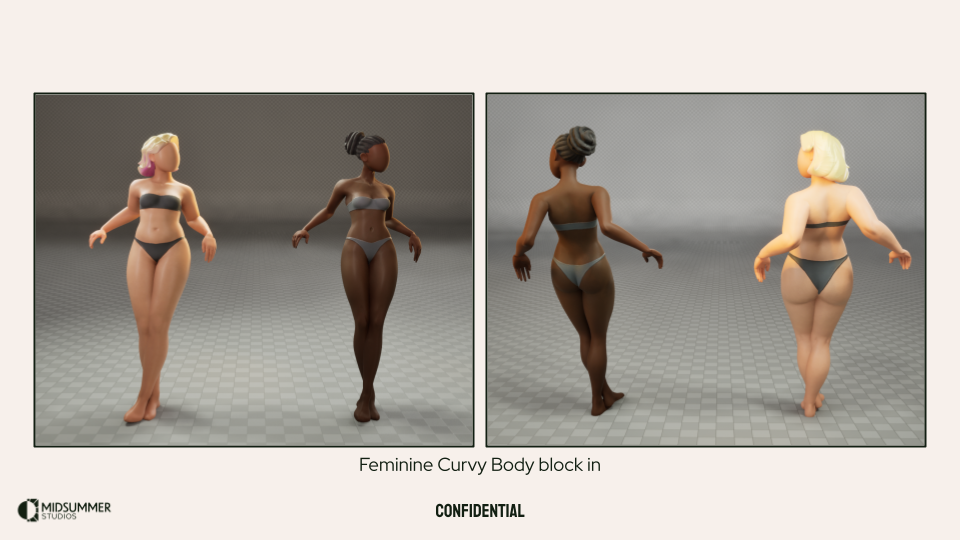
For Project Burbank we were going for a very tangible clothing structure and material quality. The viewer should be able to almost feel the surface quality of the fabrics through exaggerated folds, surface texture, and the scale of tertiary details. We were referencing custom made high end dolls and stop motion movies. During our look development phase, I built a few base body archetypes that we would use to dress our cast so we could mix and match outfits per body type and use these base bodies for clothing creation in ZBrush and Marvelous Designer. Though our initial production modeling process was hand sculpted, we moved to Marvelous Designer for both the simulation benefits and for speed of asset variant creation. Our final outfits ended up being a mixture of hand sculpted, Marvelous Designer simulated, and some free asset-store downloads all unified with our in-house materials. This process enabled us to create a set of pillars we would uphold as we began to go wide and create more and more assets for our demo.
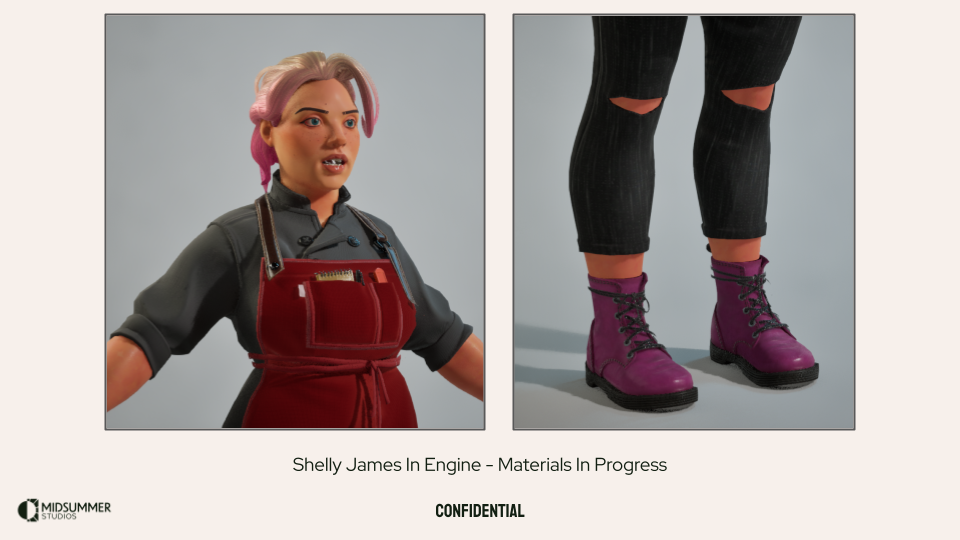
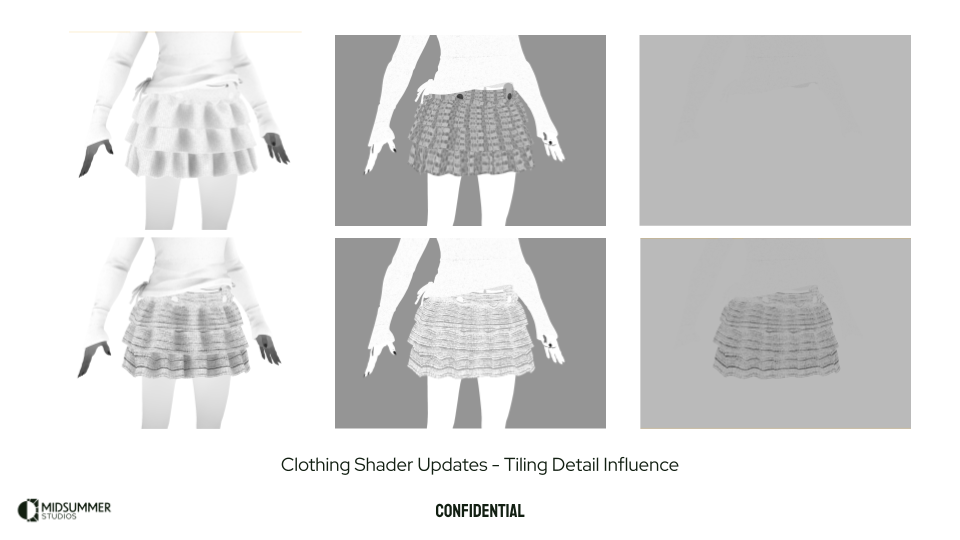
Here is a video of all of our clothing for our first demo with a combination of the v1 clothing shader and v2. I was pretty happy with how the fabrics were responding and our general look overall. The shader features that are showcased in this are tinting, patterning, UV2 based stitching, tiling detail maps that affect normal + dithered opacity. Some of the models use the trim workflow outlined above, as well. None of the textures in this scene are larger than 512, but there are a few different draws per outfit. This was something to tackle later on when I got into Mutable and started developing our customization system.
Much like our face ROM scene, we had one for costumes as well. This video showcases the ROM setup that Kevin put together so we can evaluate our clothing deformations and dynamics setups.
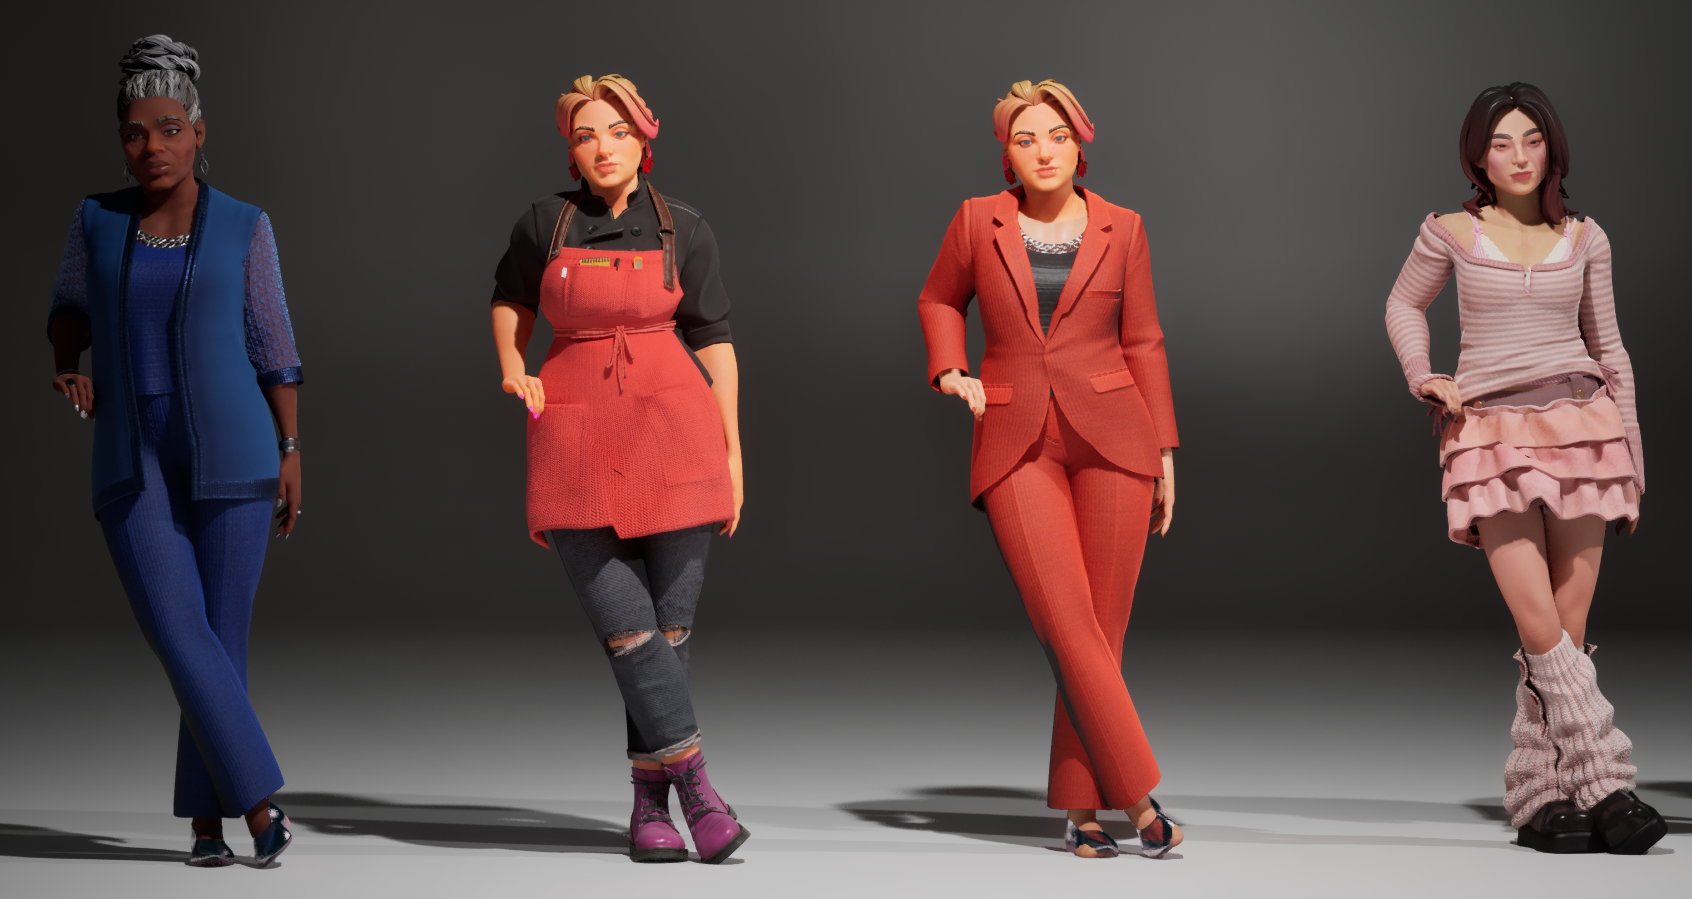
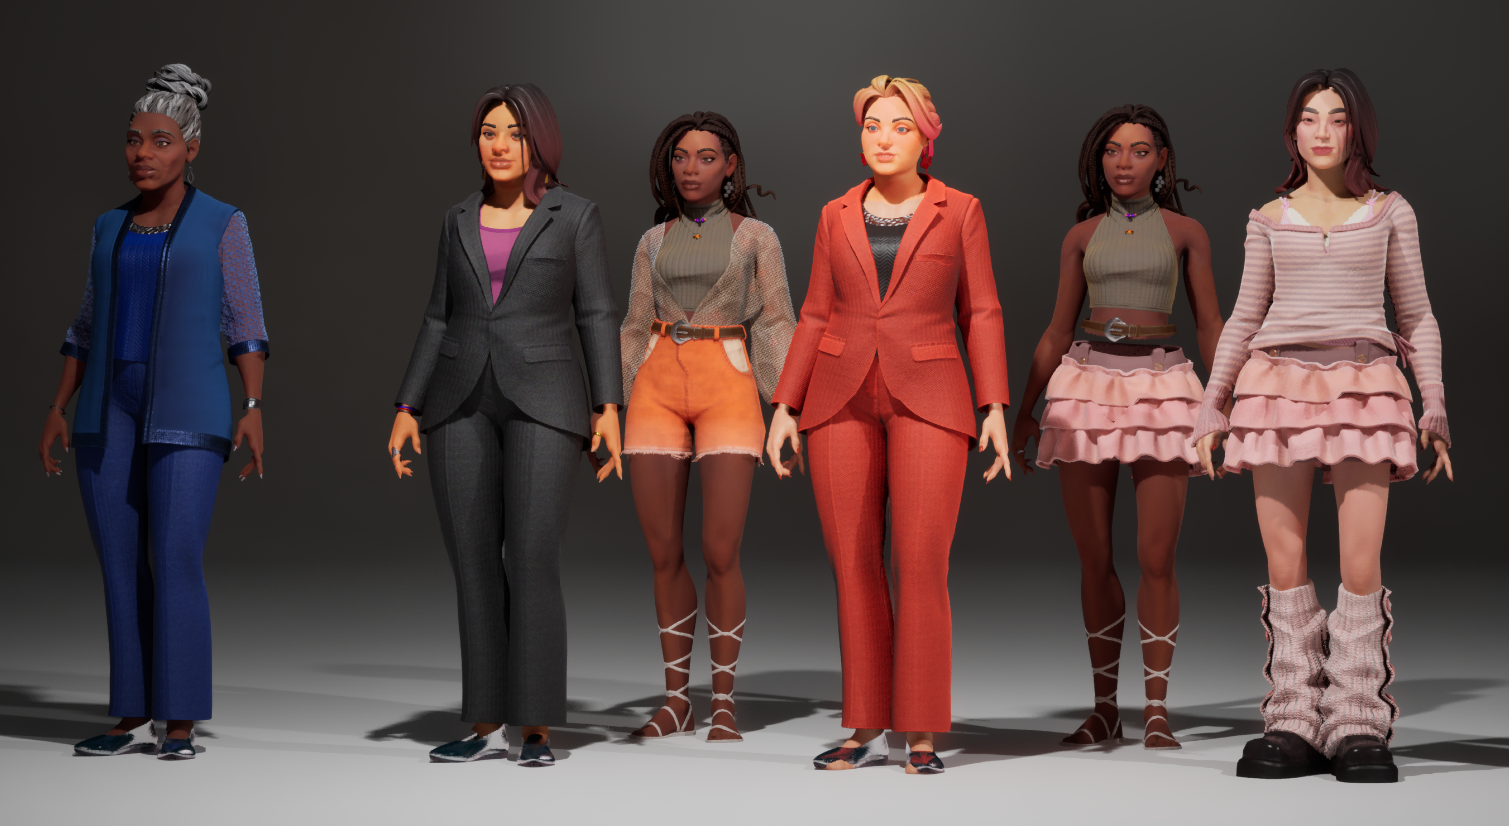
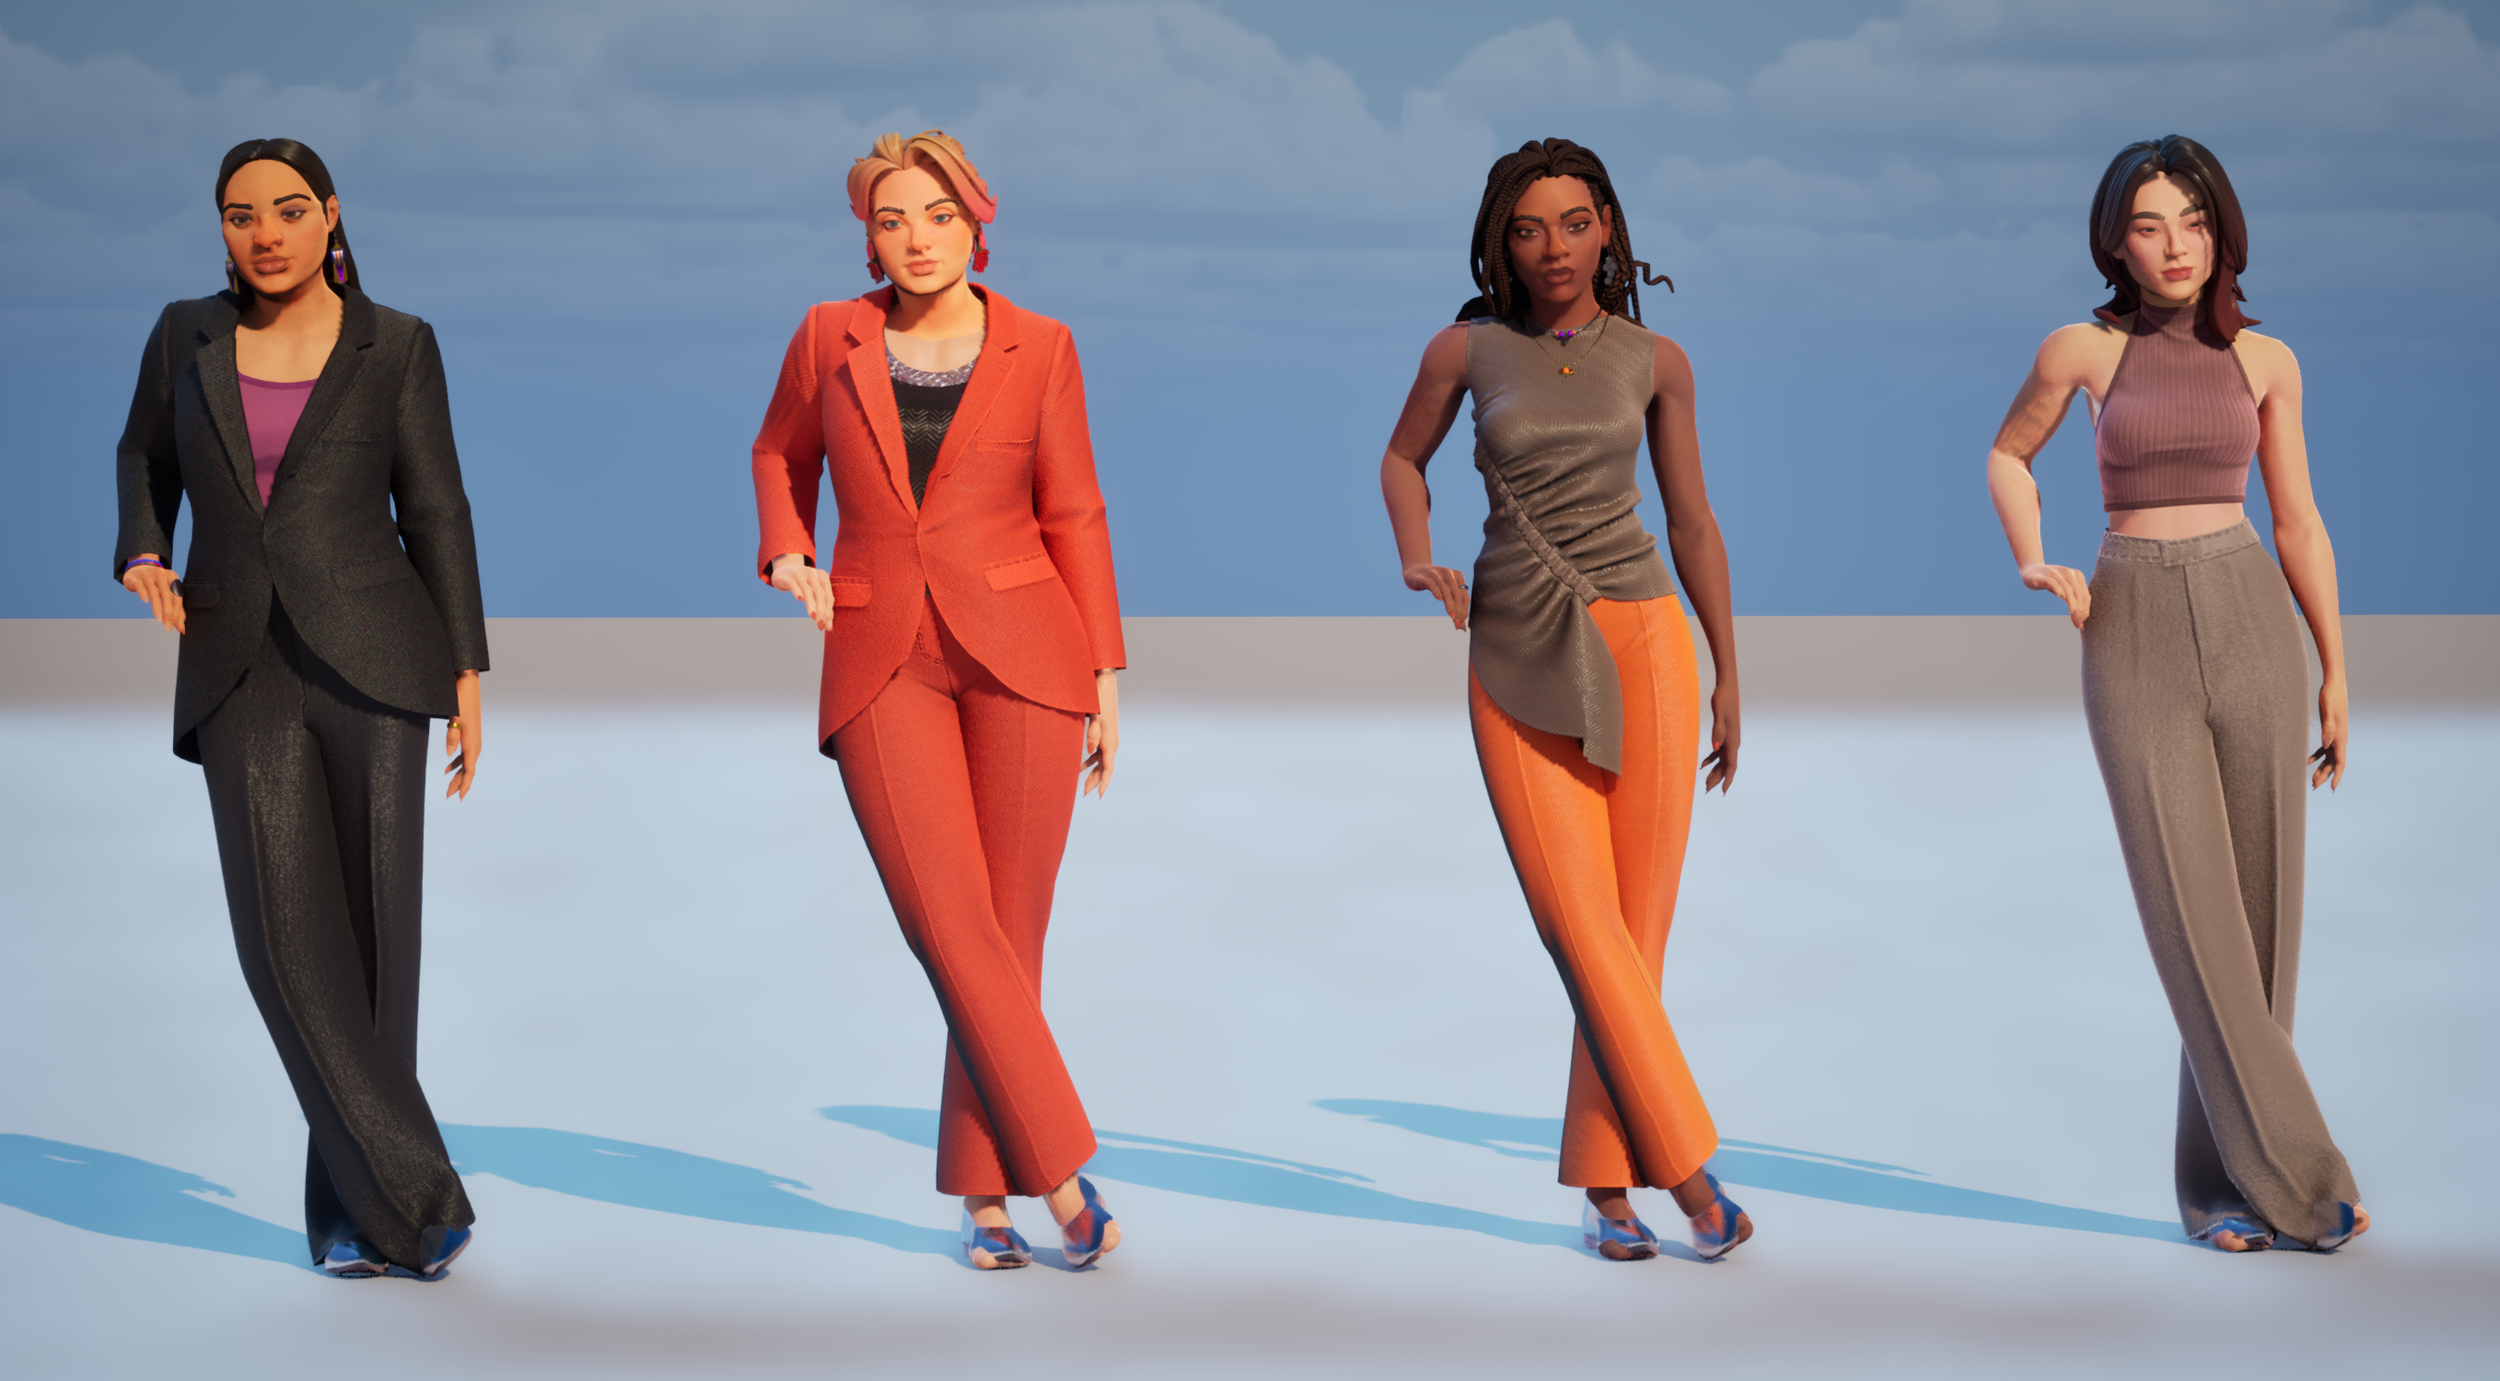
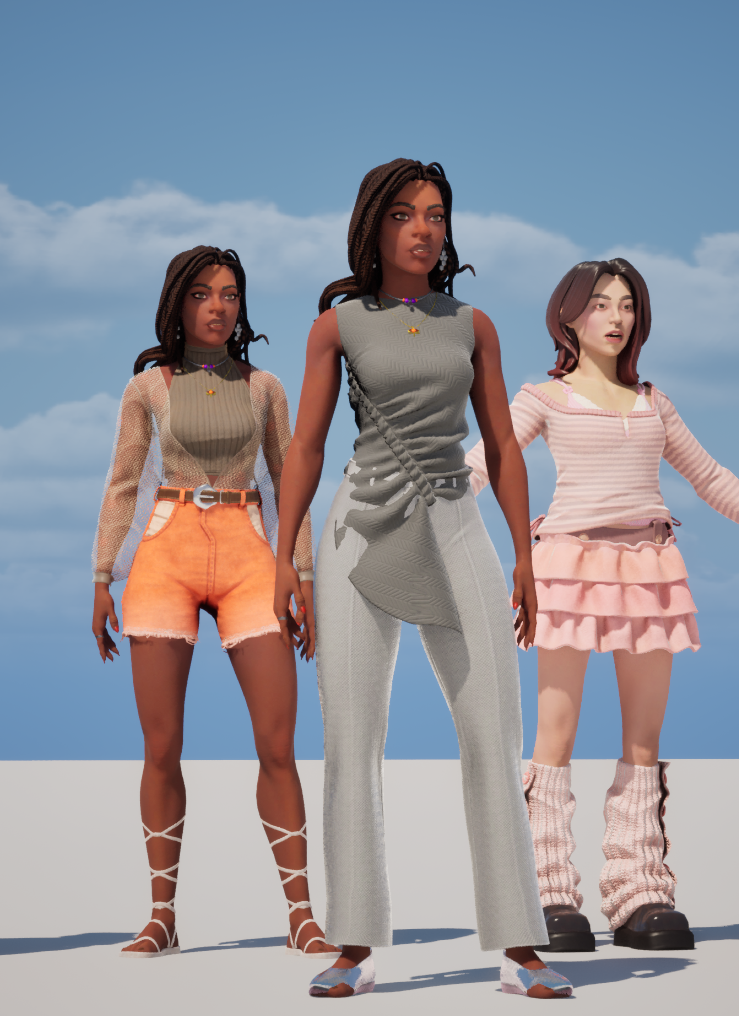
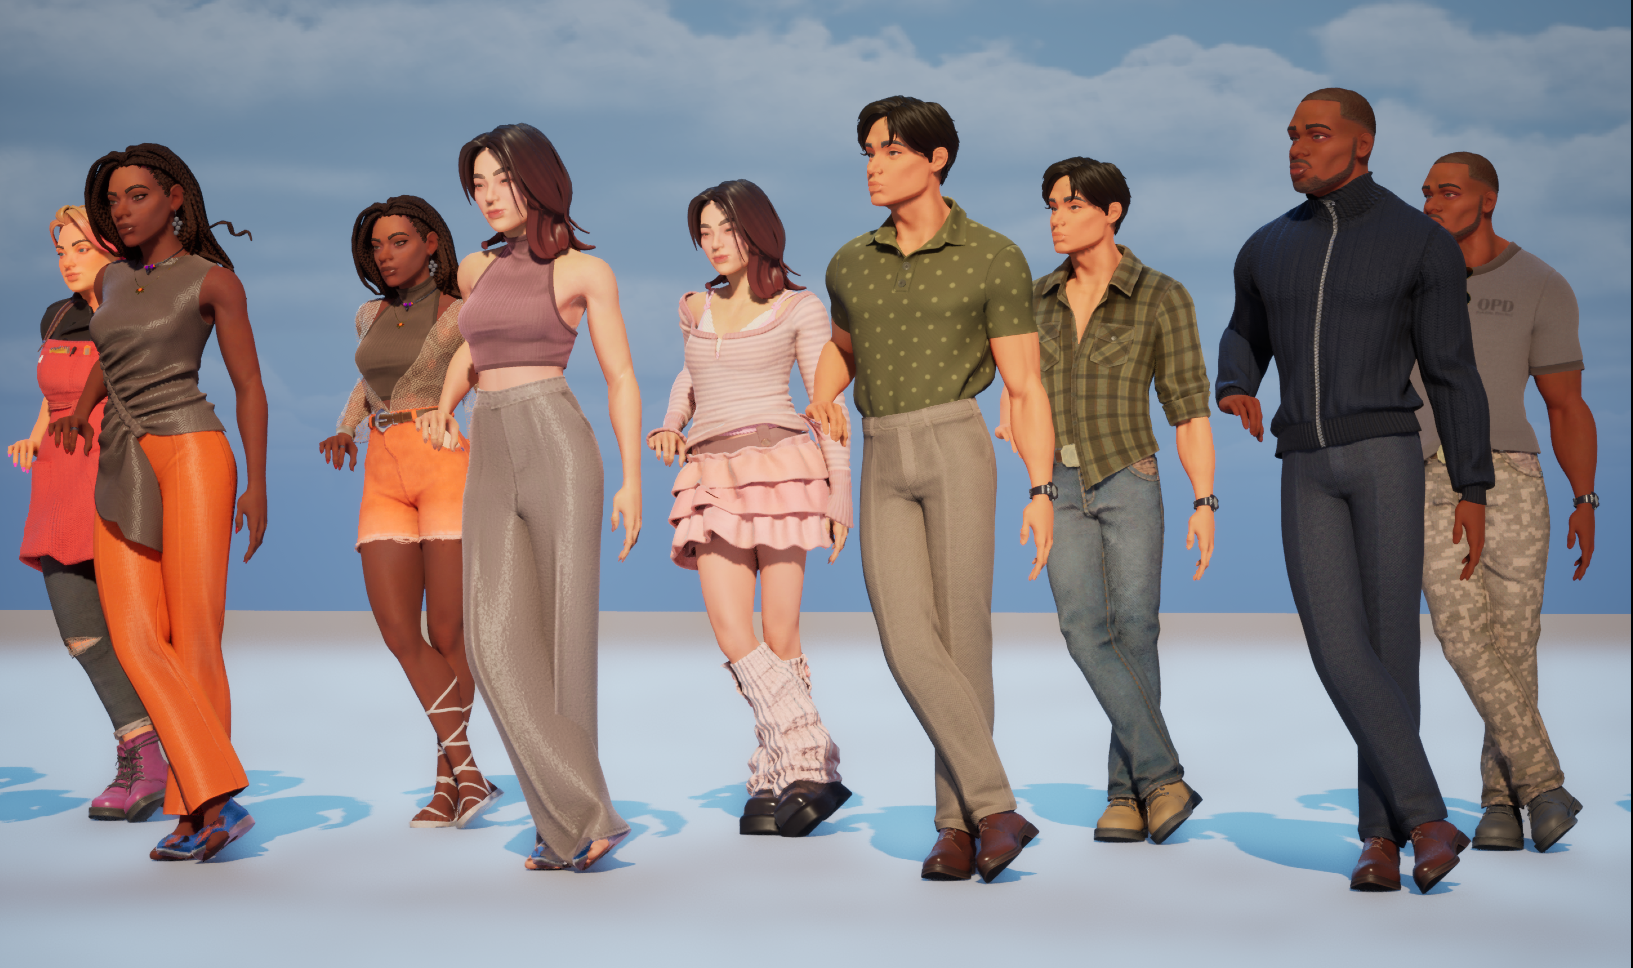
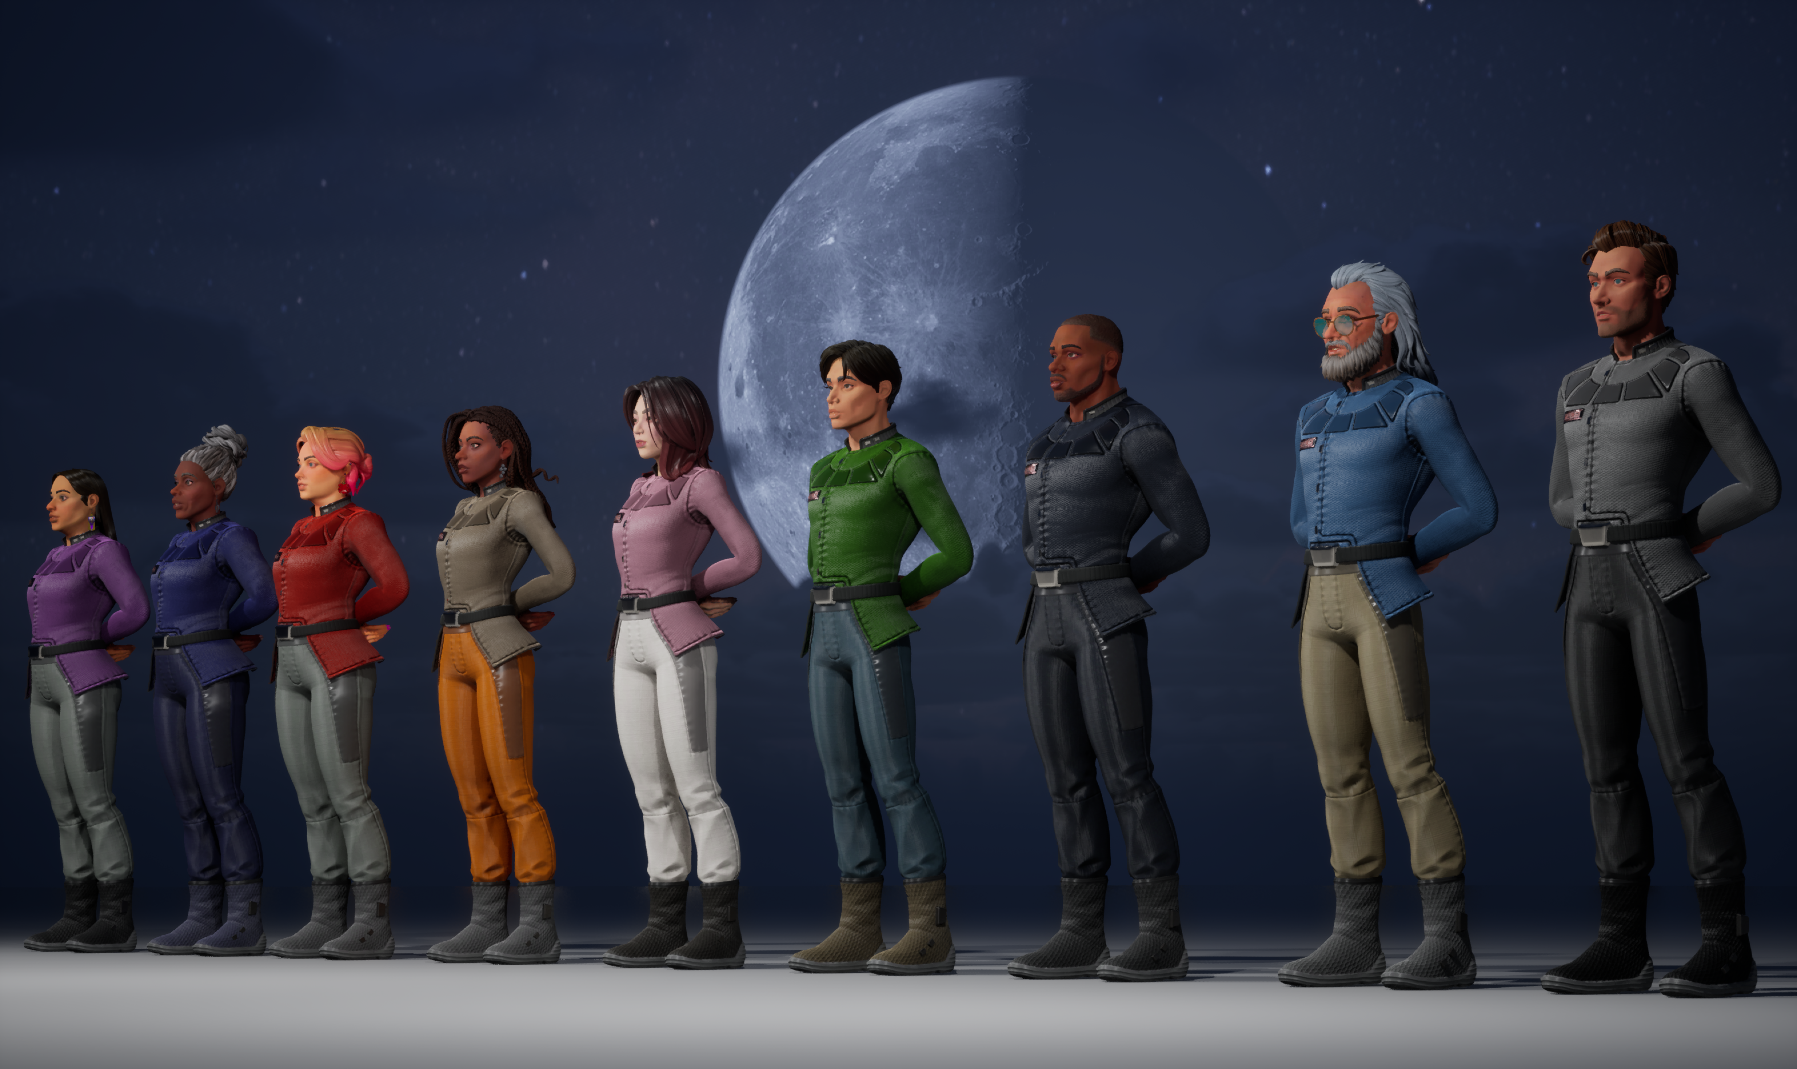
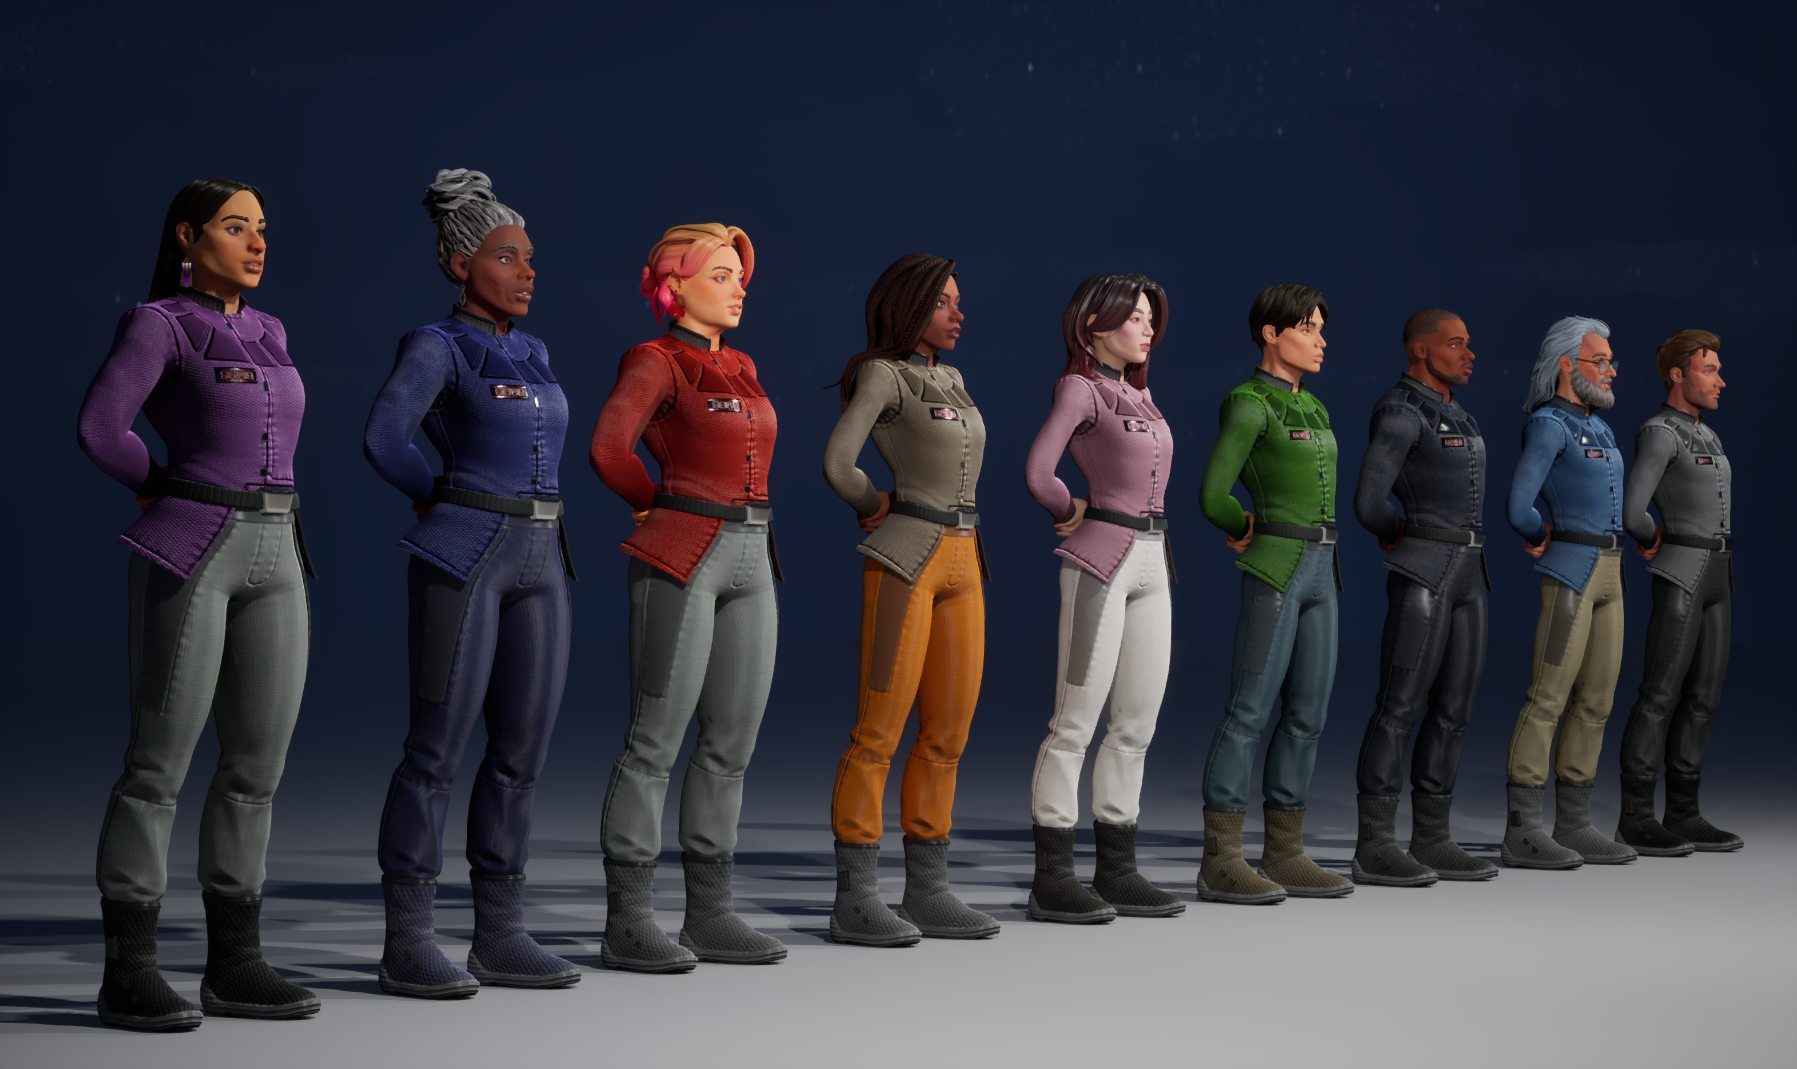
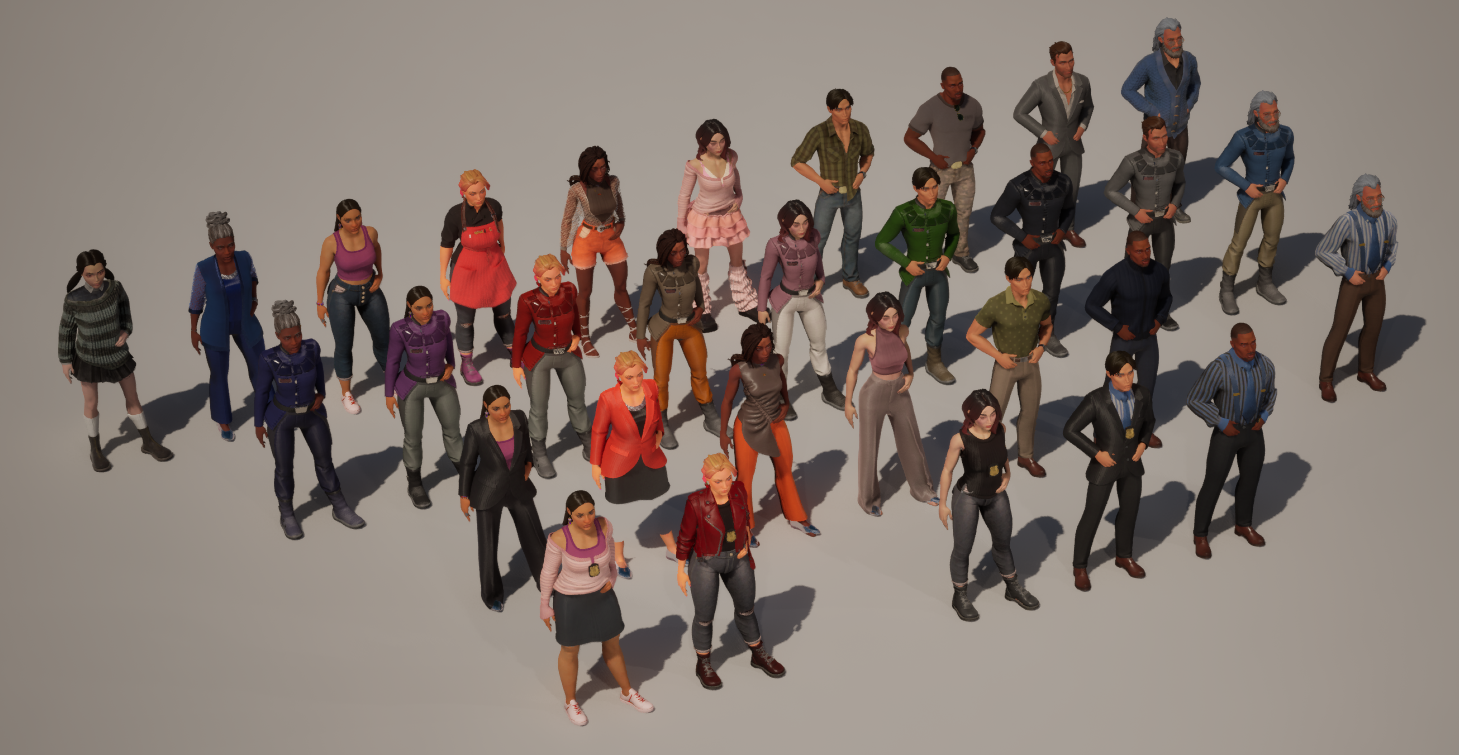
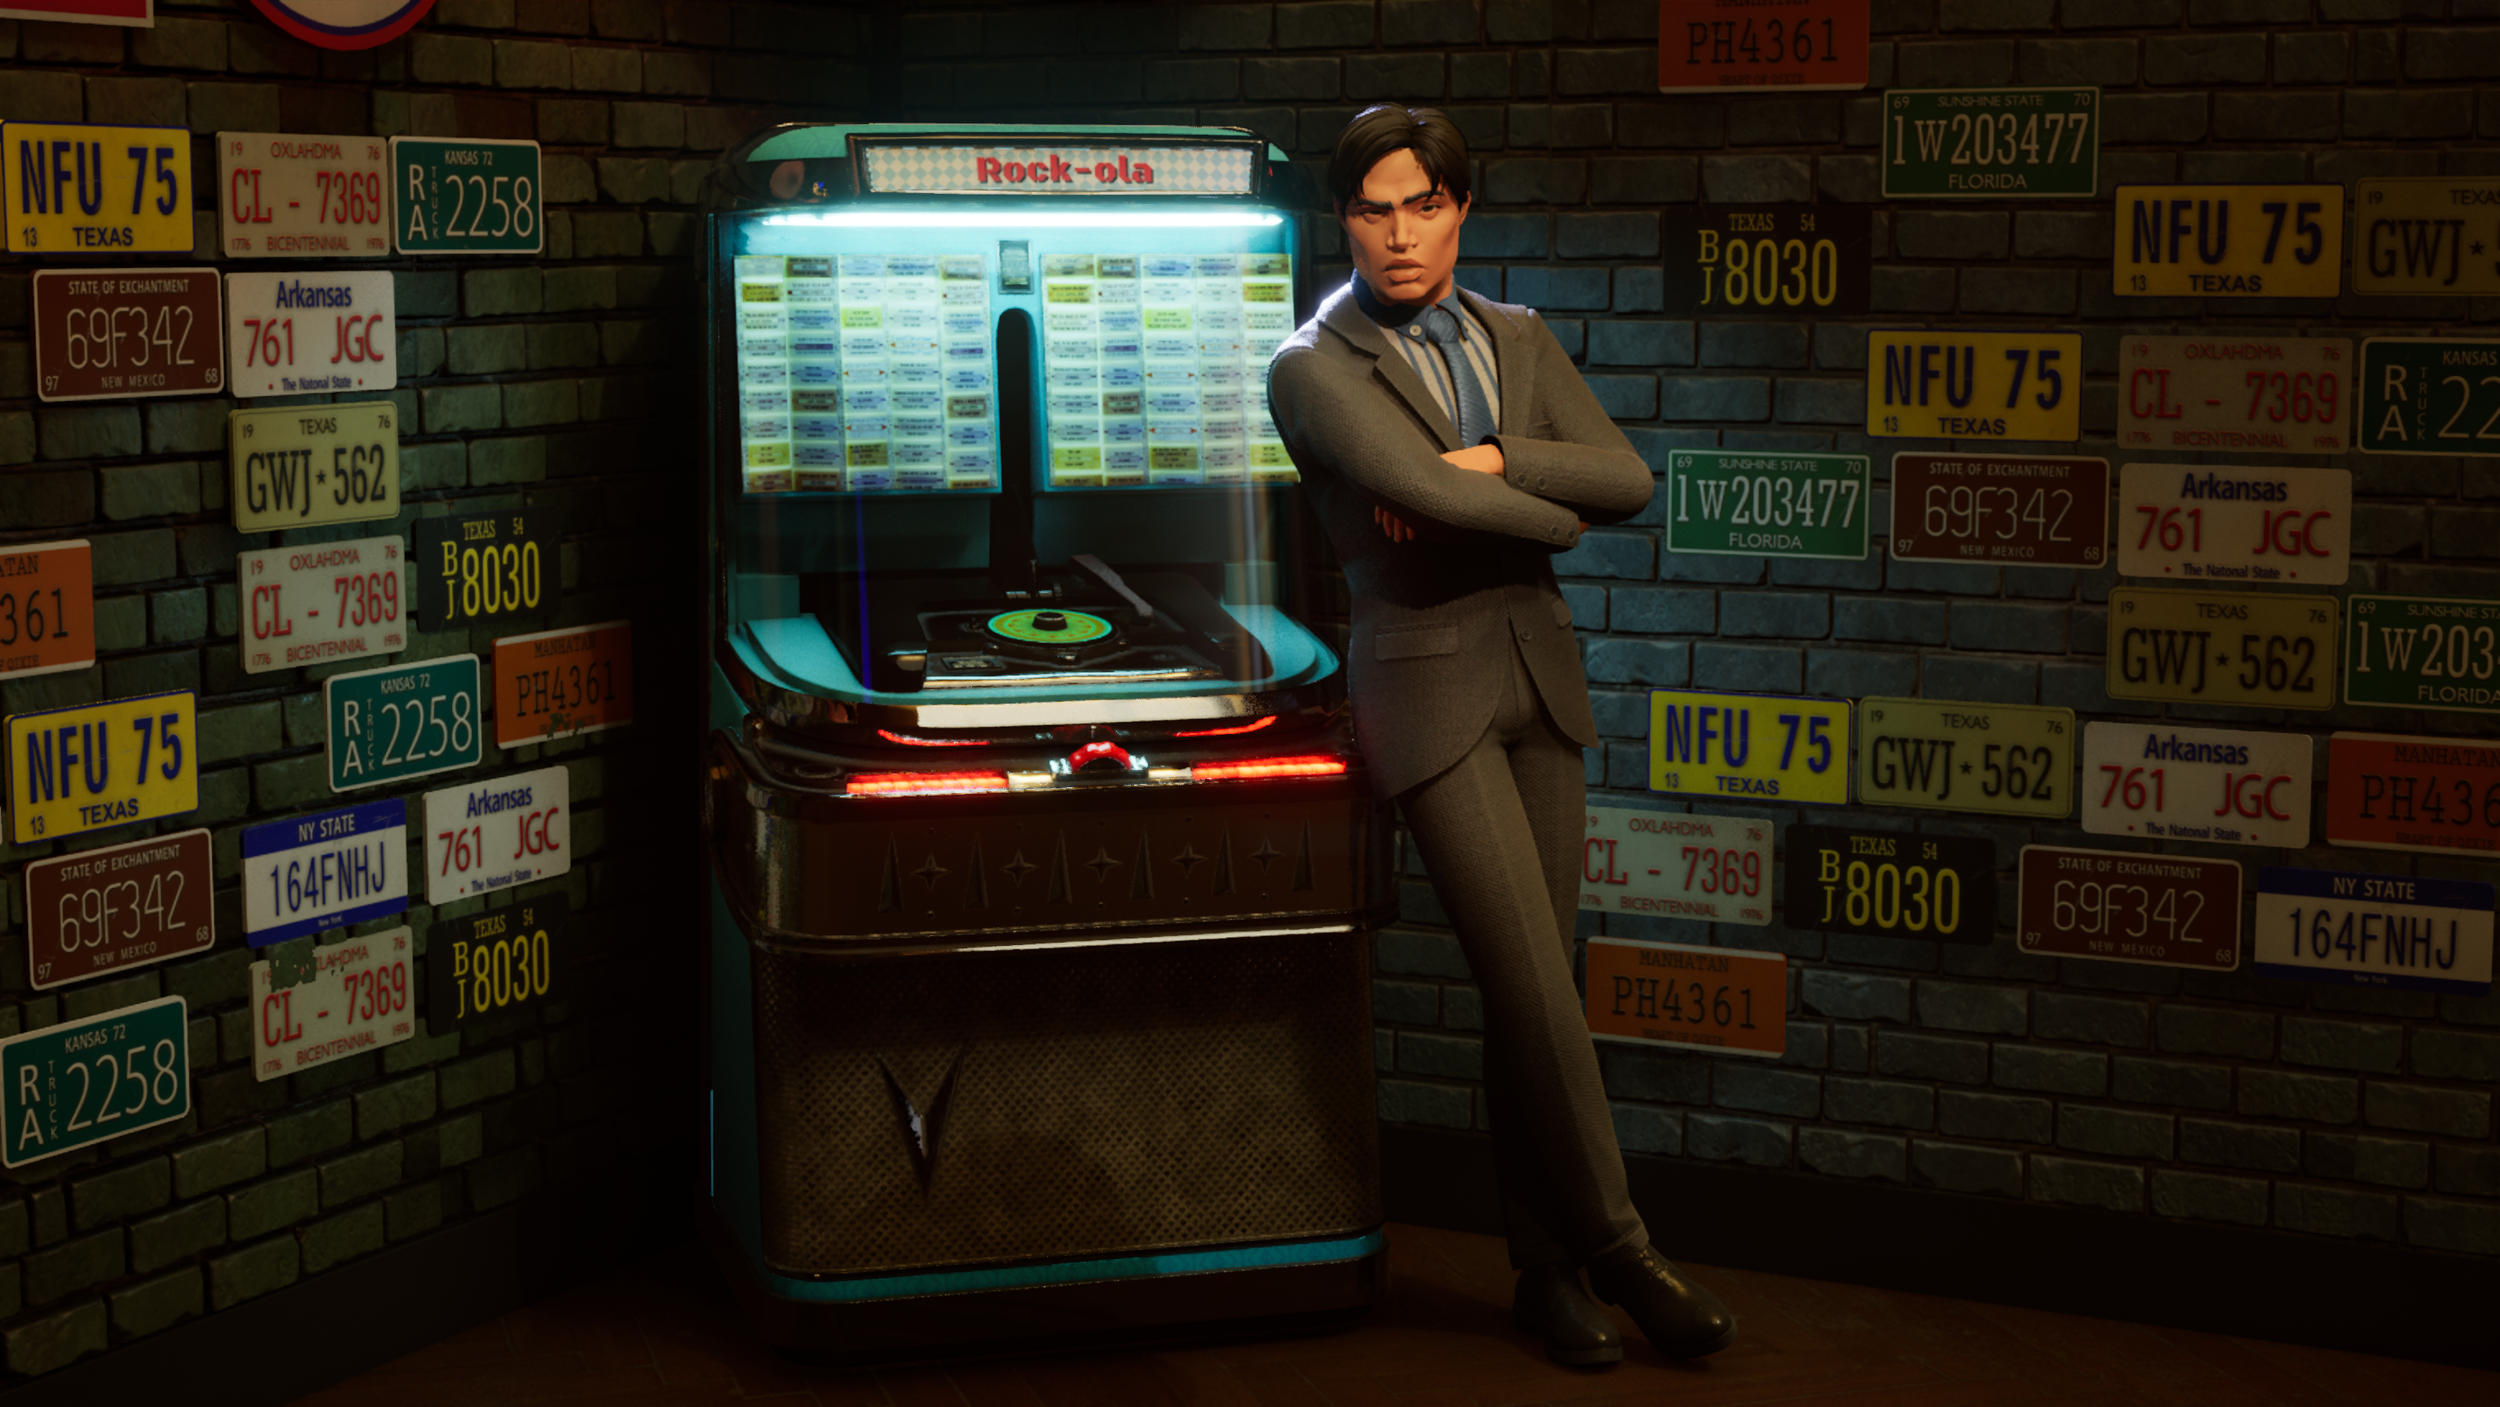
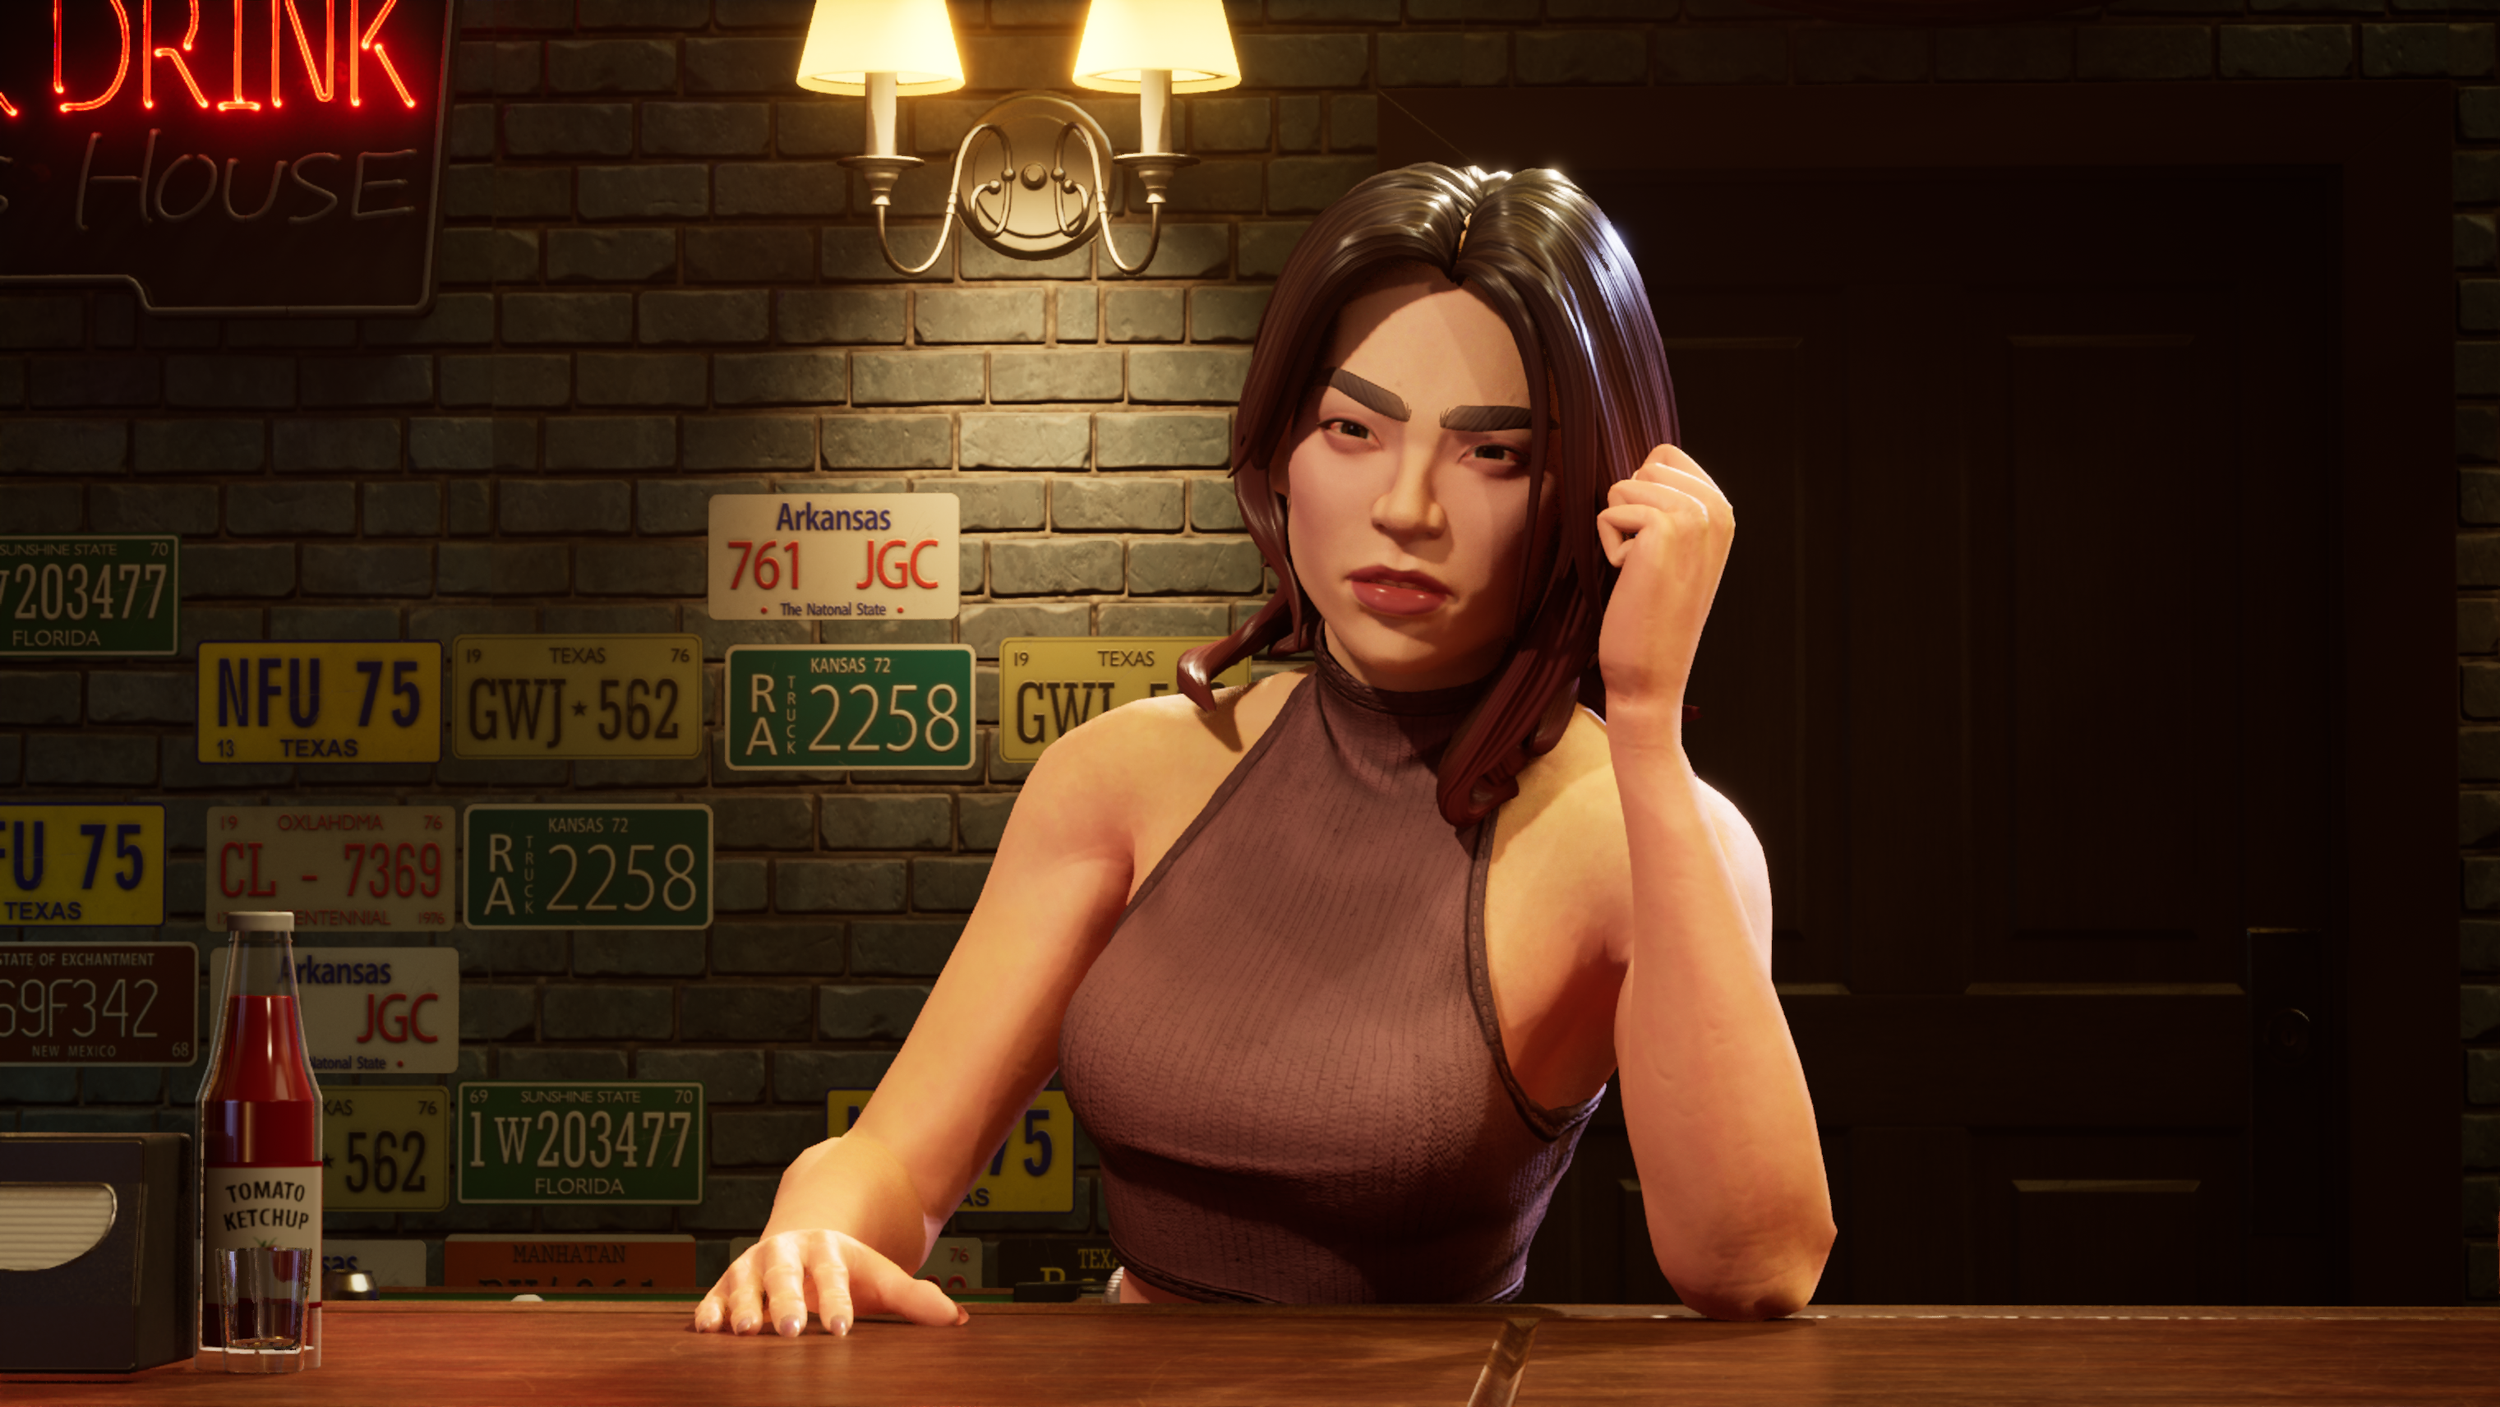
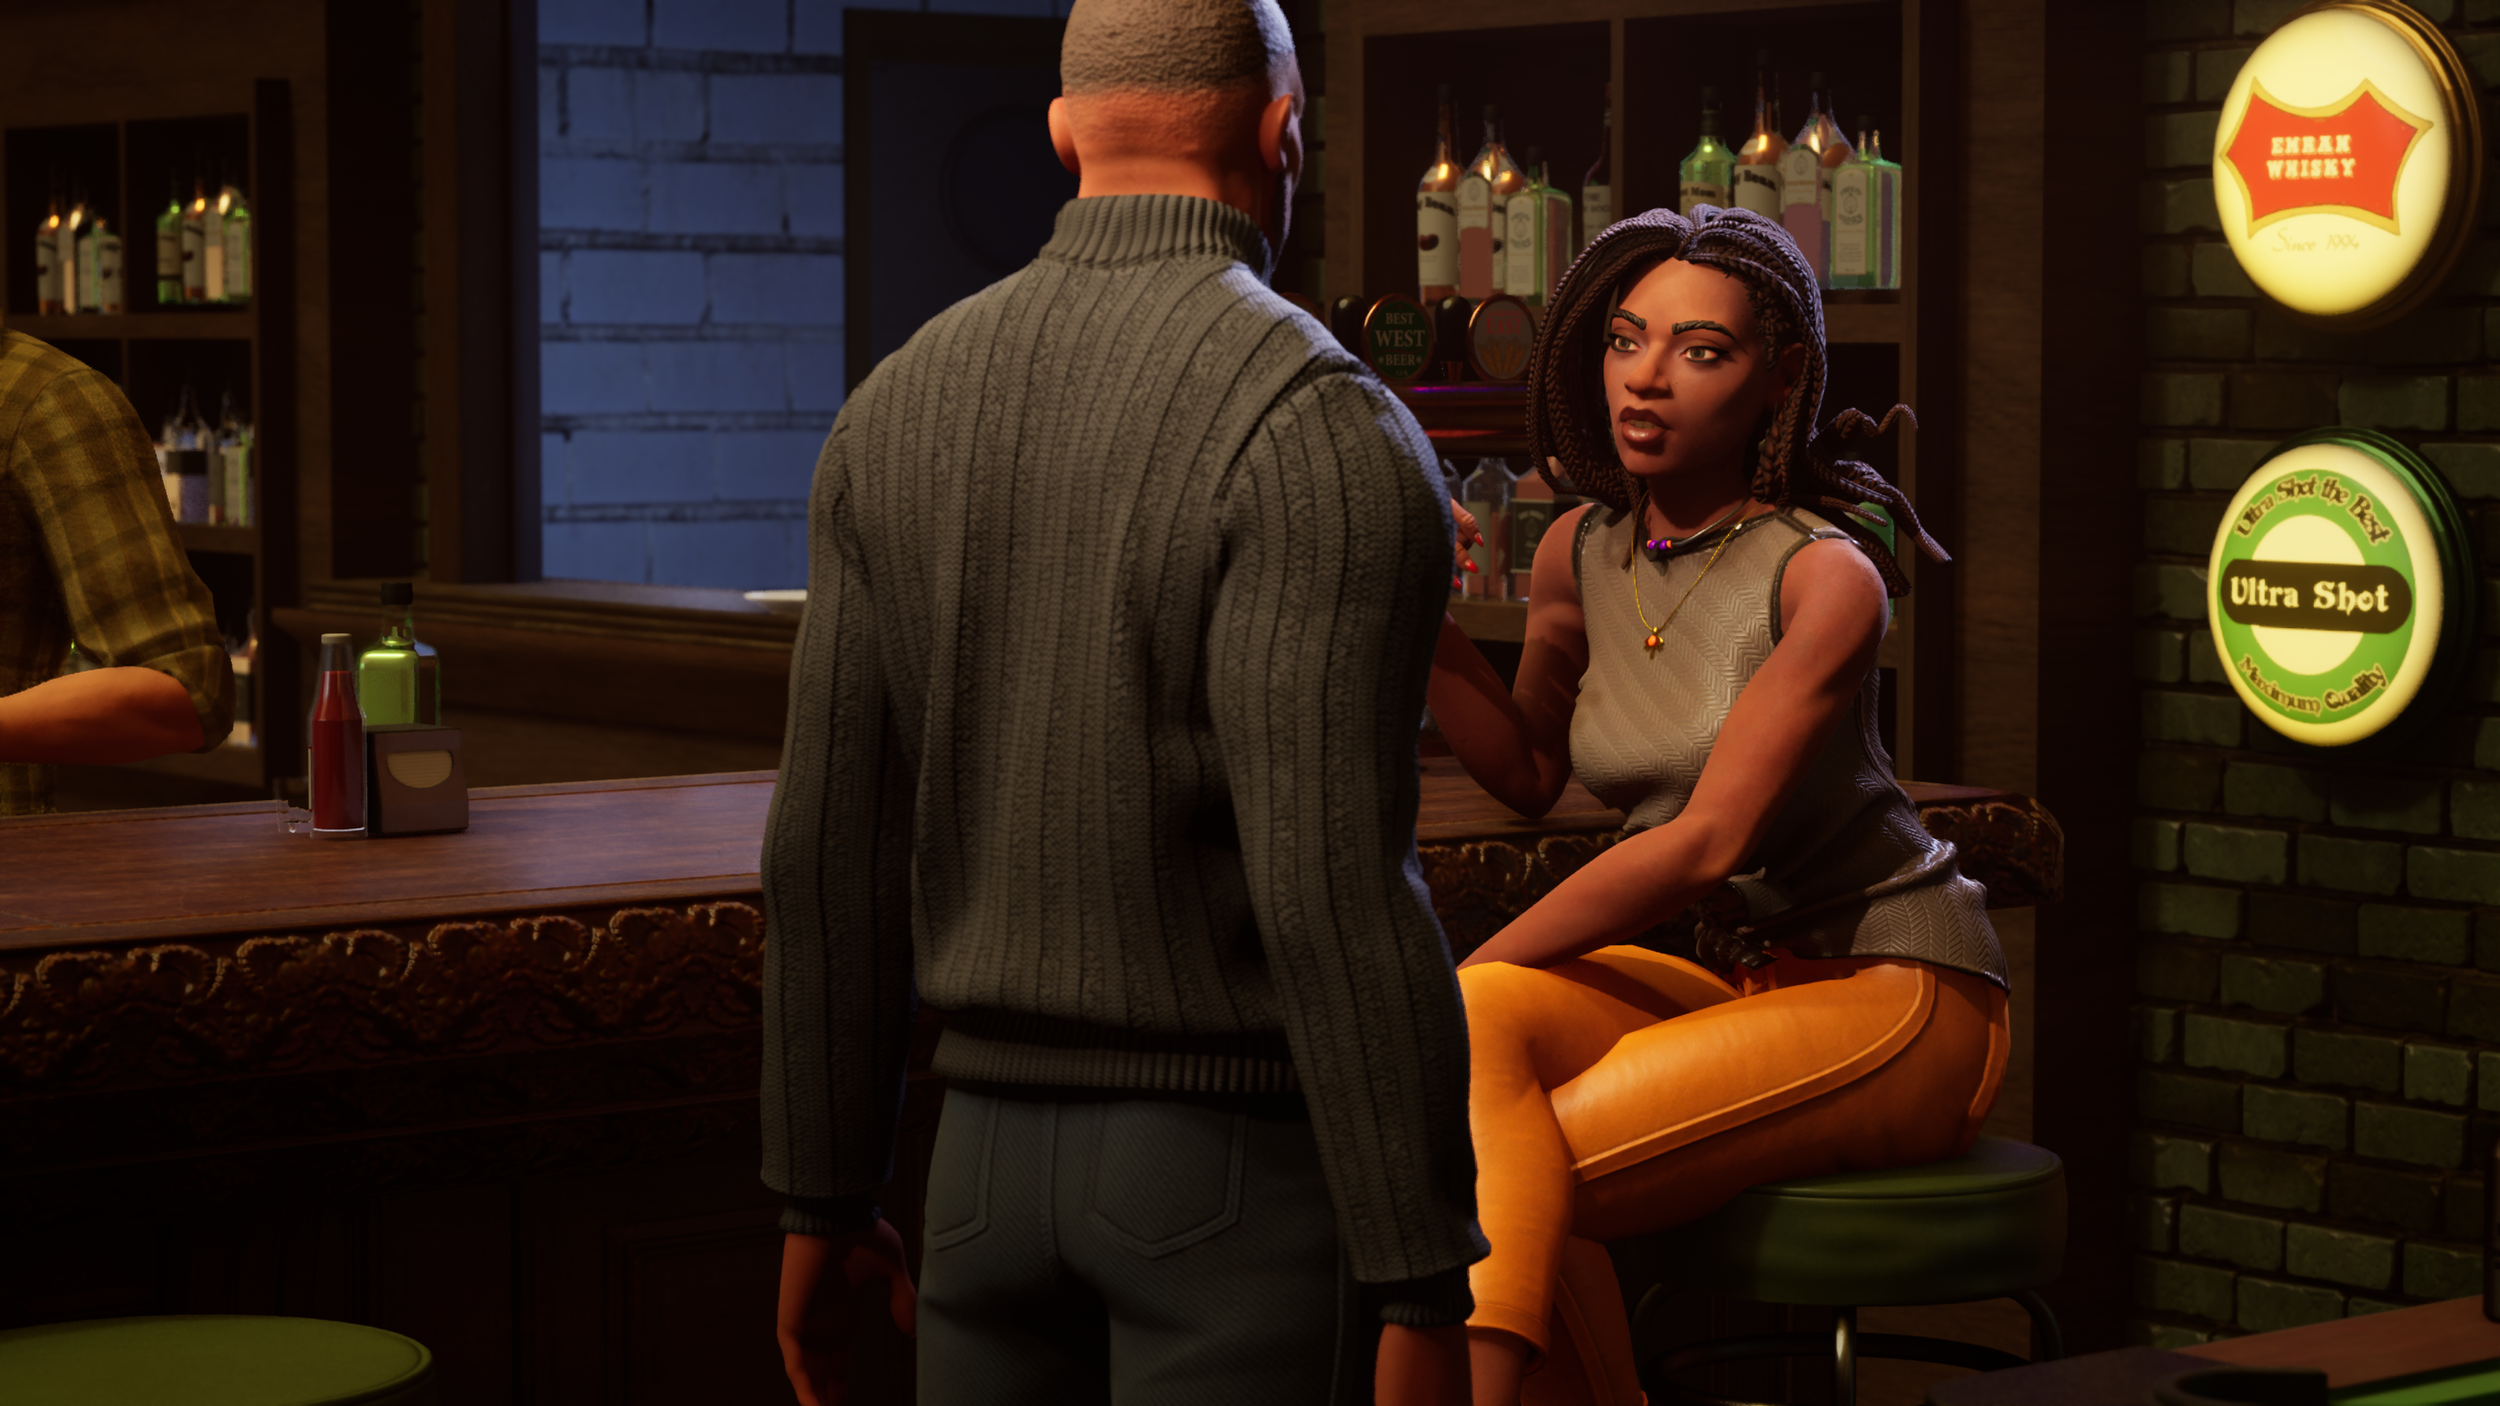
This is the final cast of characters that we developed for our first demo. We learned a lot about the characters and our game during the development of this crew and had a lot of ideas of where we wanted to take them for the next phase of development.
Character Alignment Part Two
Now that we have a full cast of characters, a playable demo with a few sets, and we were starting to really understand the game we were making, it was time to put our own characters on the line and see who is hitting the mark and who is not. Kevin and I had a bunch of ideas at this point of where we wanted to take the cast of characters visually, but we wanted to be sure they were aligned with our Creative Director.
Here is the result of our second alignment meeting. Lots of good discussion was had and we have a good idea of where to go with our cast.
Costume Pillars
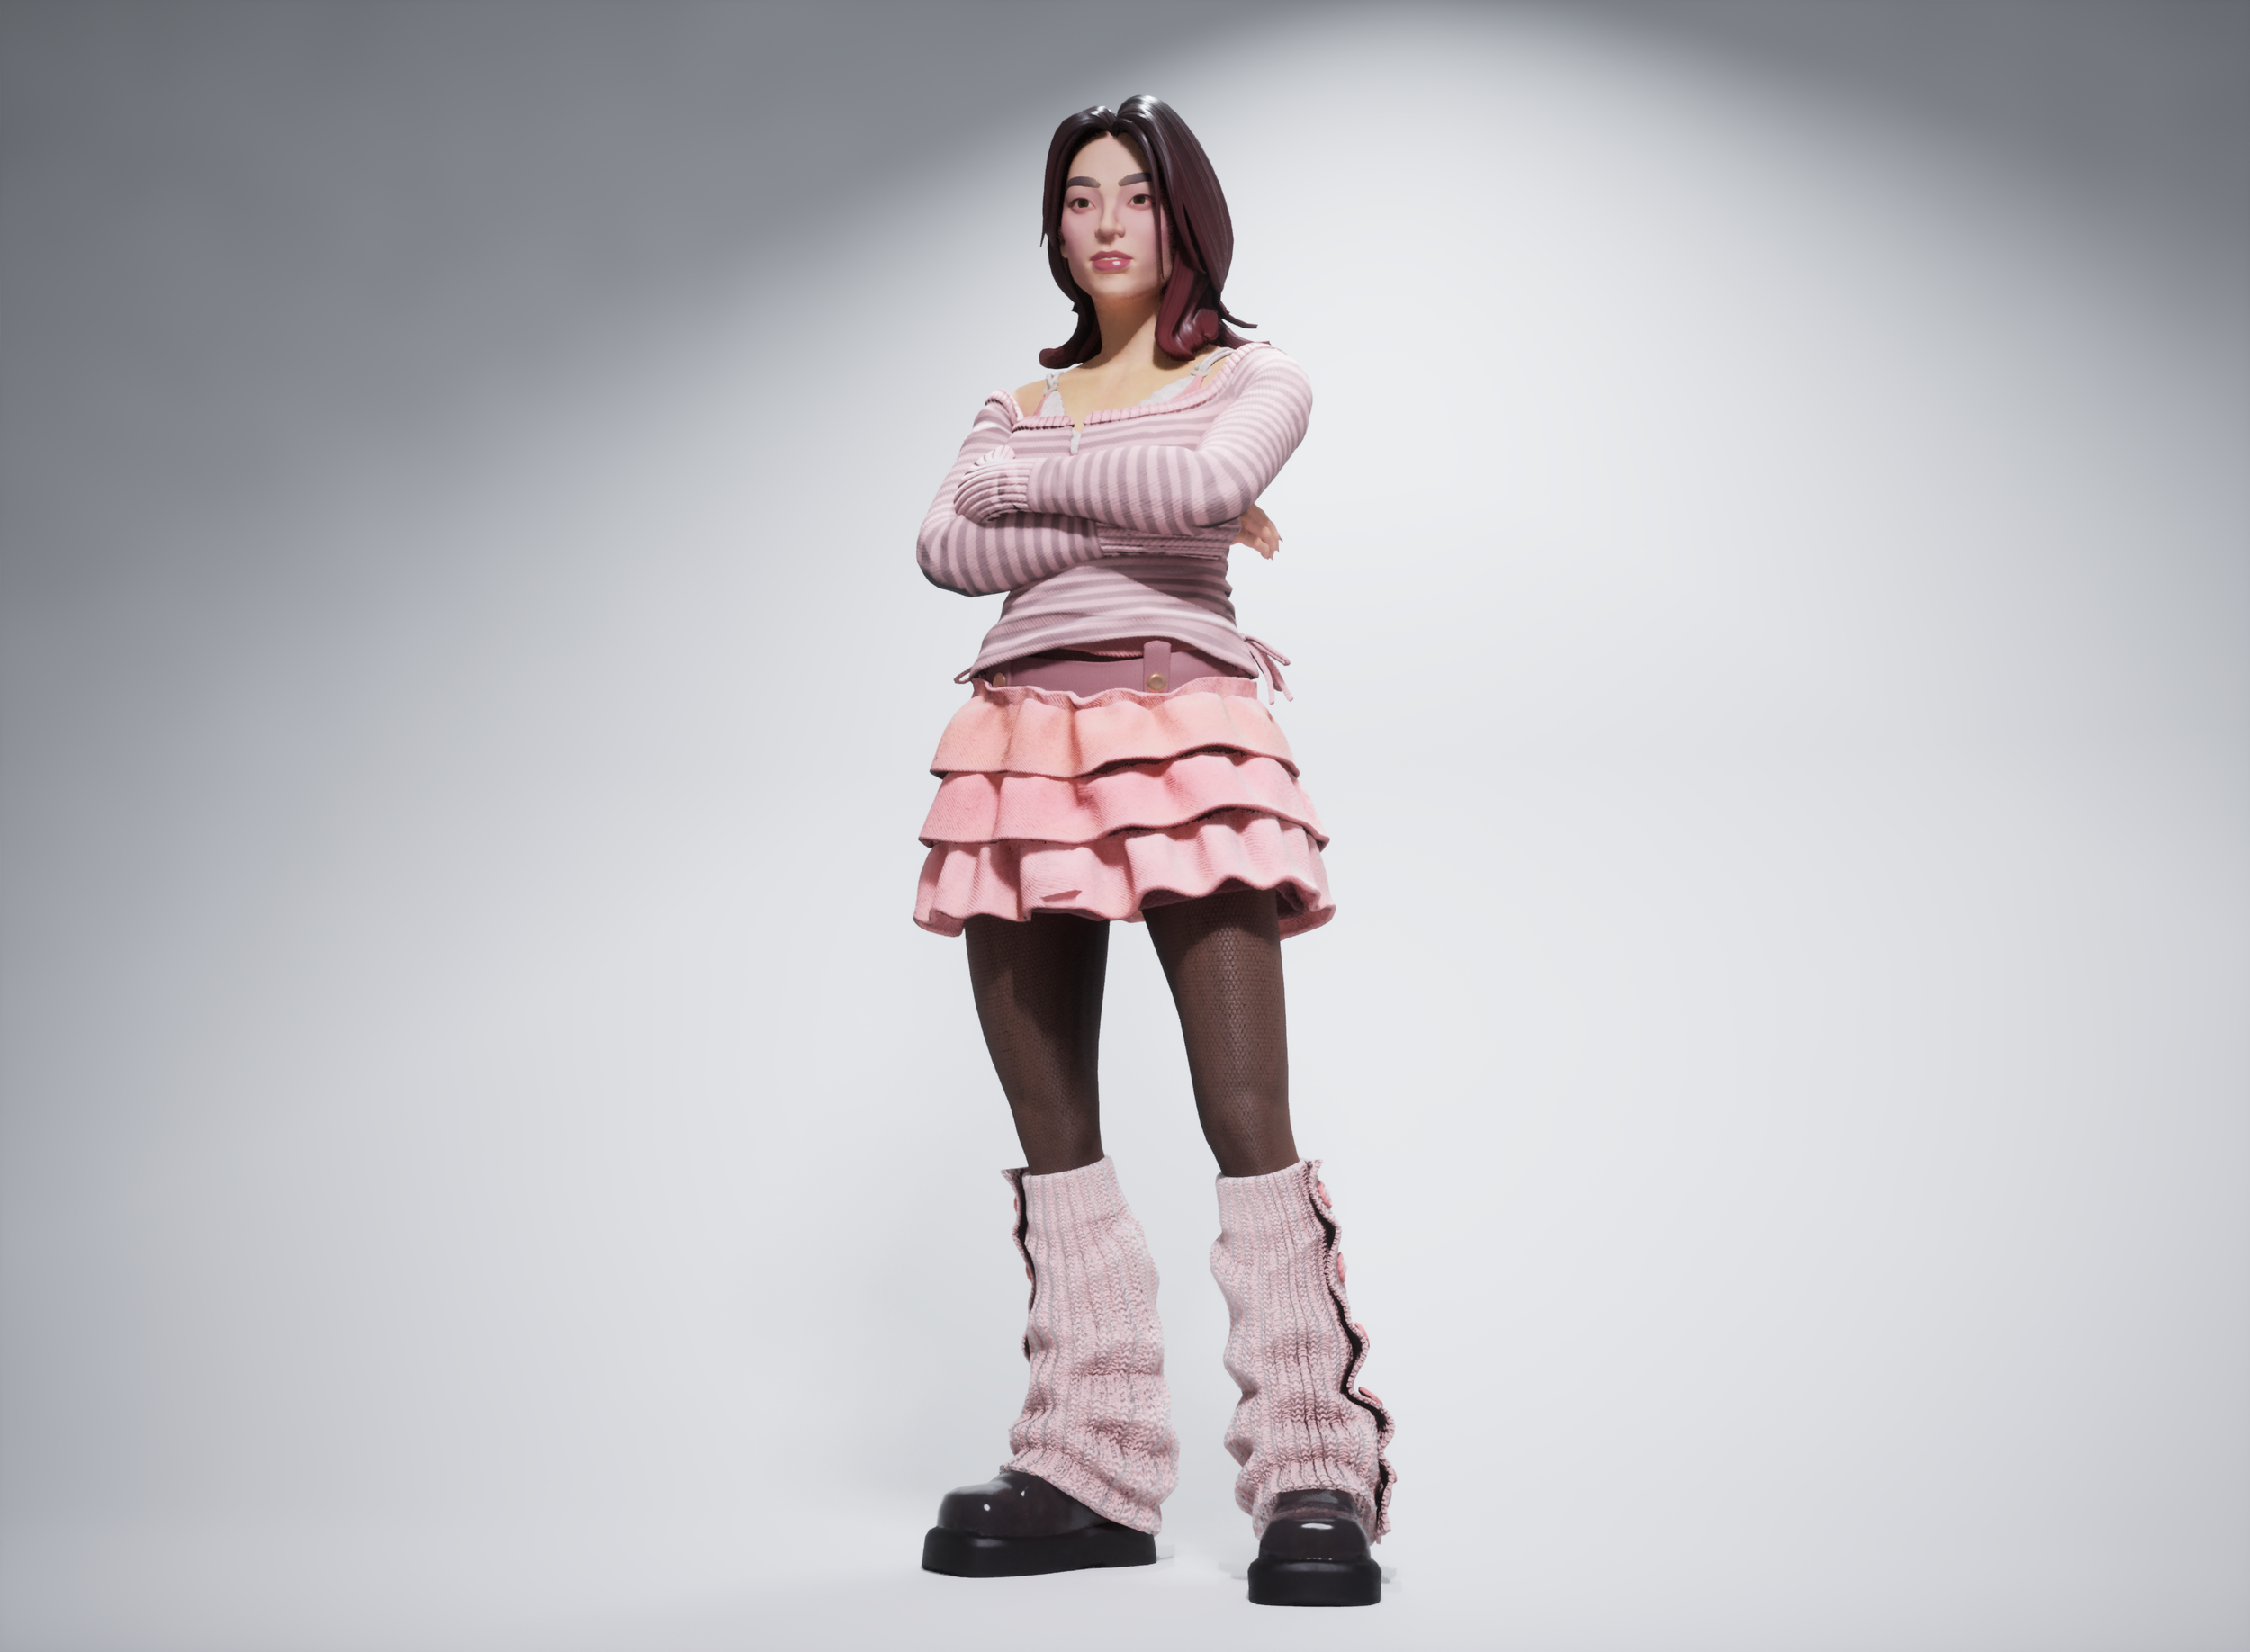
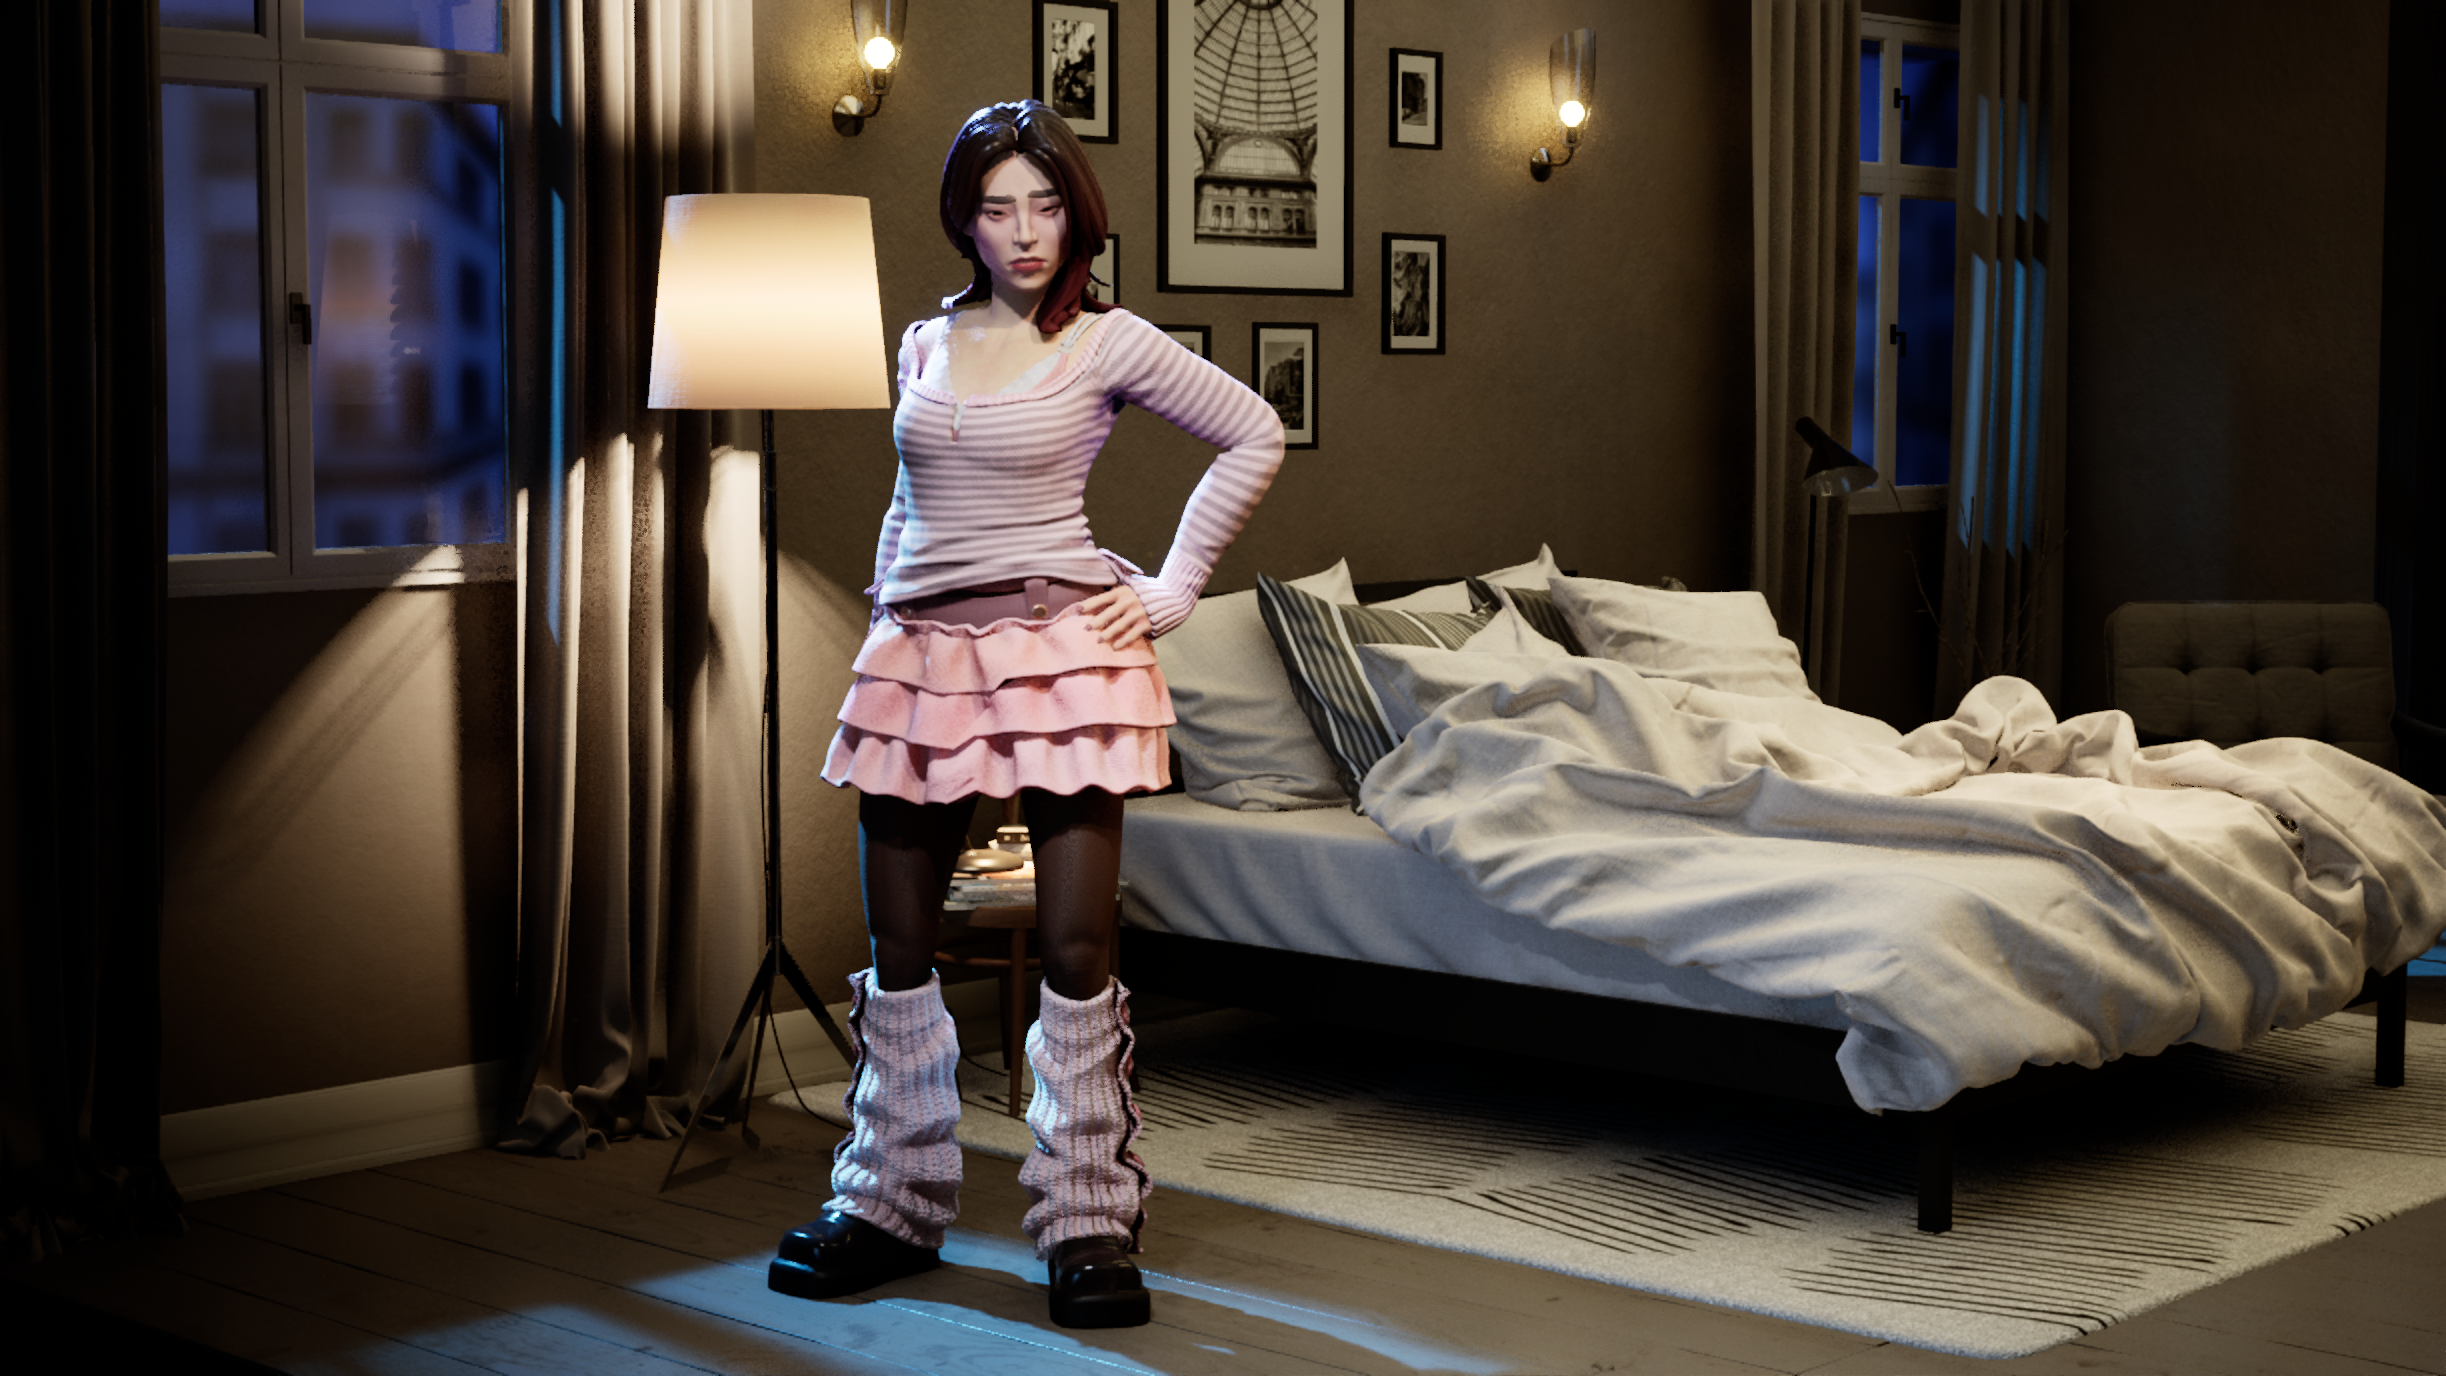
After the second alignment meeting, we came to the conclusion that we wanted to really lean into the high end doll aesthetic and push the look of our characters towards a more distinct and theatrical look. We analyzed the trends in the outfits that we deemed right for Burbank and started to really dive deep down the high end doll rabbit hole. I put together a whole reference board dedicated to them with examples and parallels to our current character designs. We knew that we weren’t going to be leaning in full force into this new direction just yet, as we had some additional gameplay needs to support, but we did get the opportunity to try them out on a new cast member. I put some costume pillars together that would serve as the foundation goals to keep in mind as we developed the new cast member, Emily Yoon-suh Lim.
This image shows both the reference analysis of the high end dolls and the reference gathering to support our pillars for our new cast member, Yoon-suh. The board in the upper right quadrant was a great collaboration with two of the engineers on our team - Sharon Bryant and Peyton Bischof.
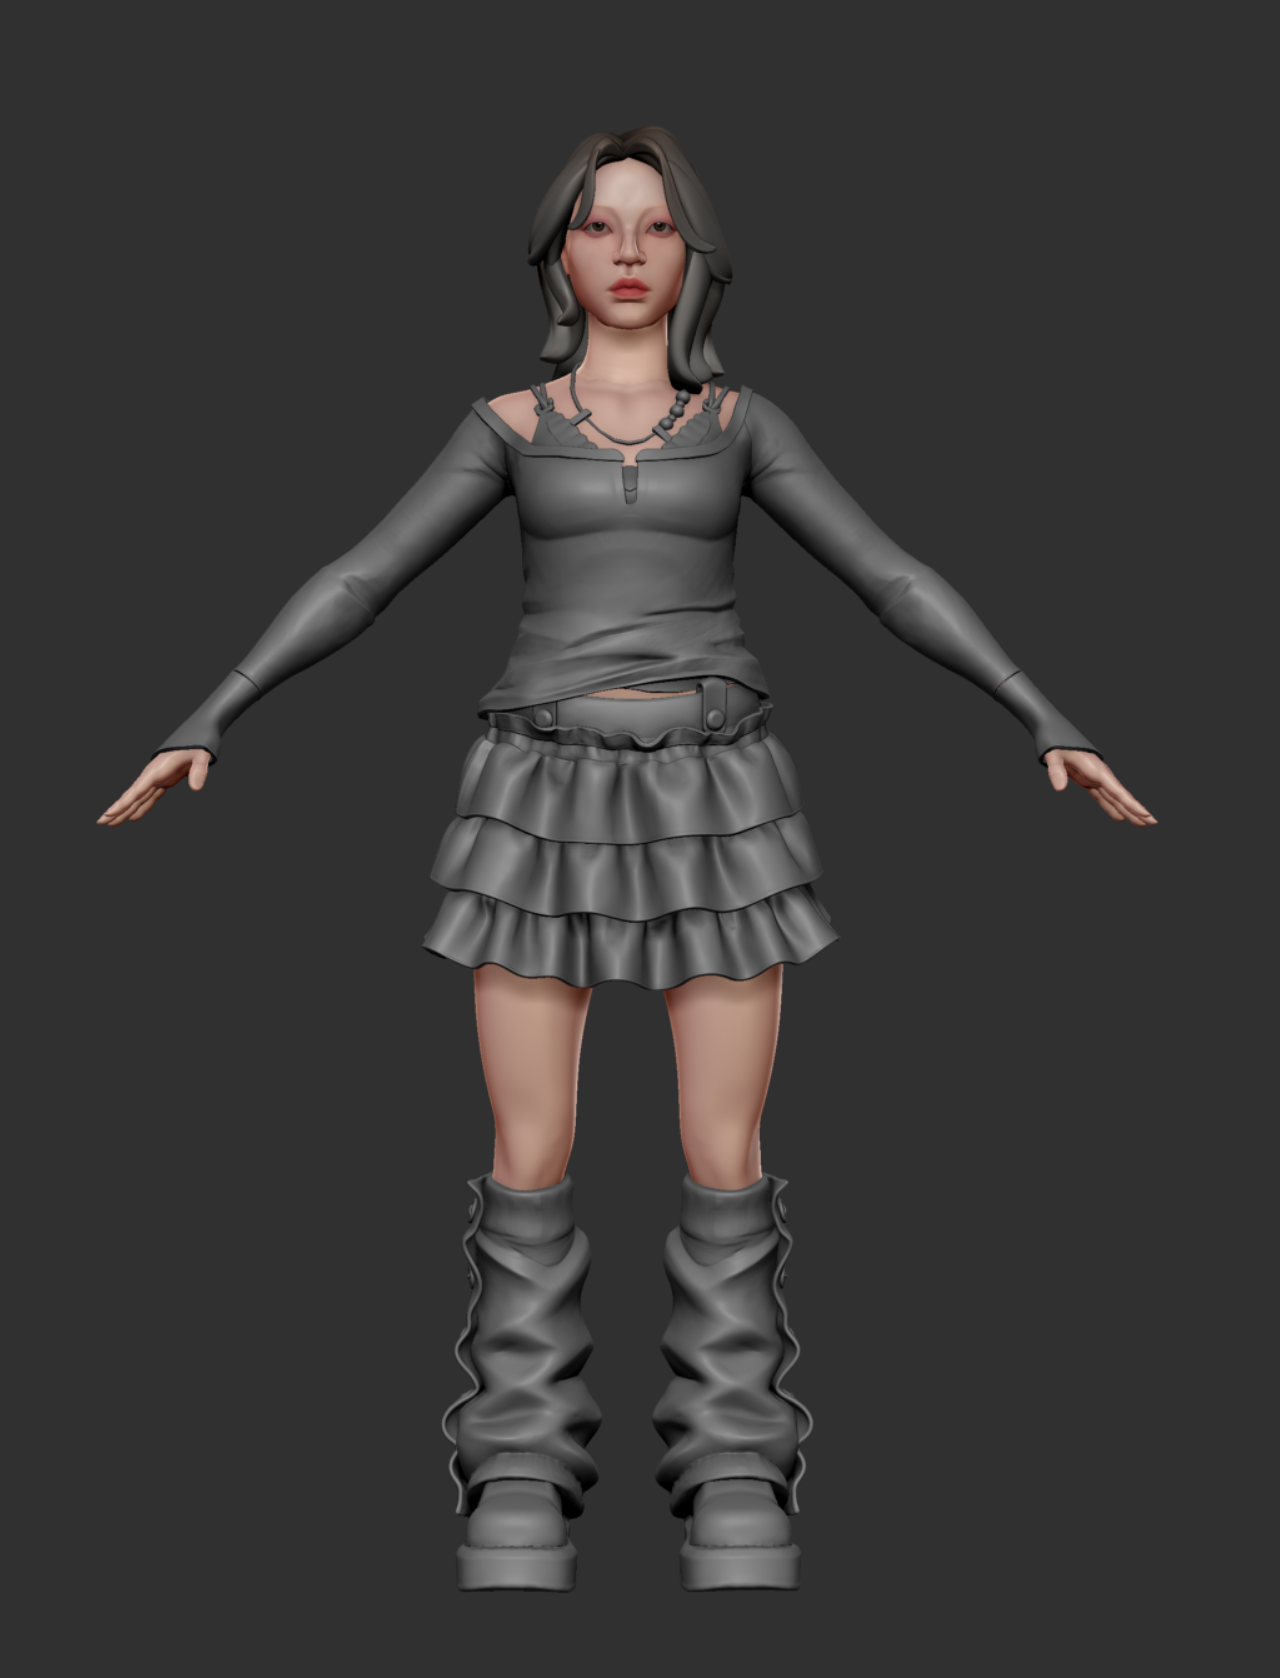
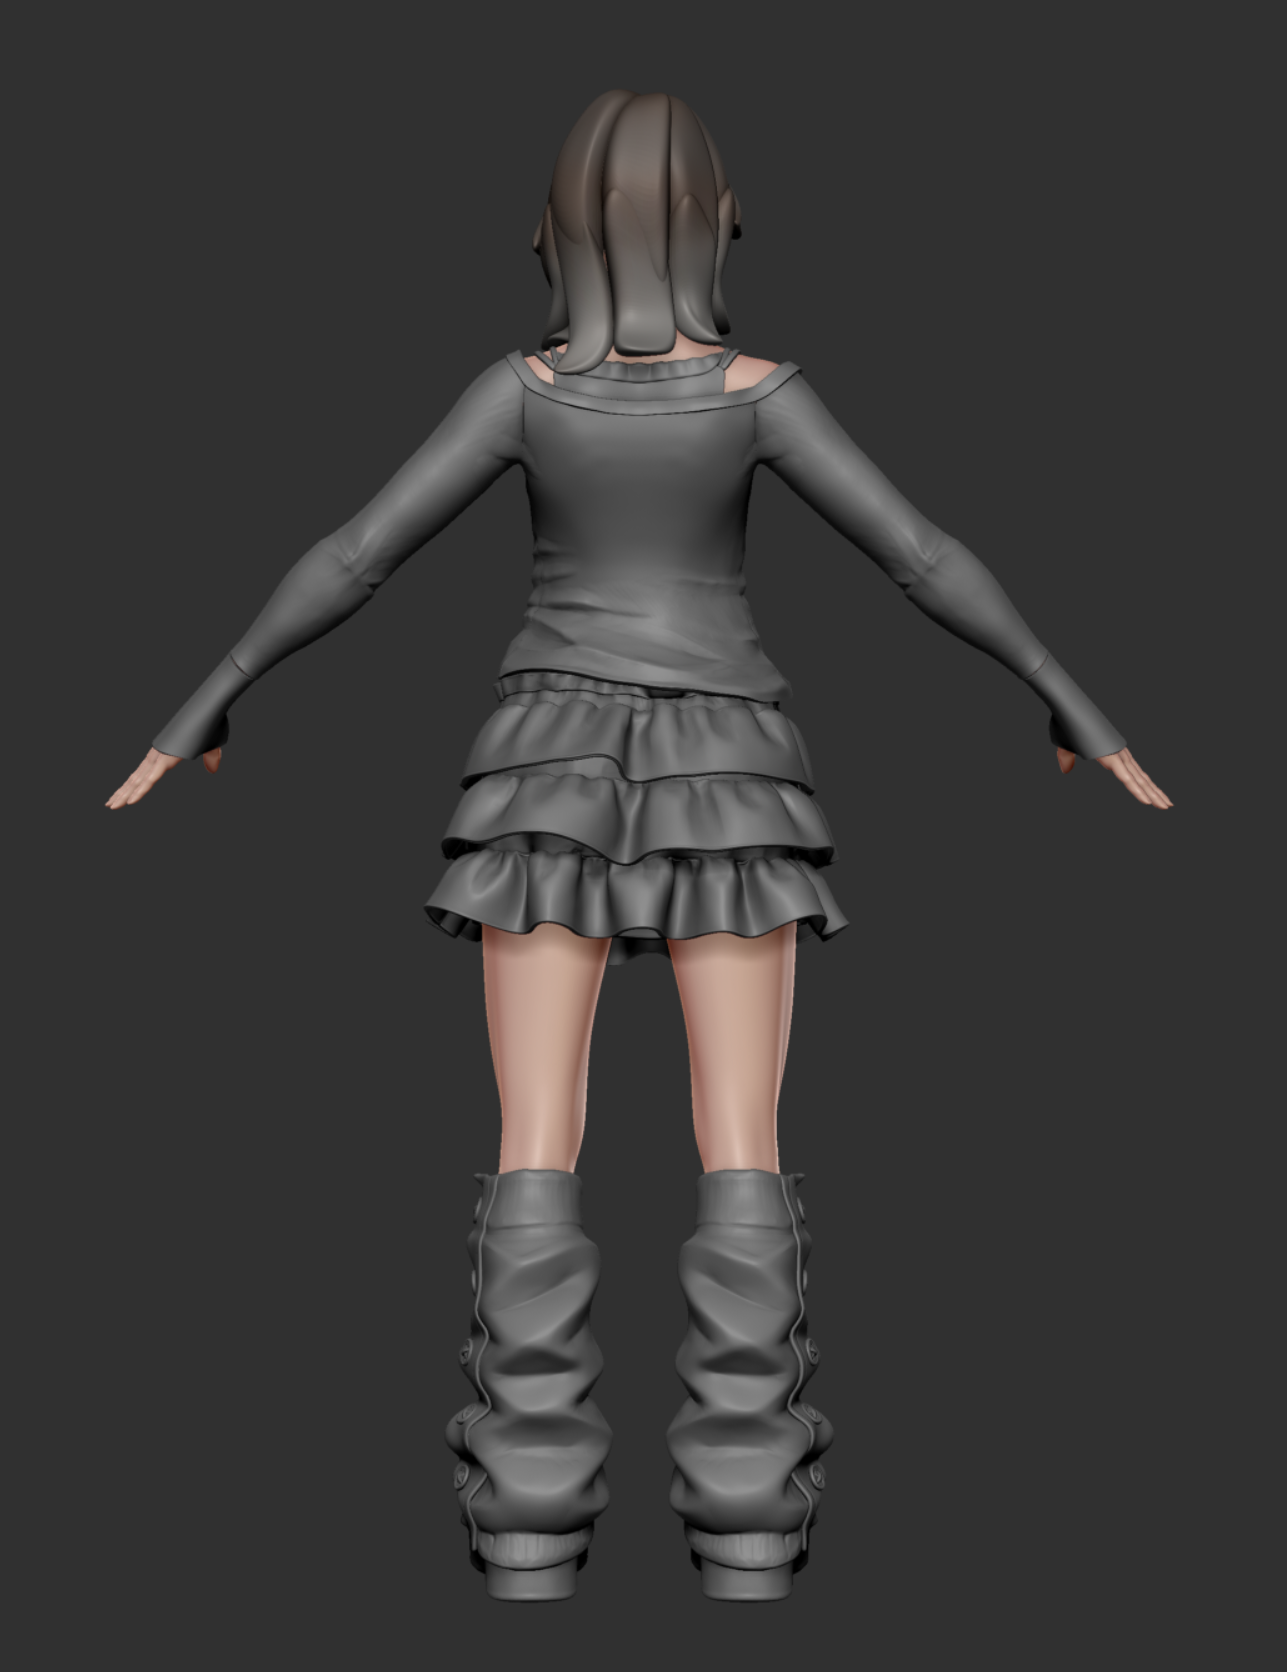
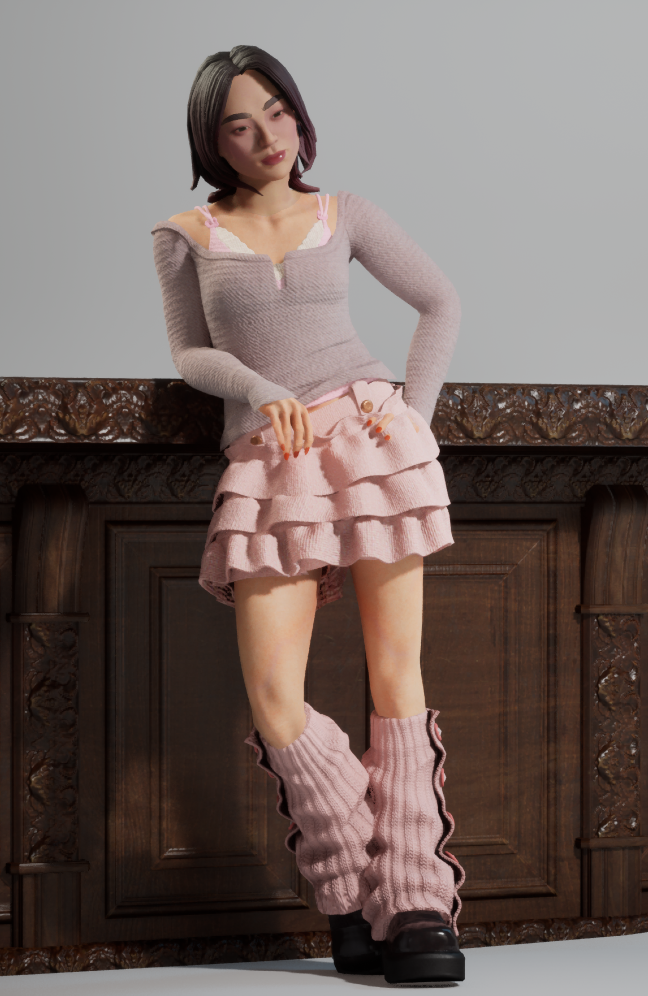
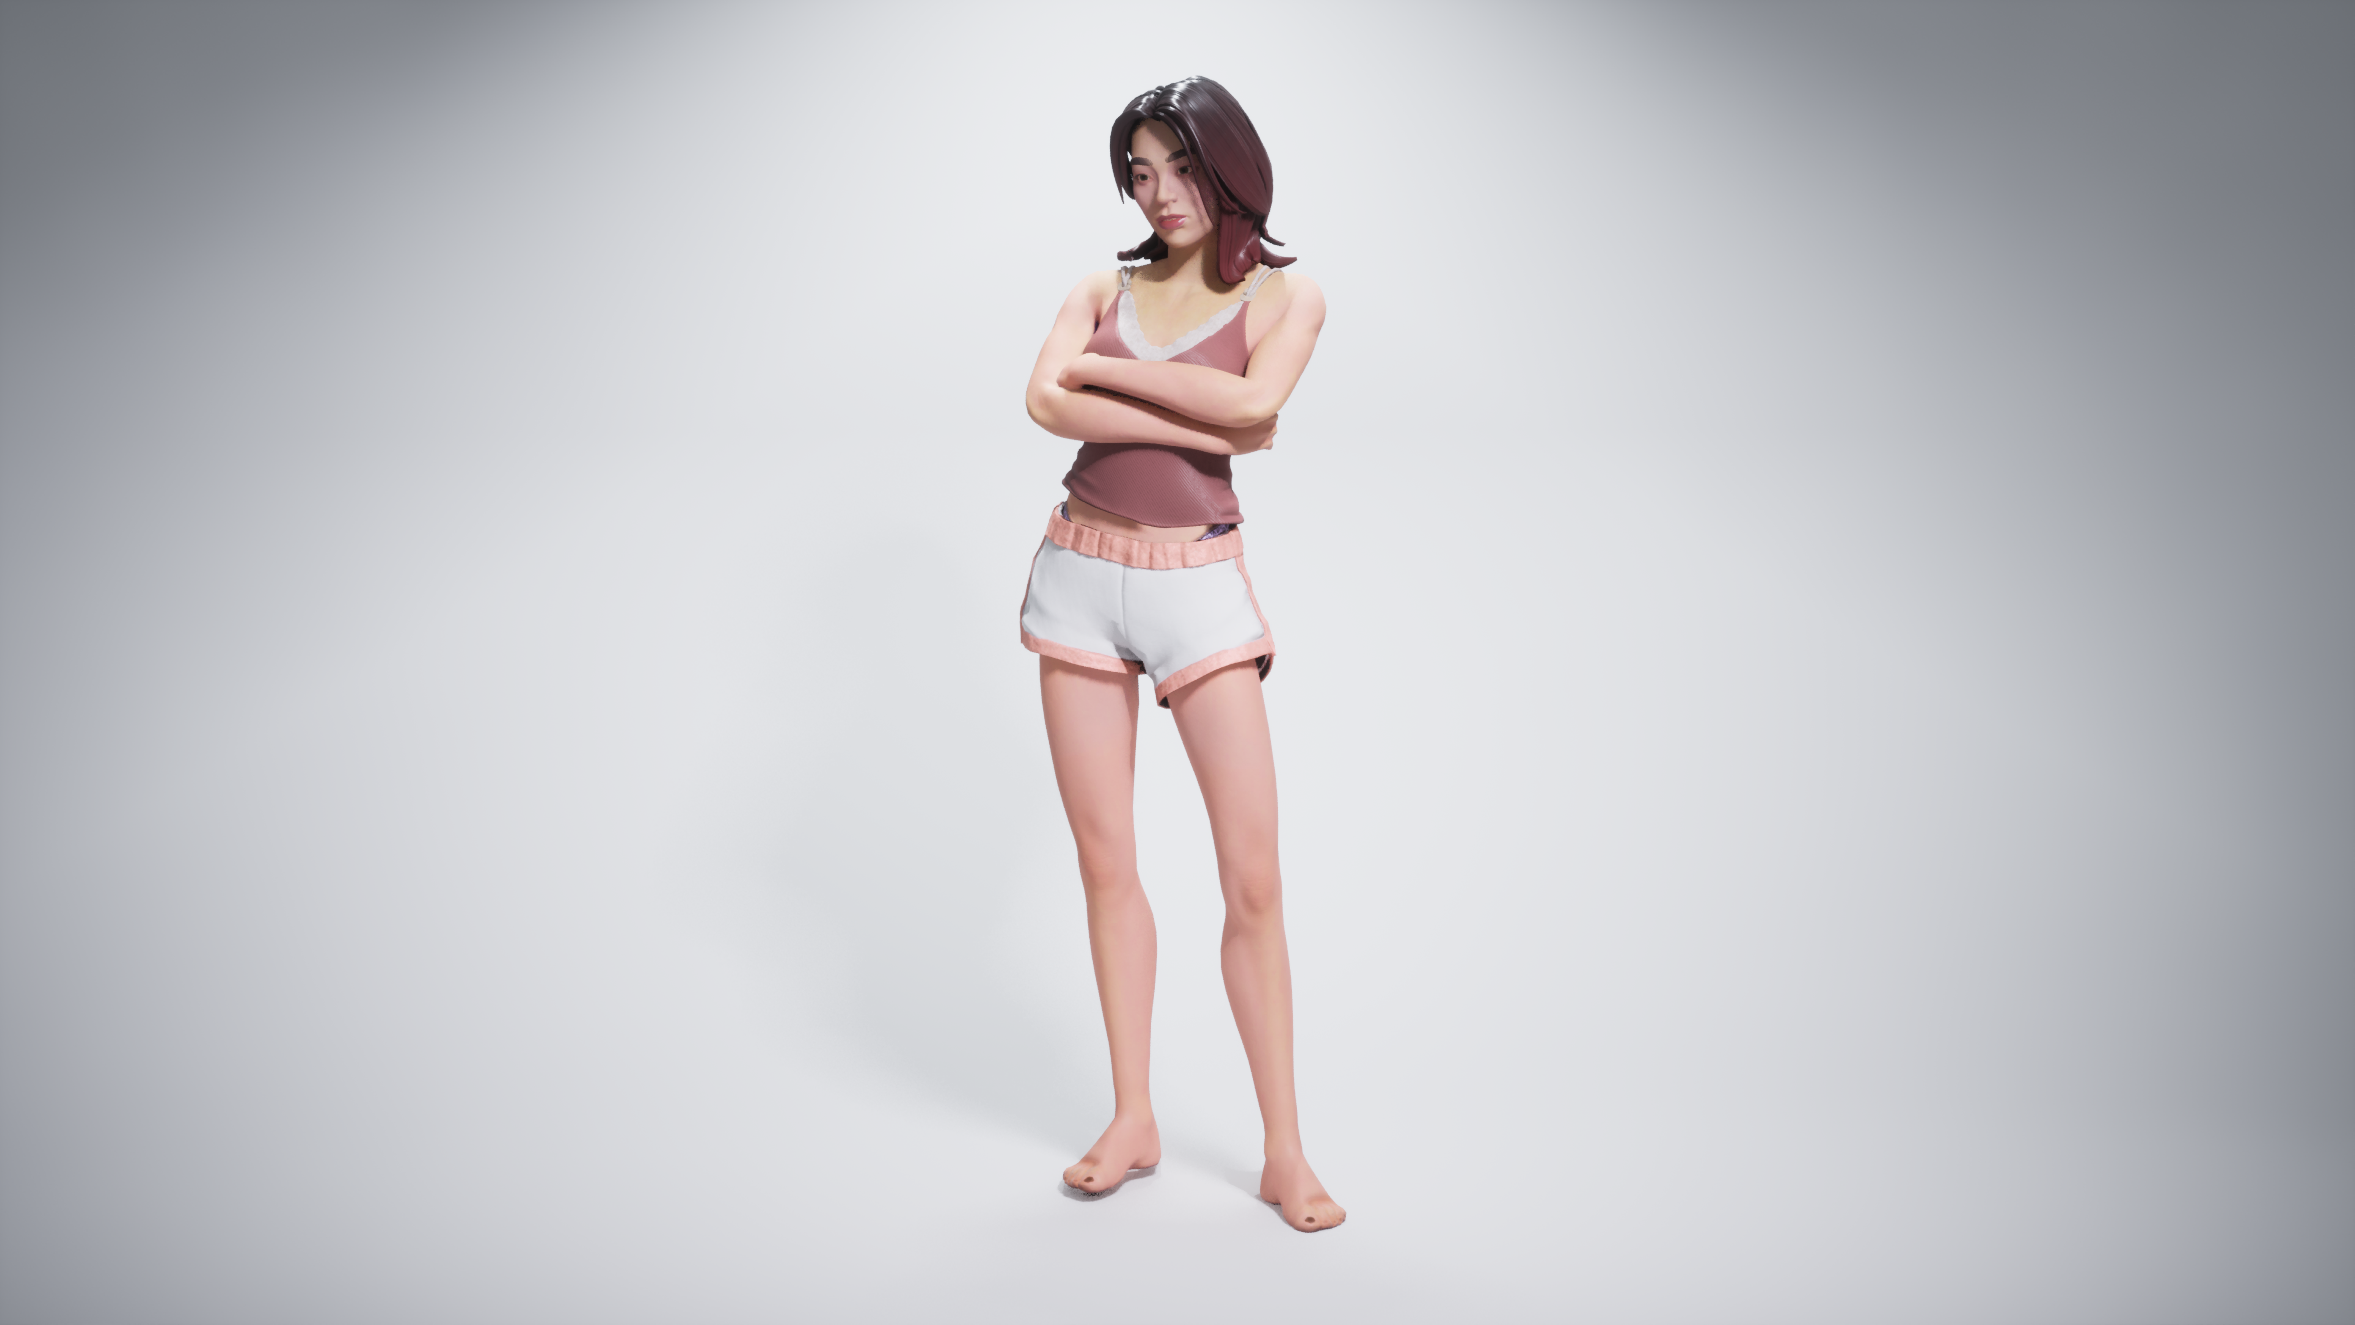
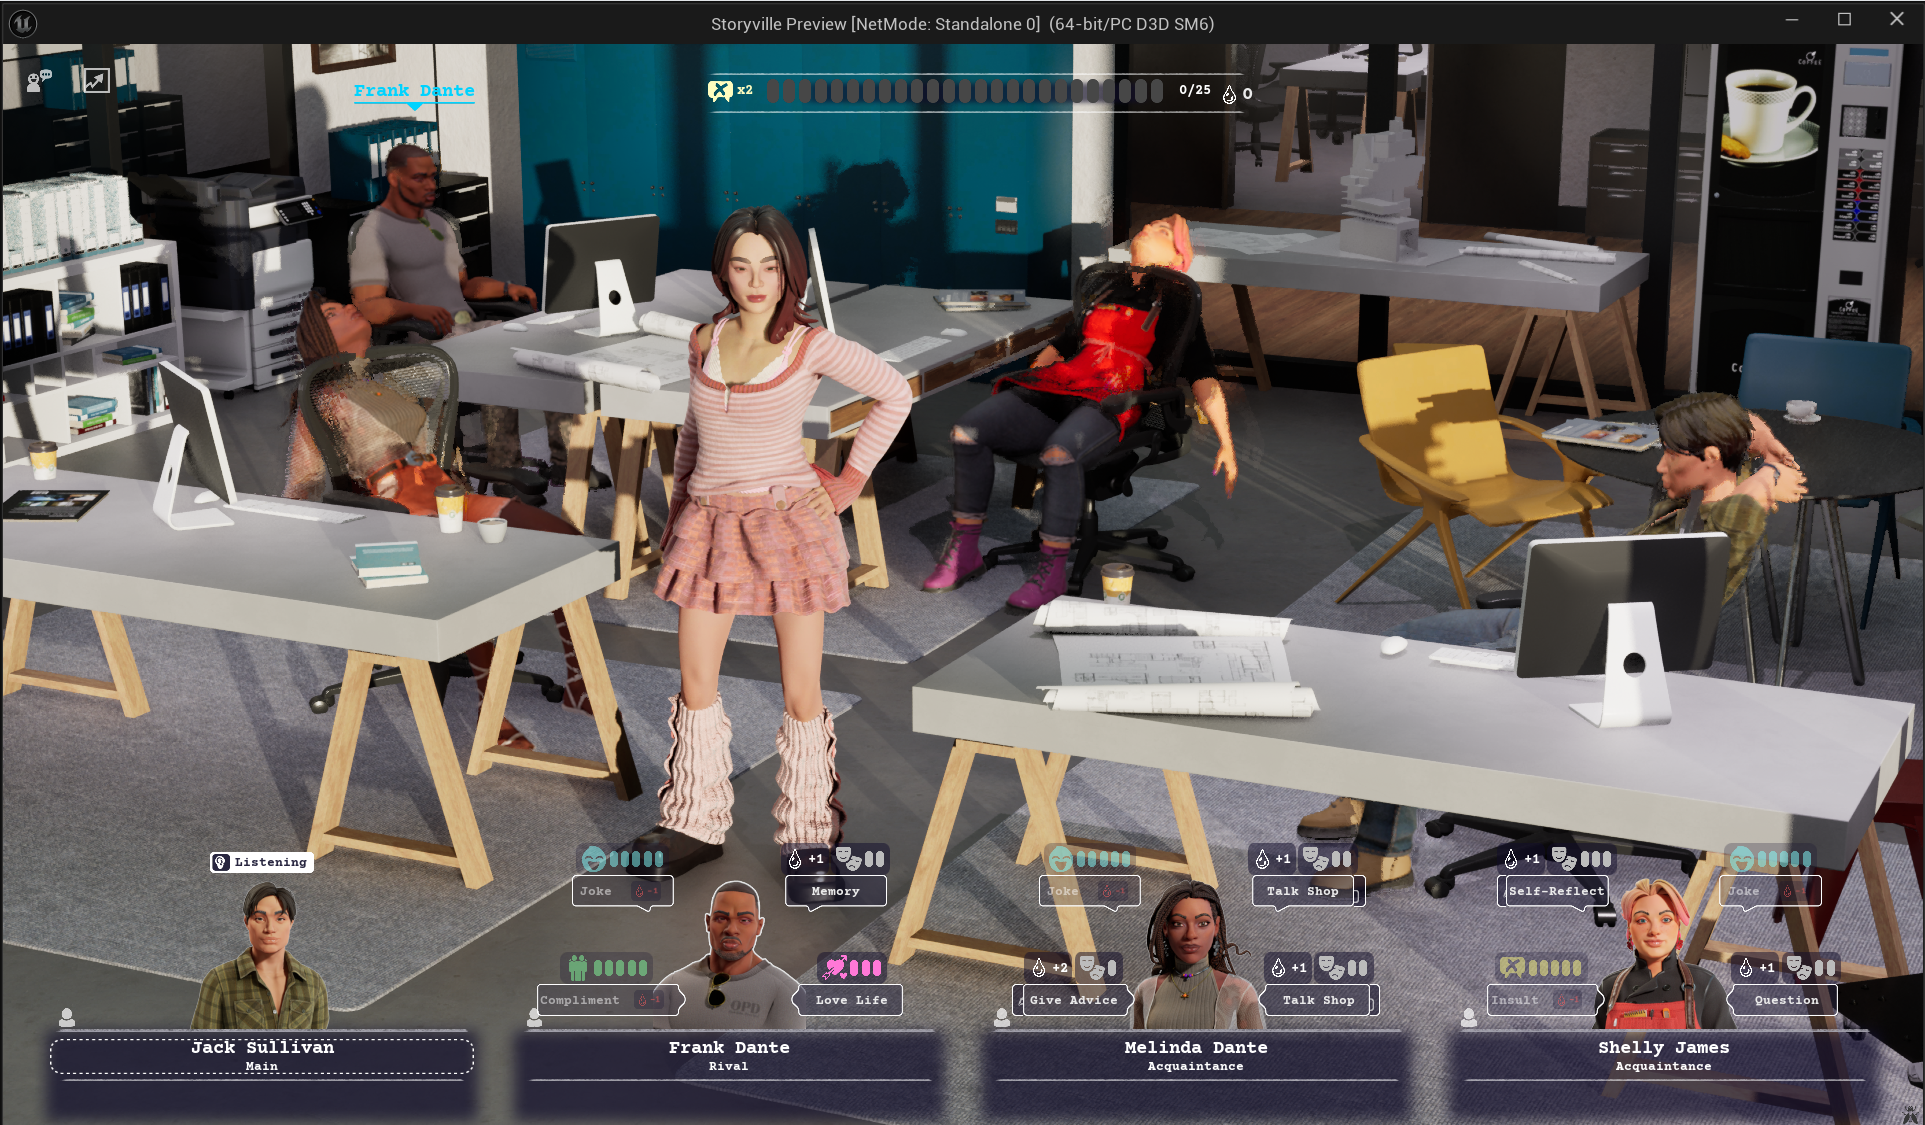
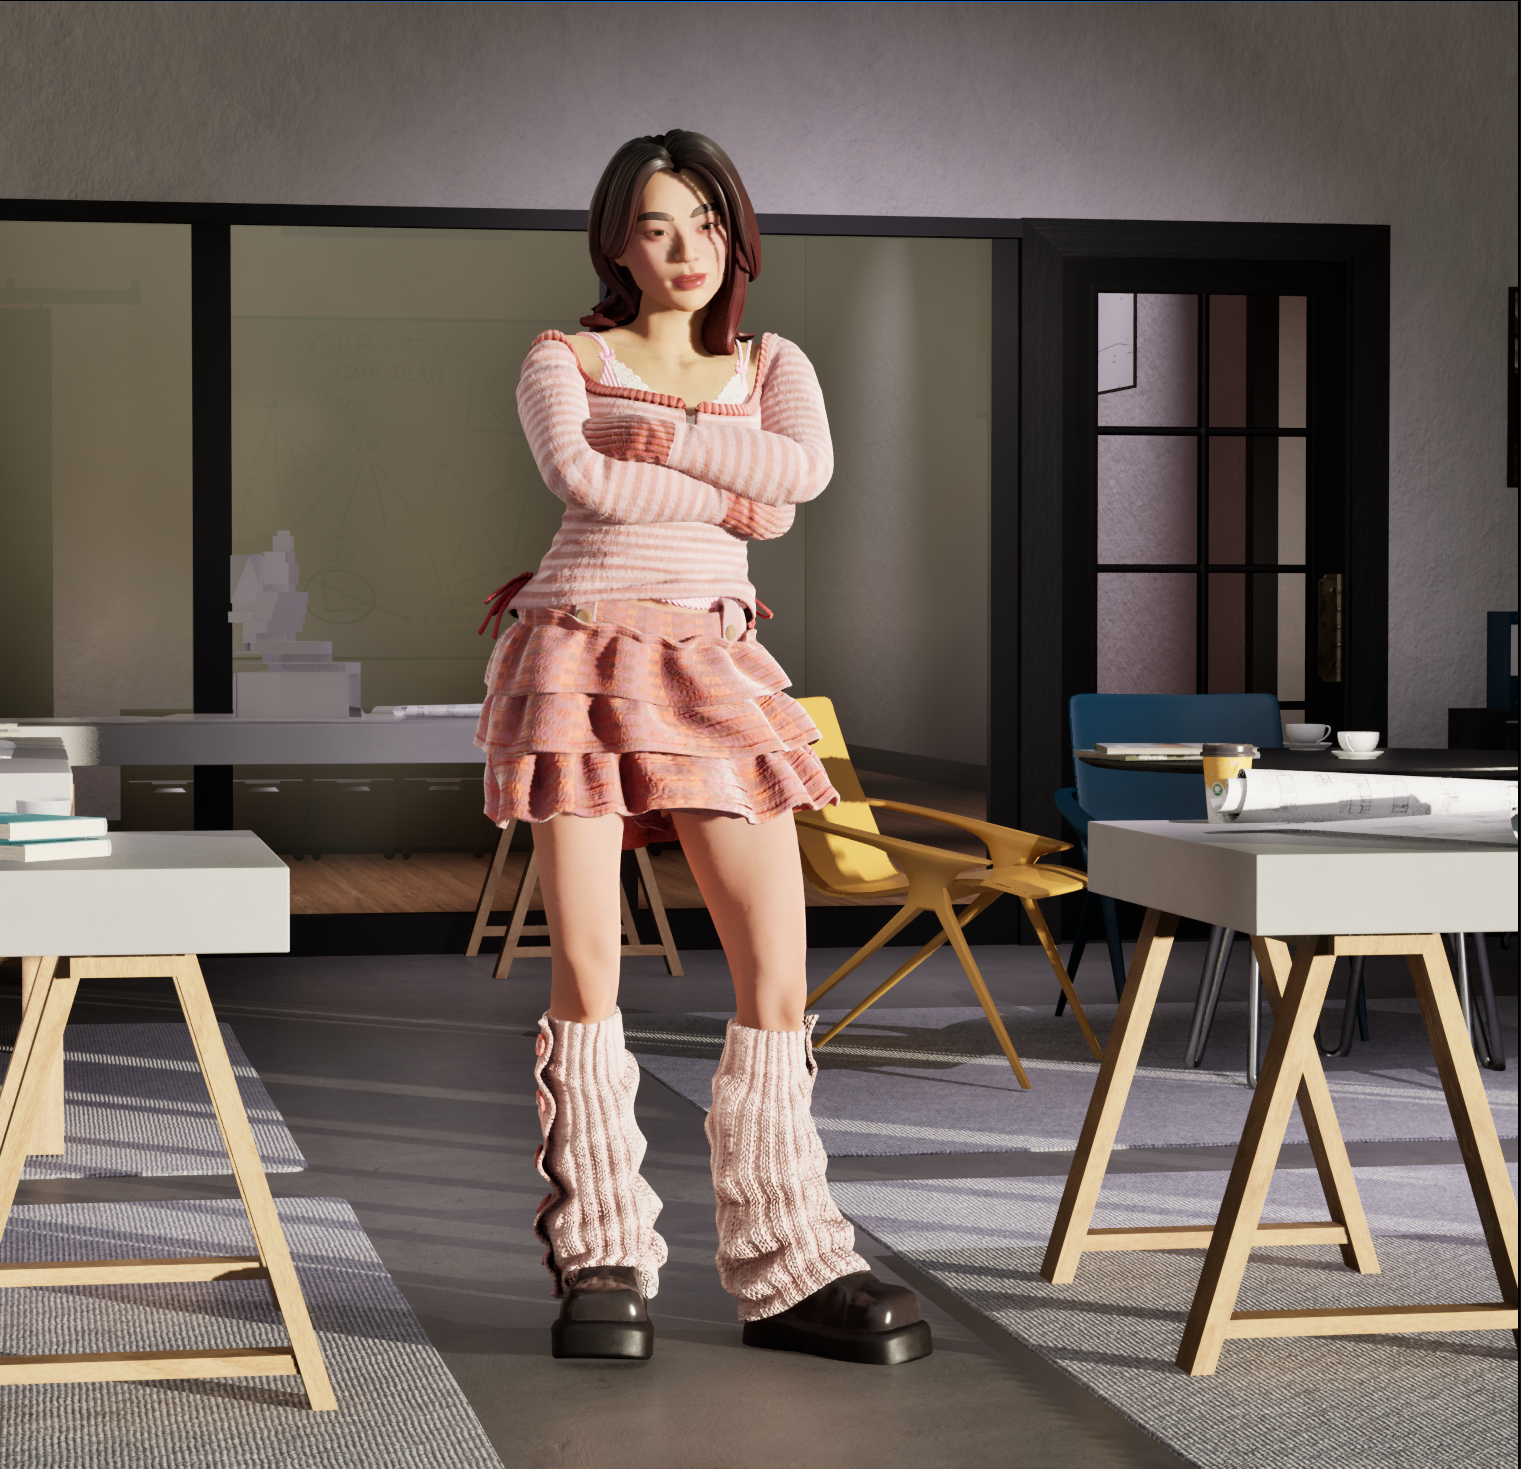
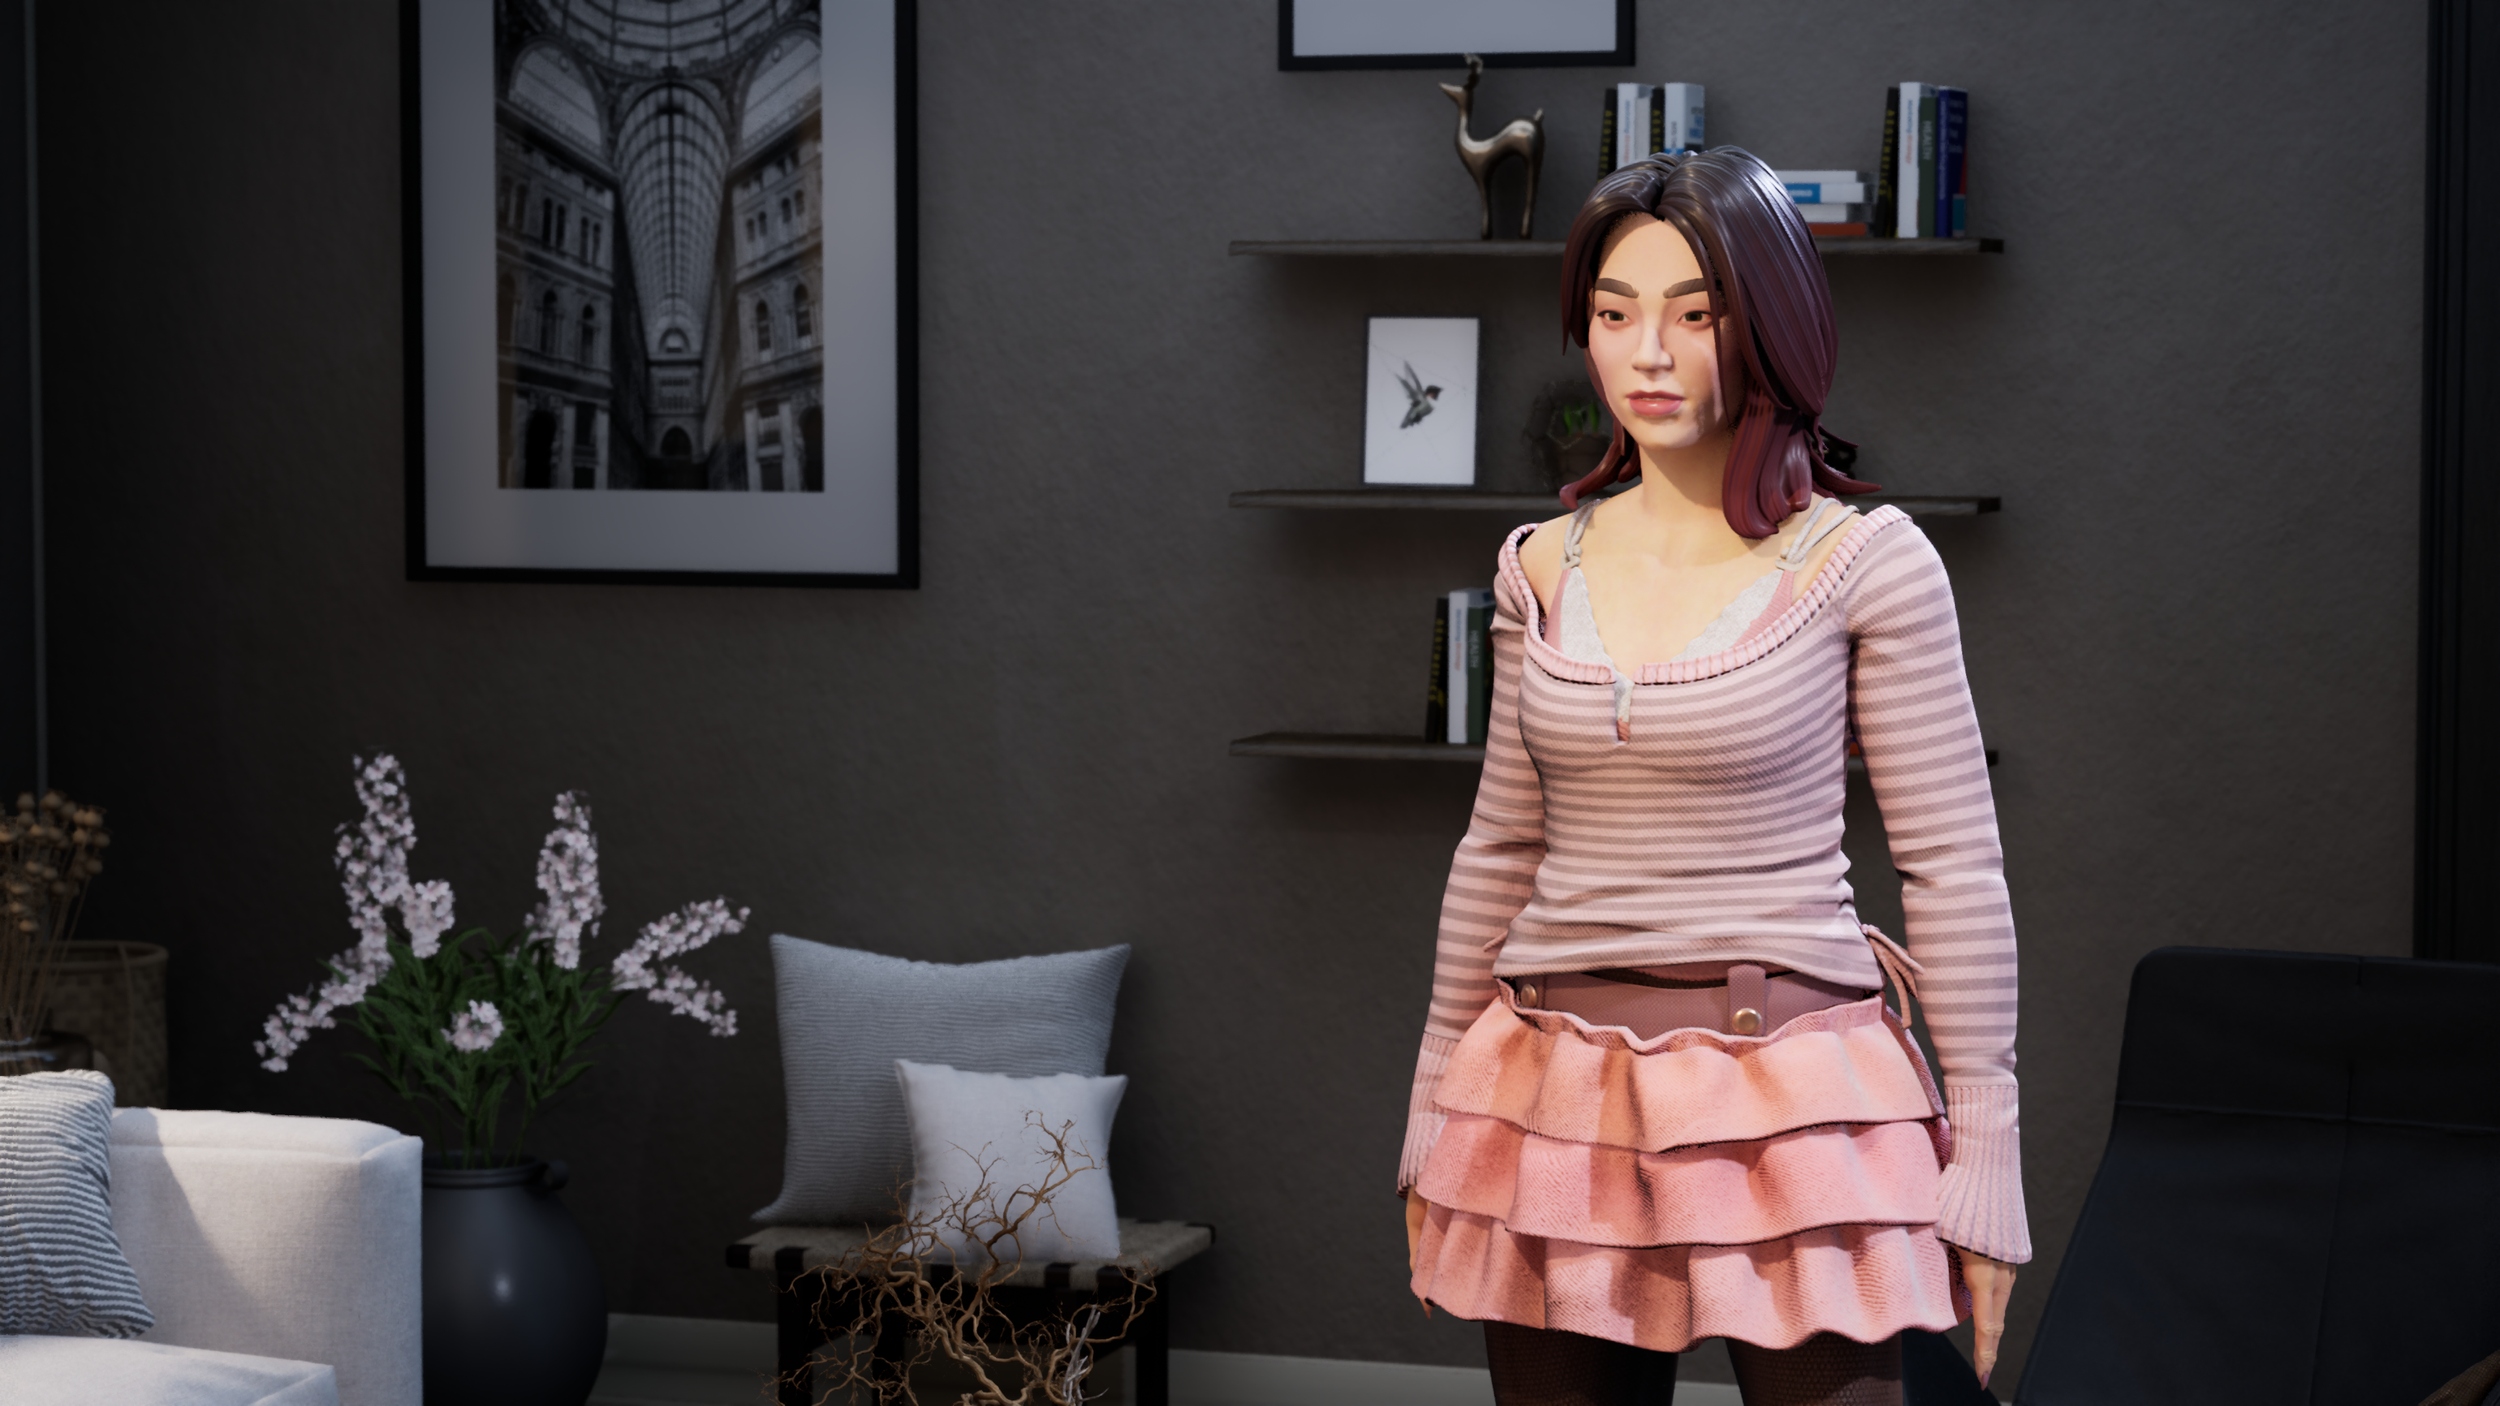
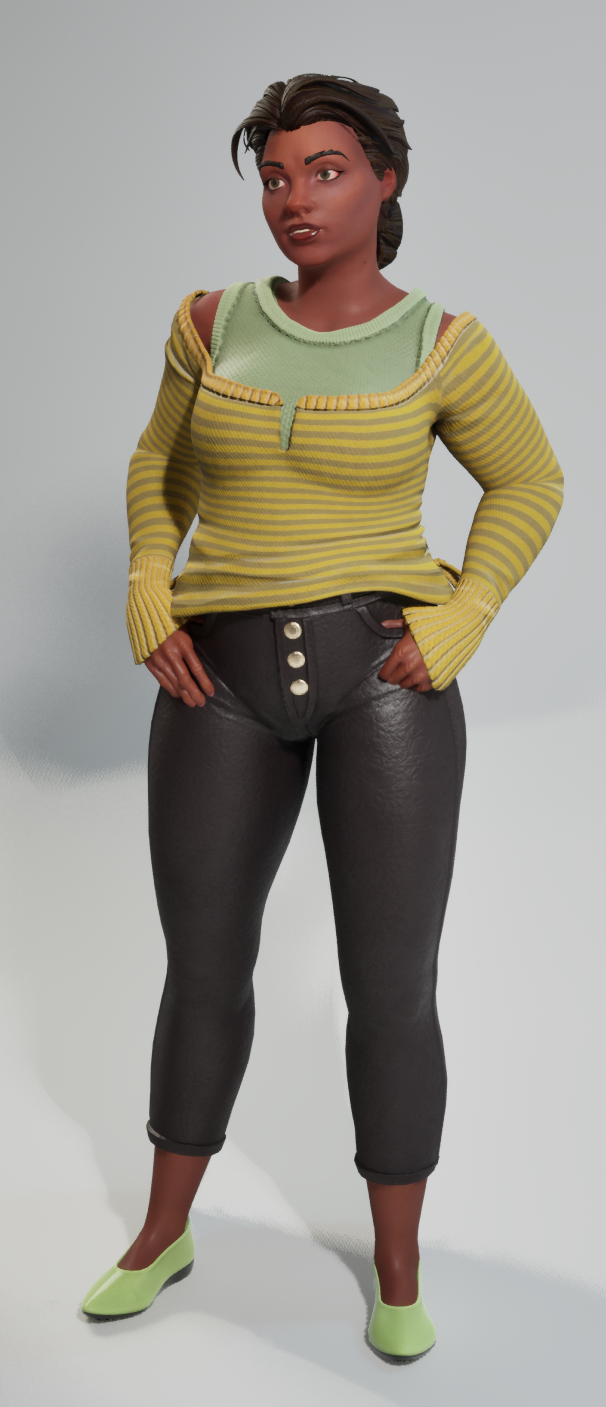
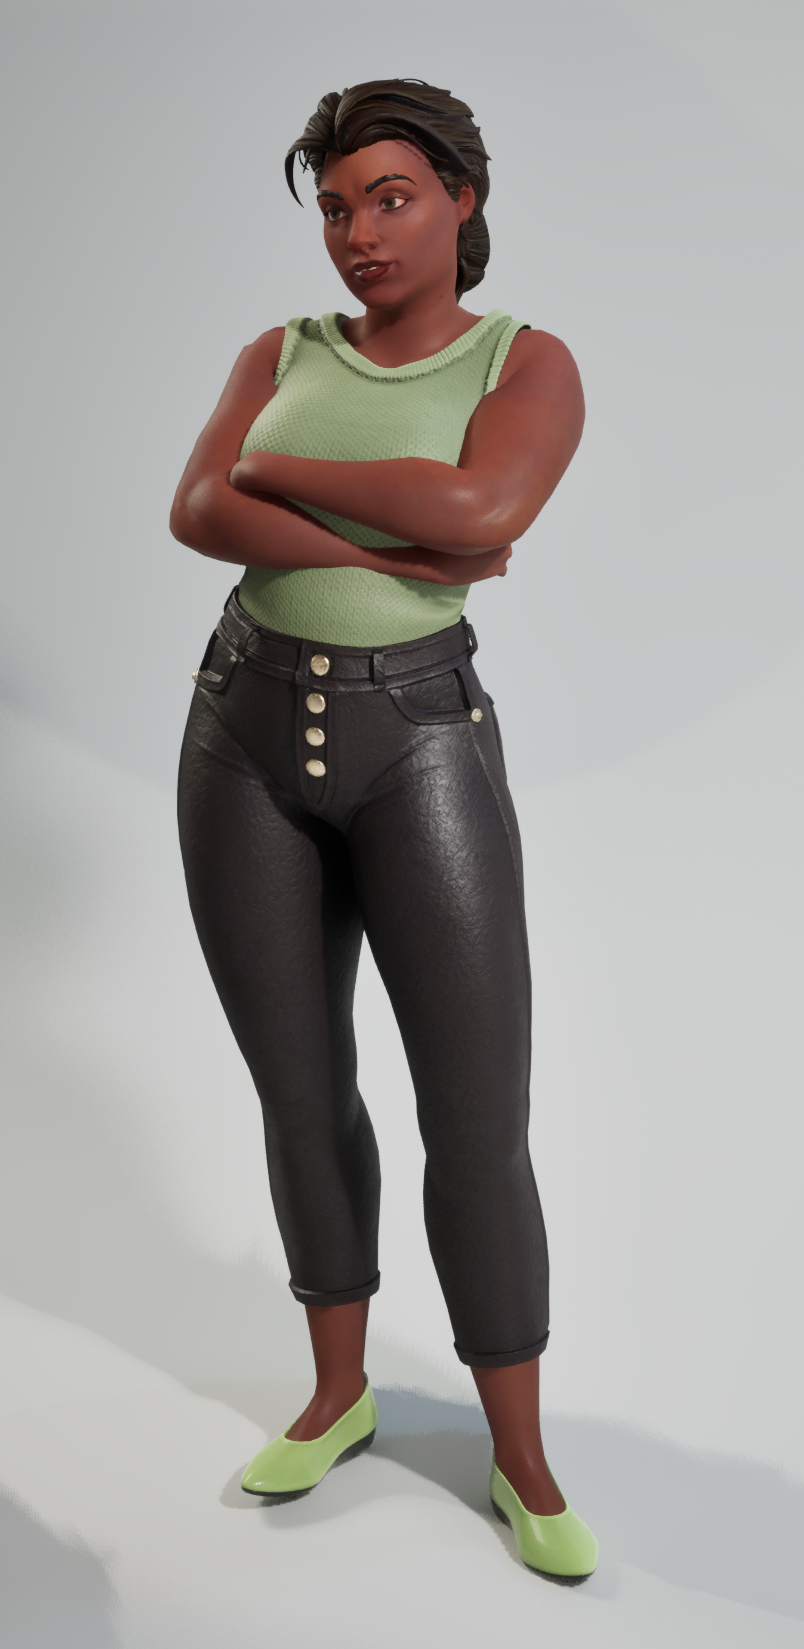
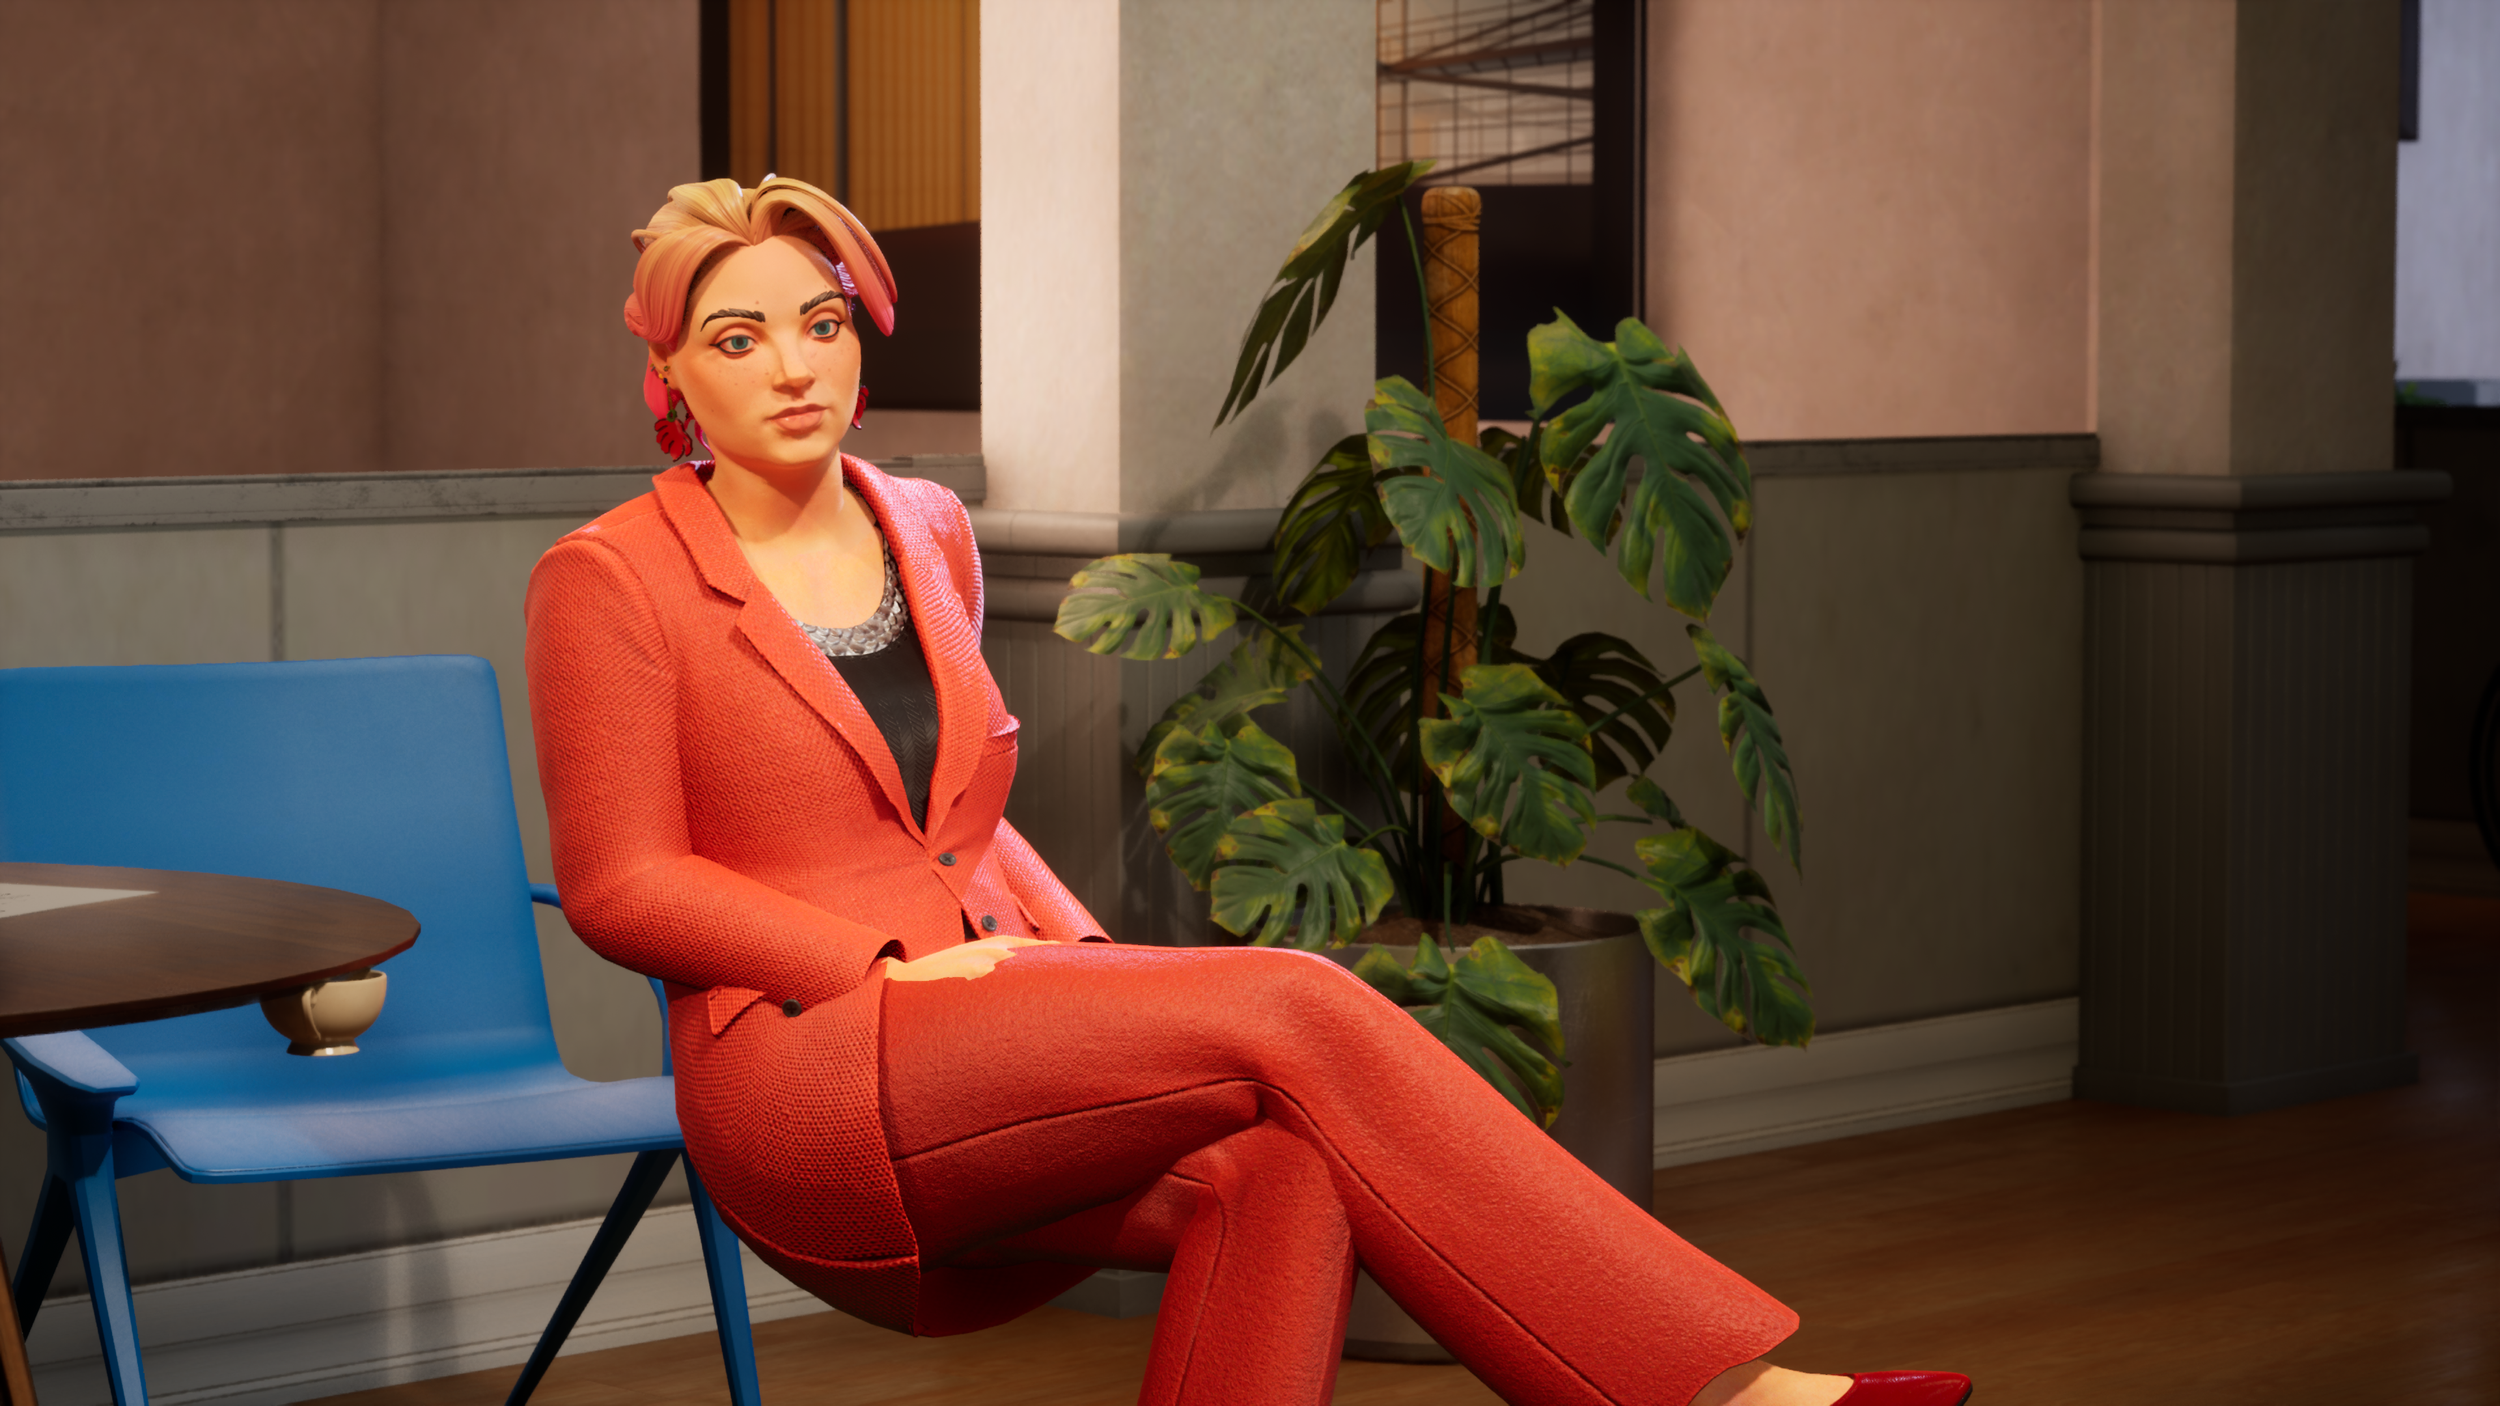
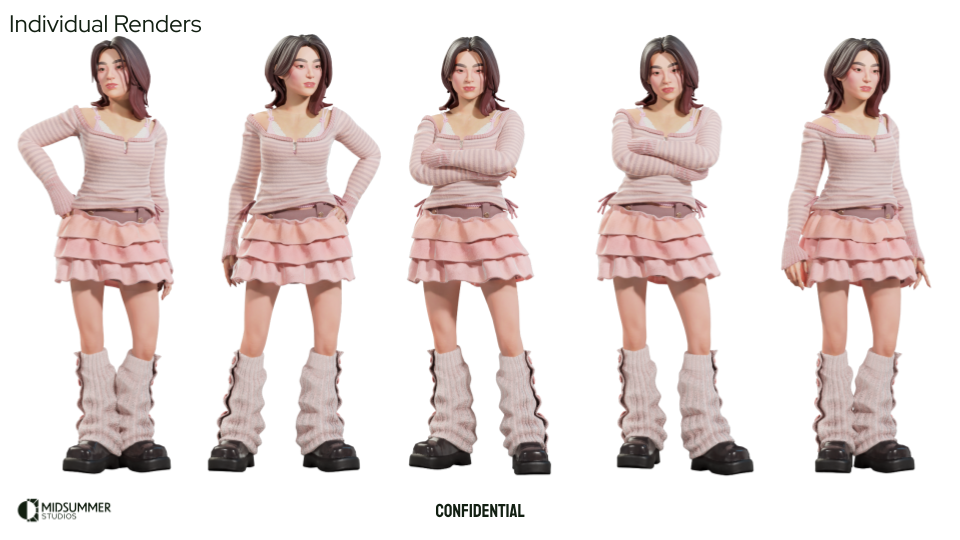
Here are some shots of Emily Lim in development. We used this as an opportunity to design a new costume with the outfit pillars we developed.


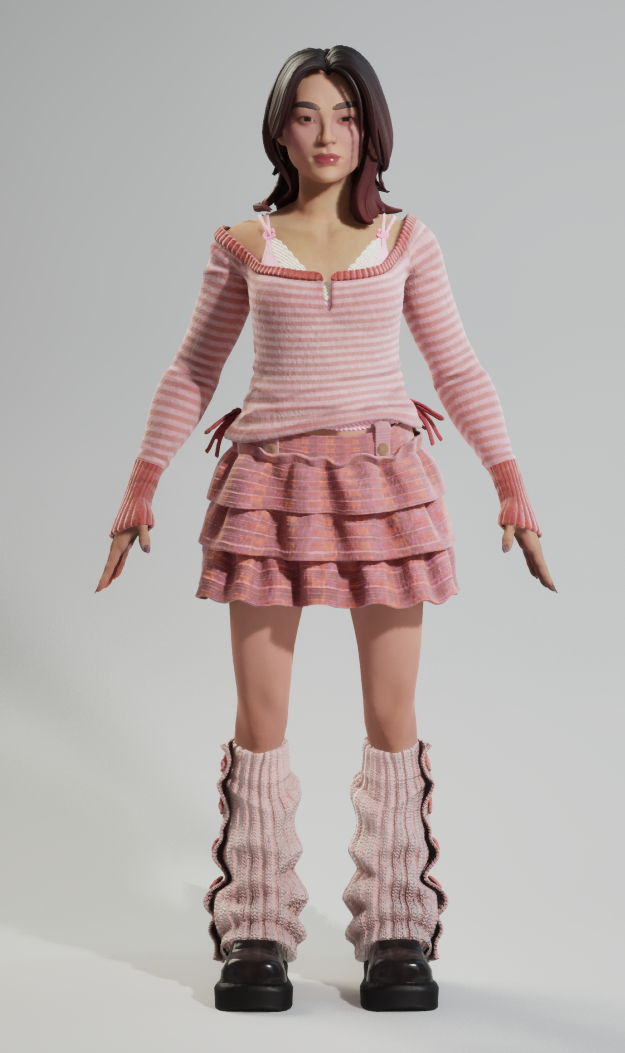
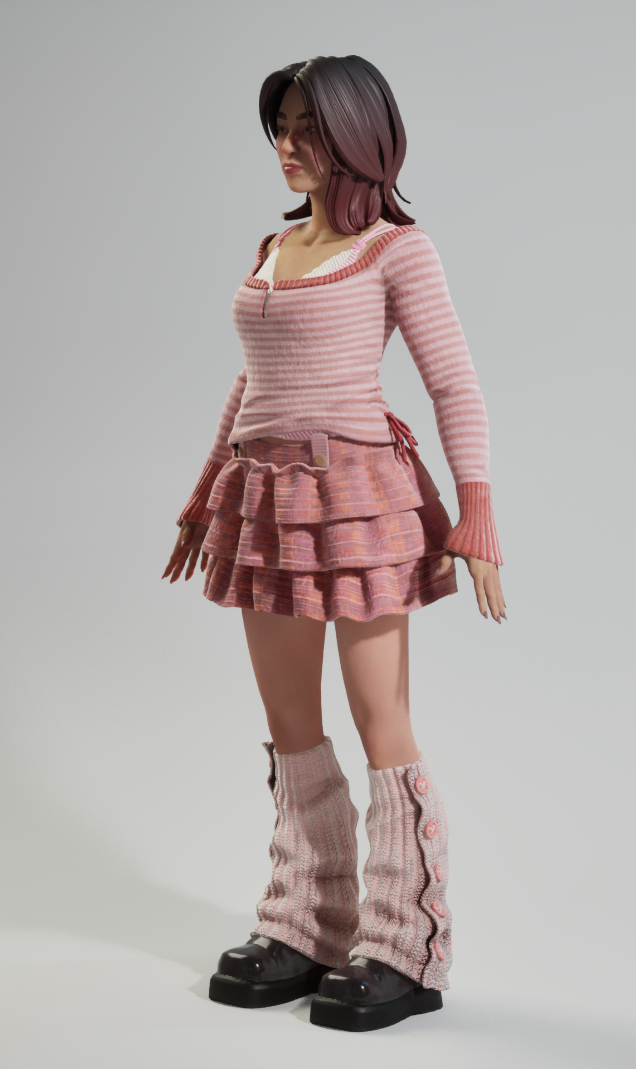
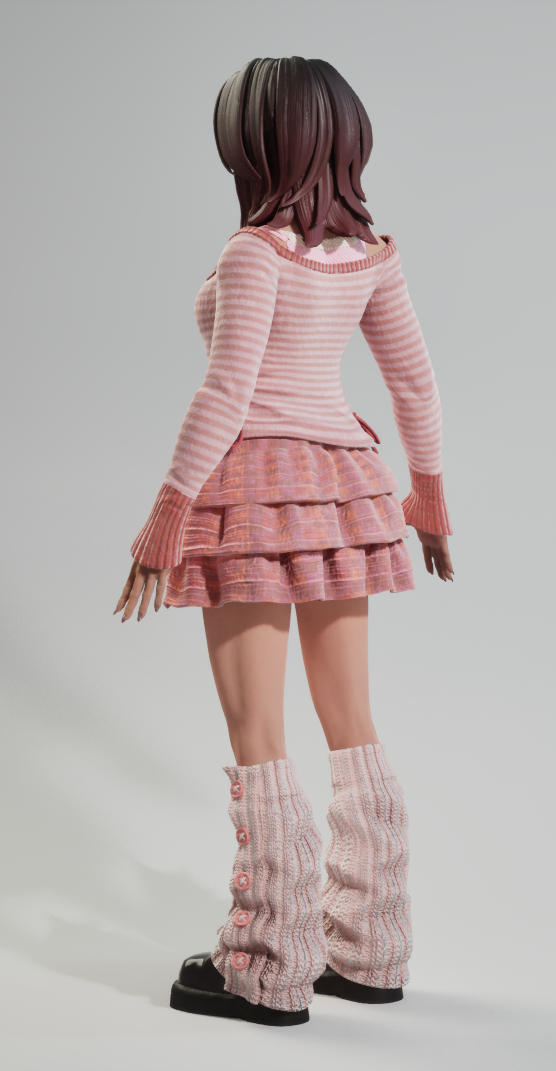
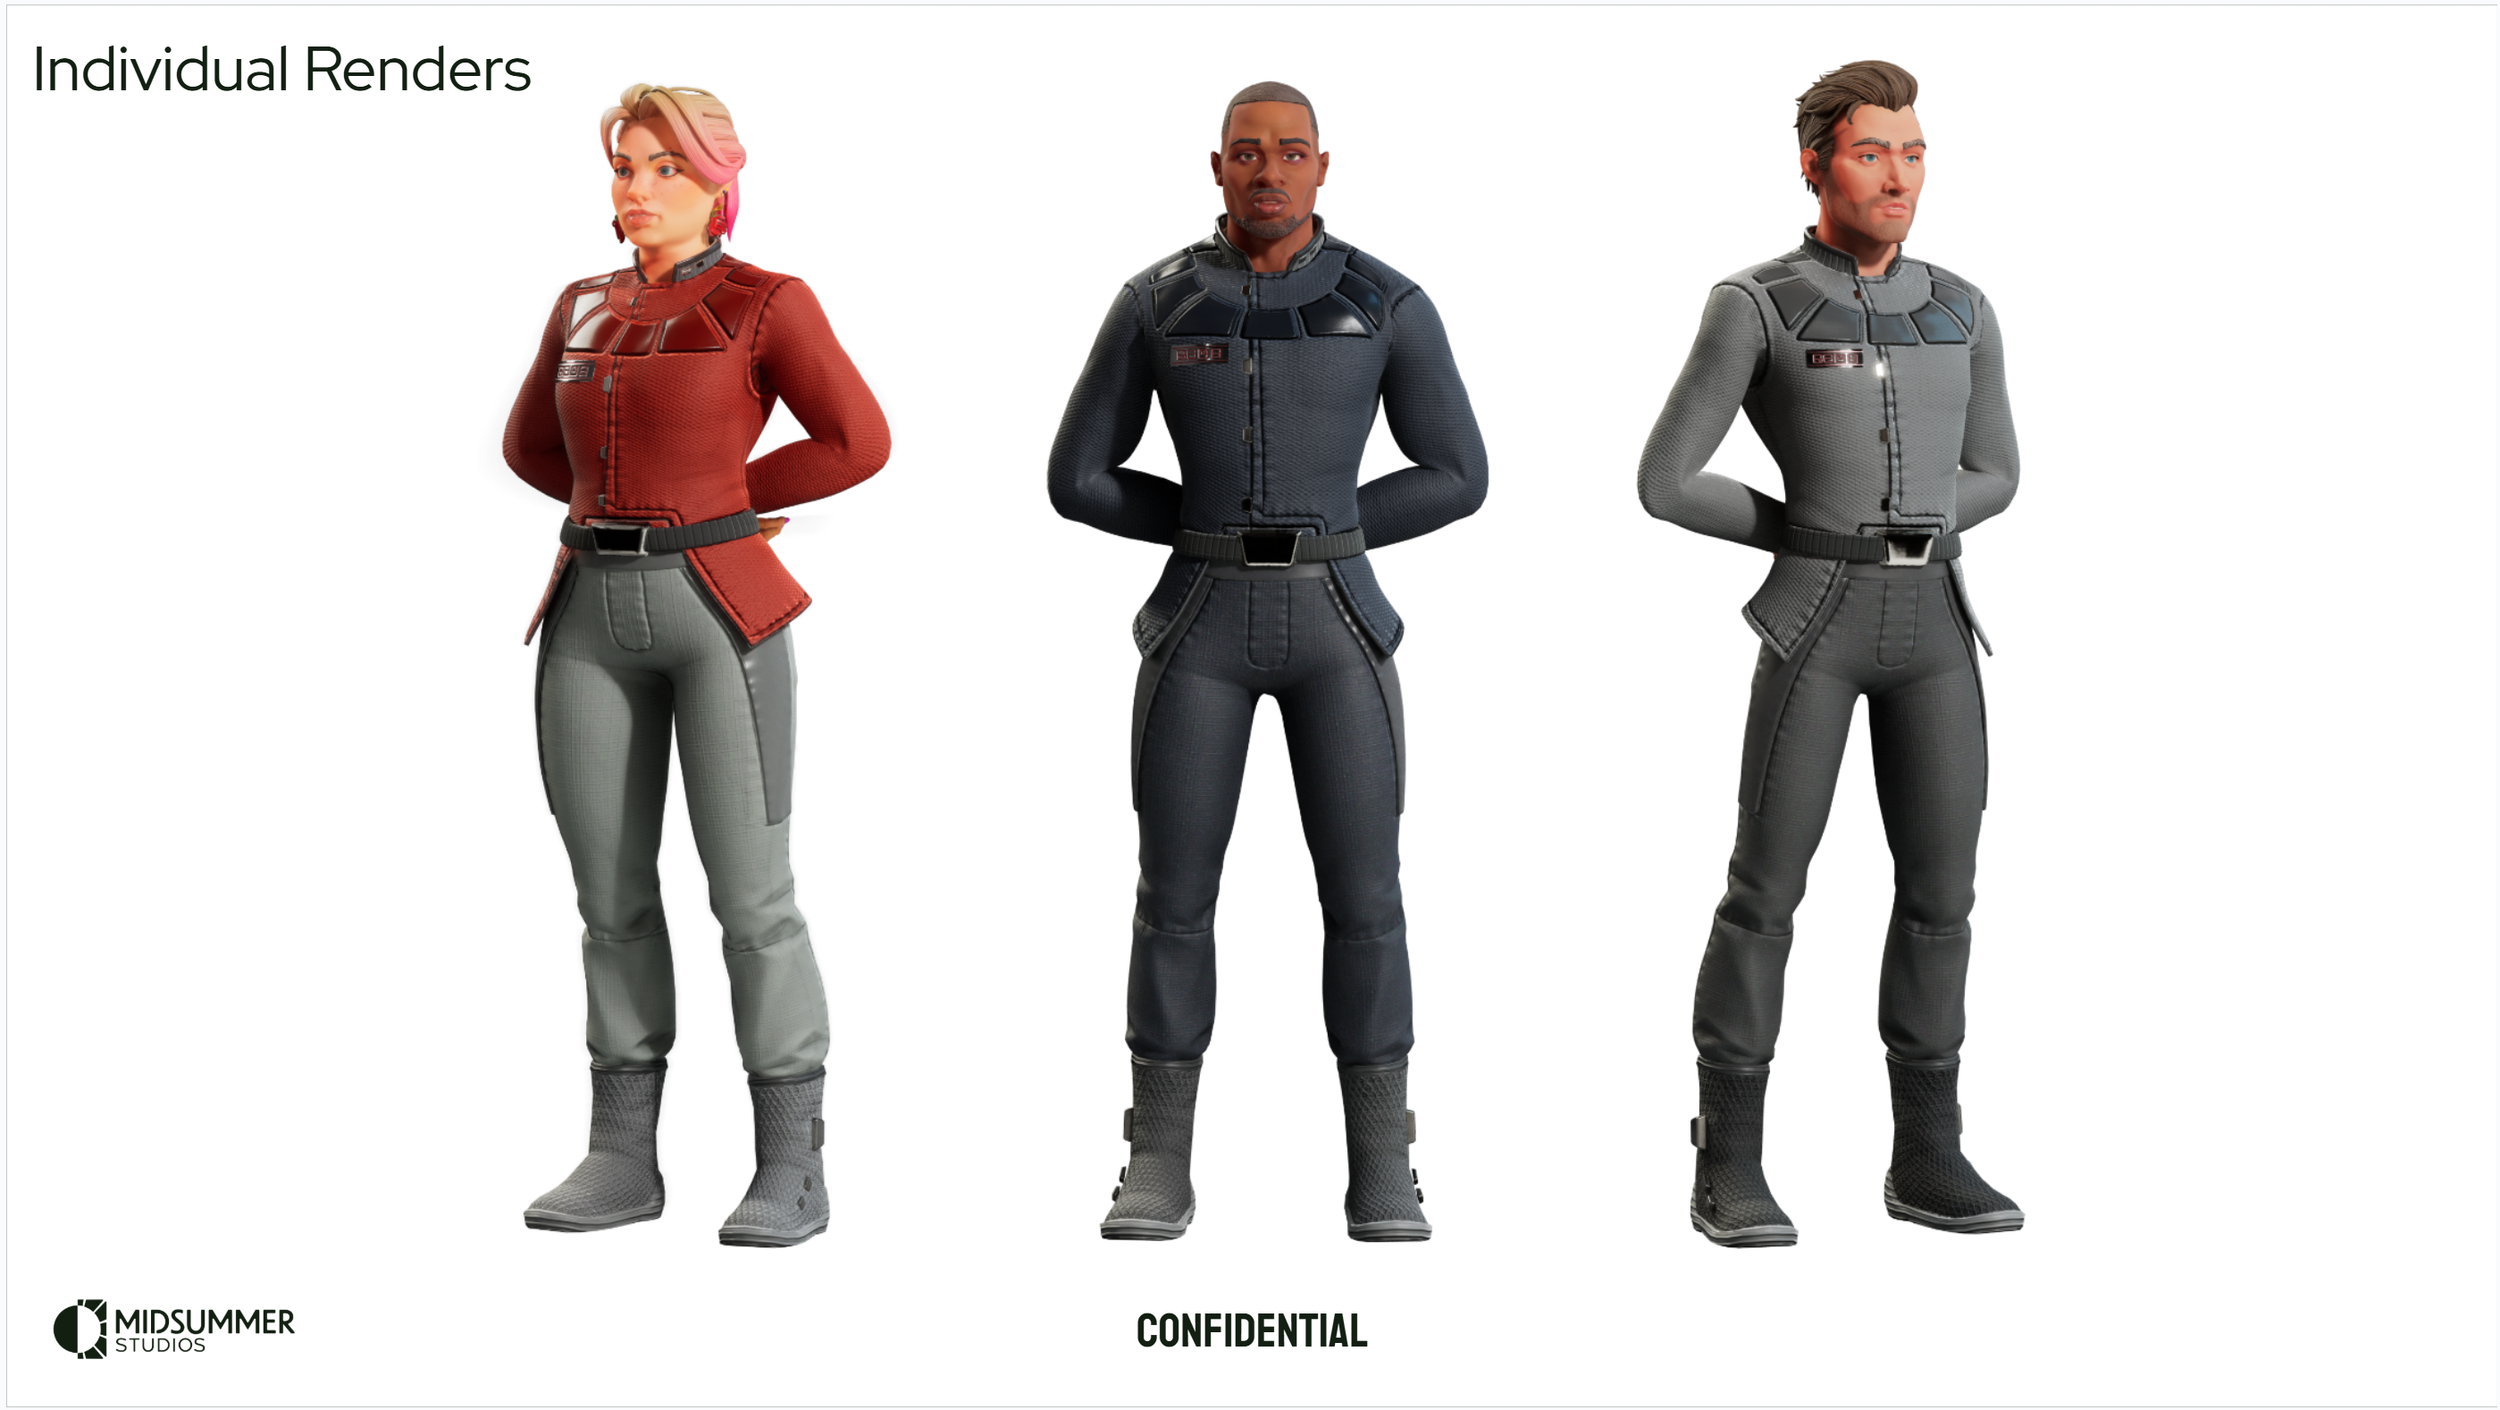
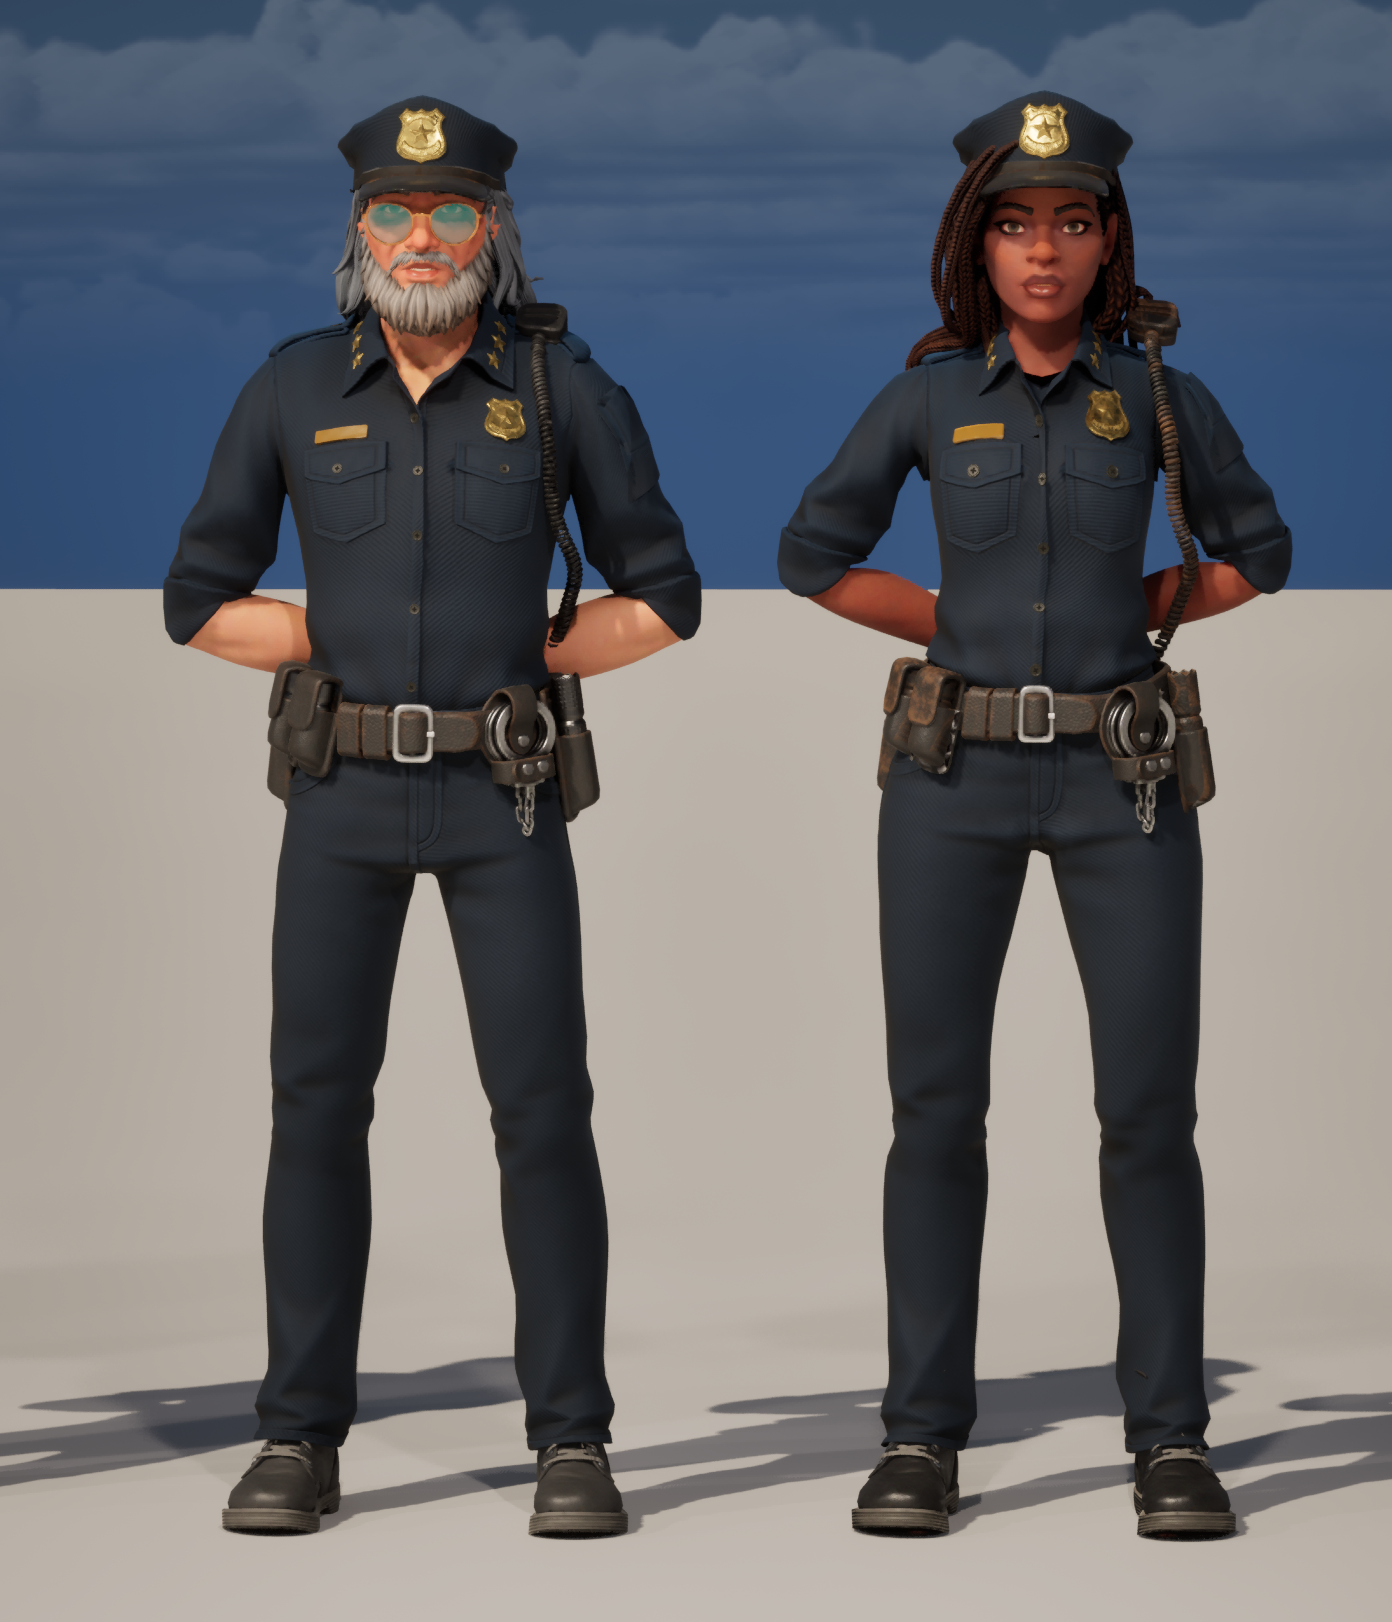
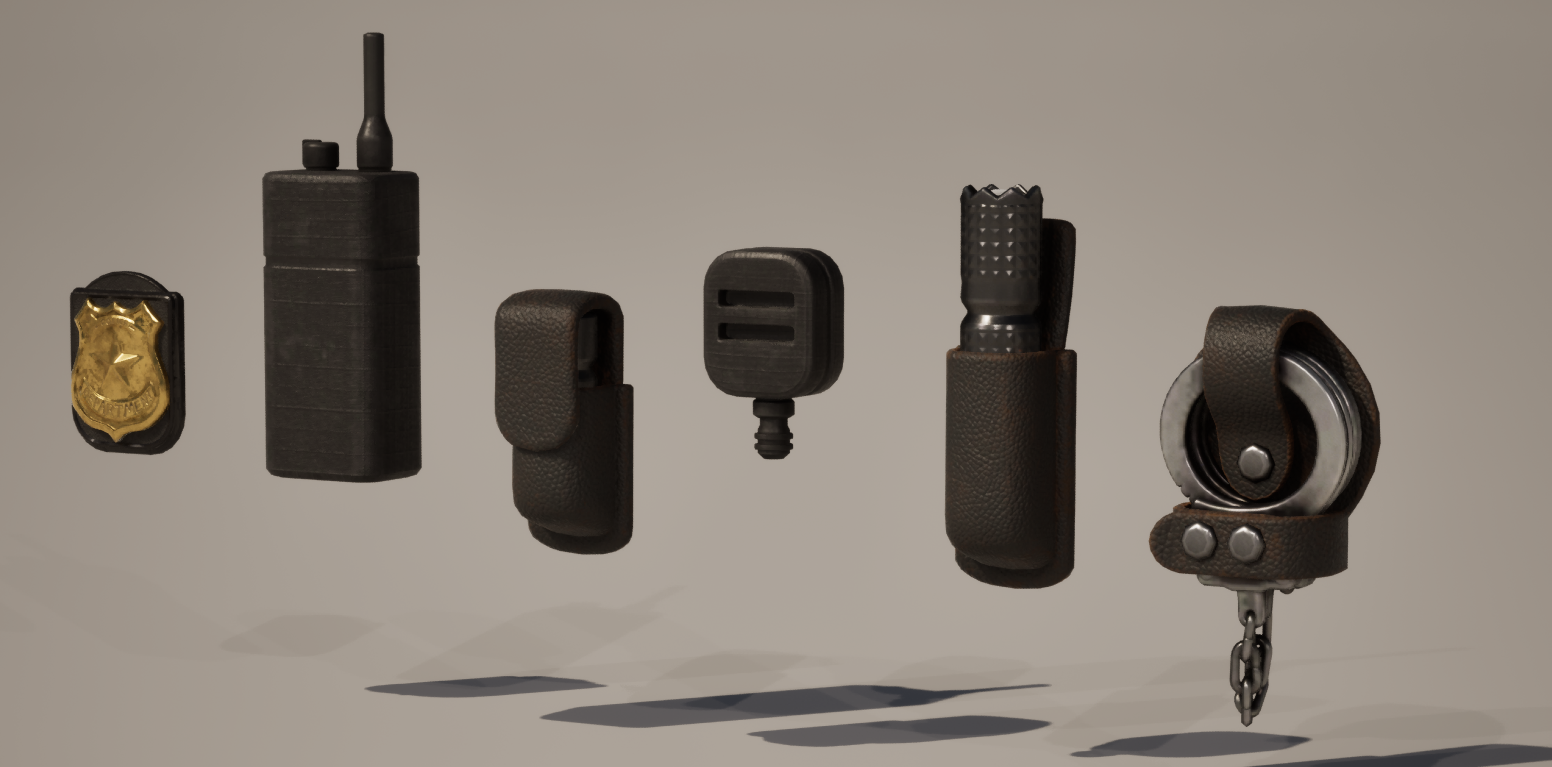
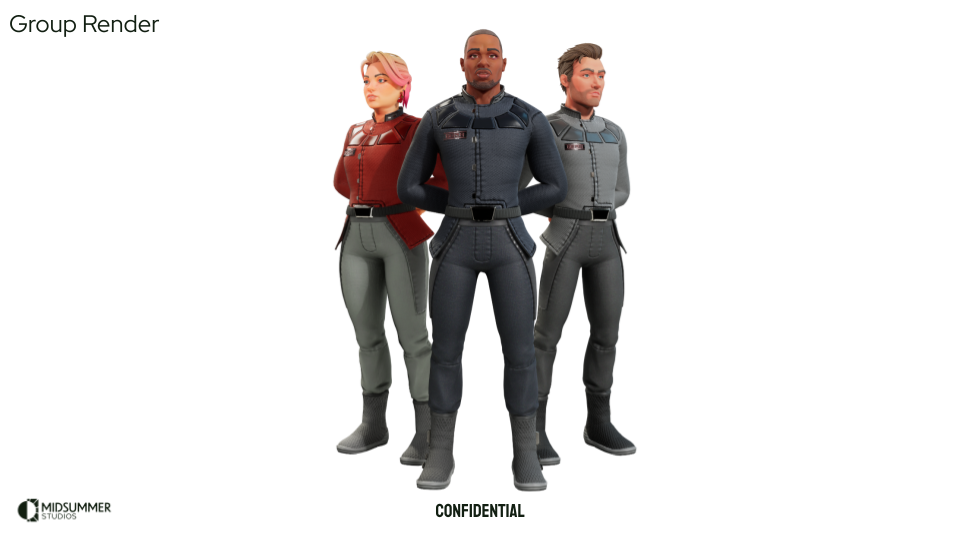
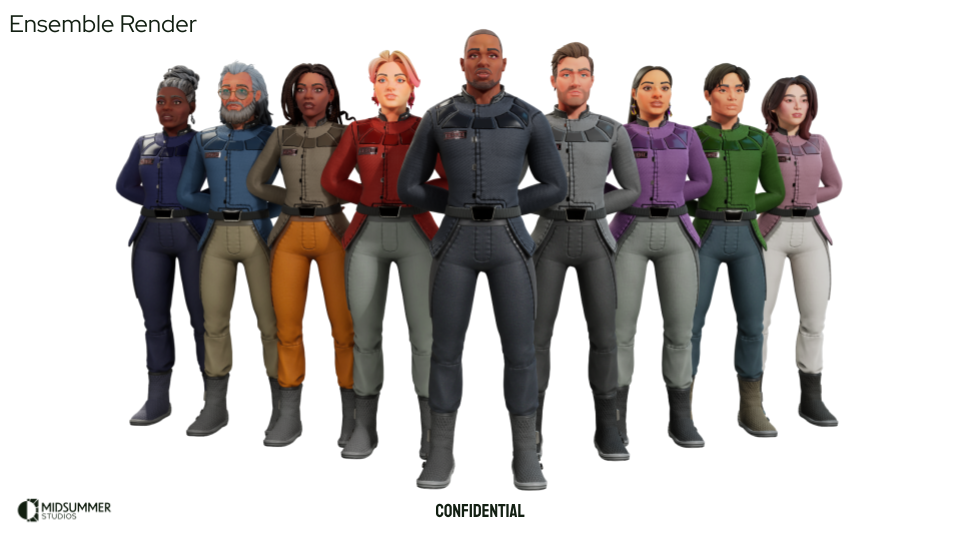
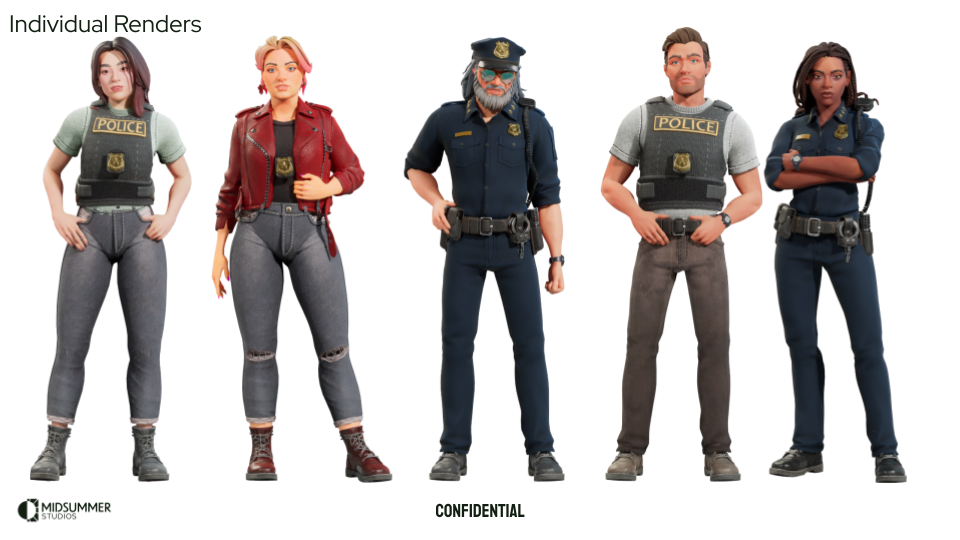
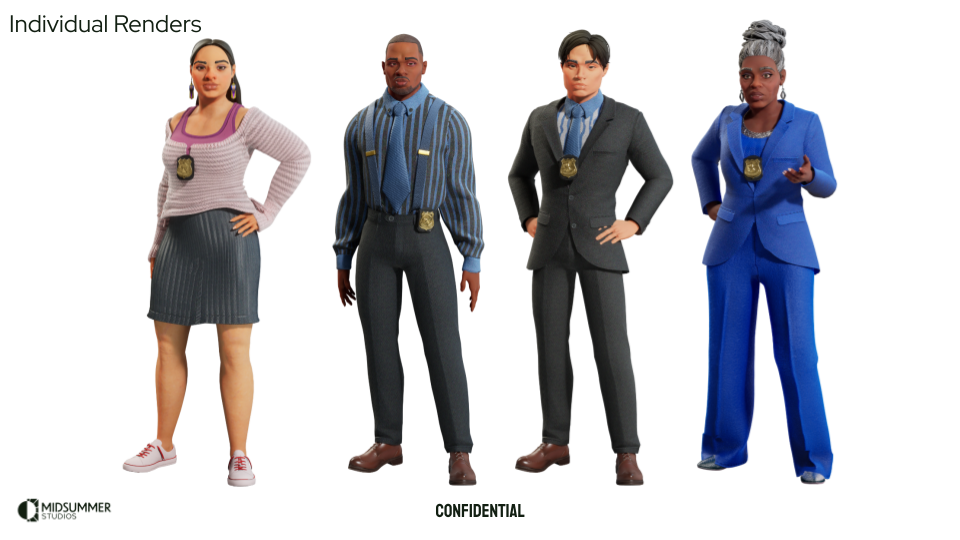
Costume Themes
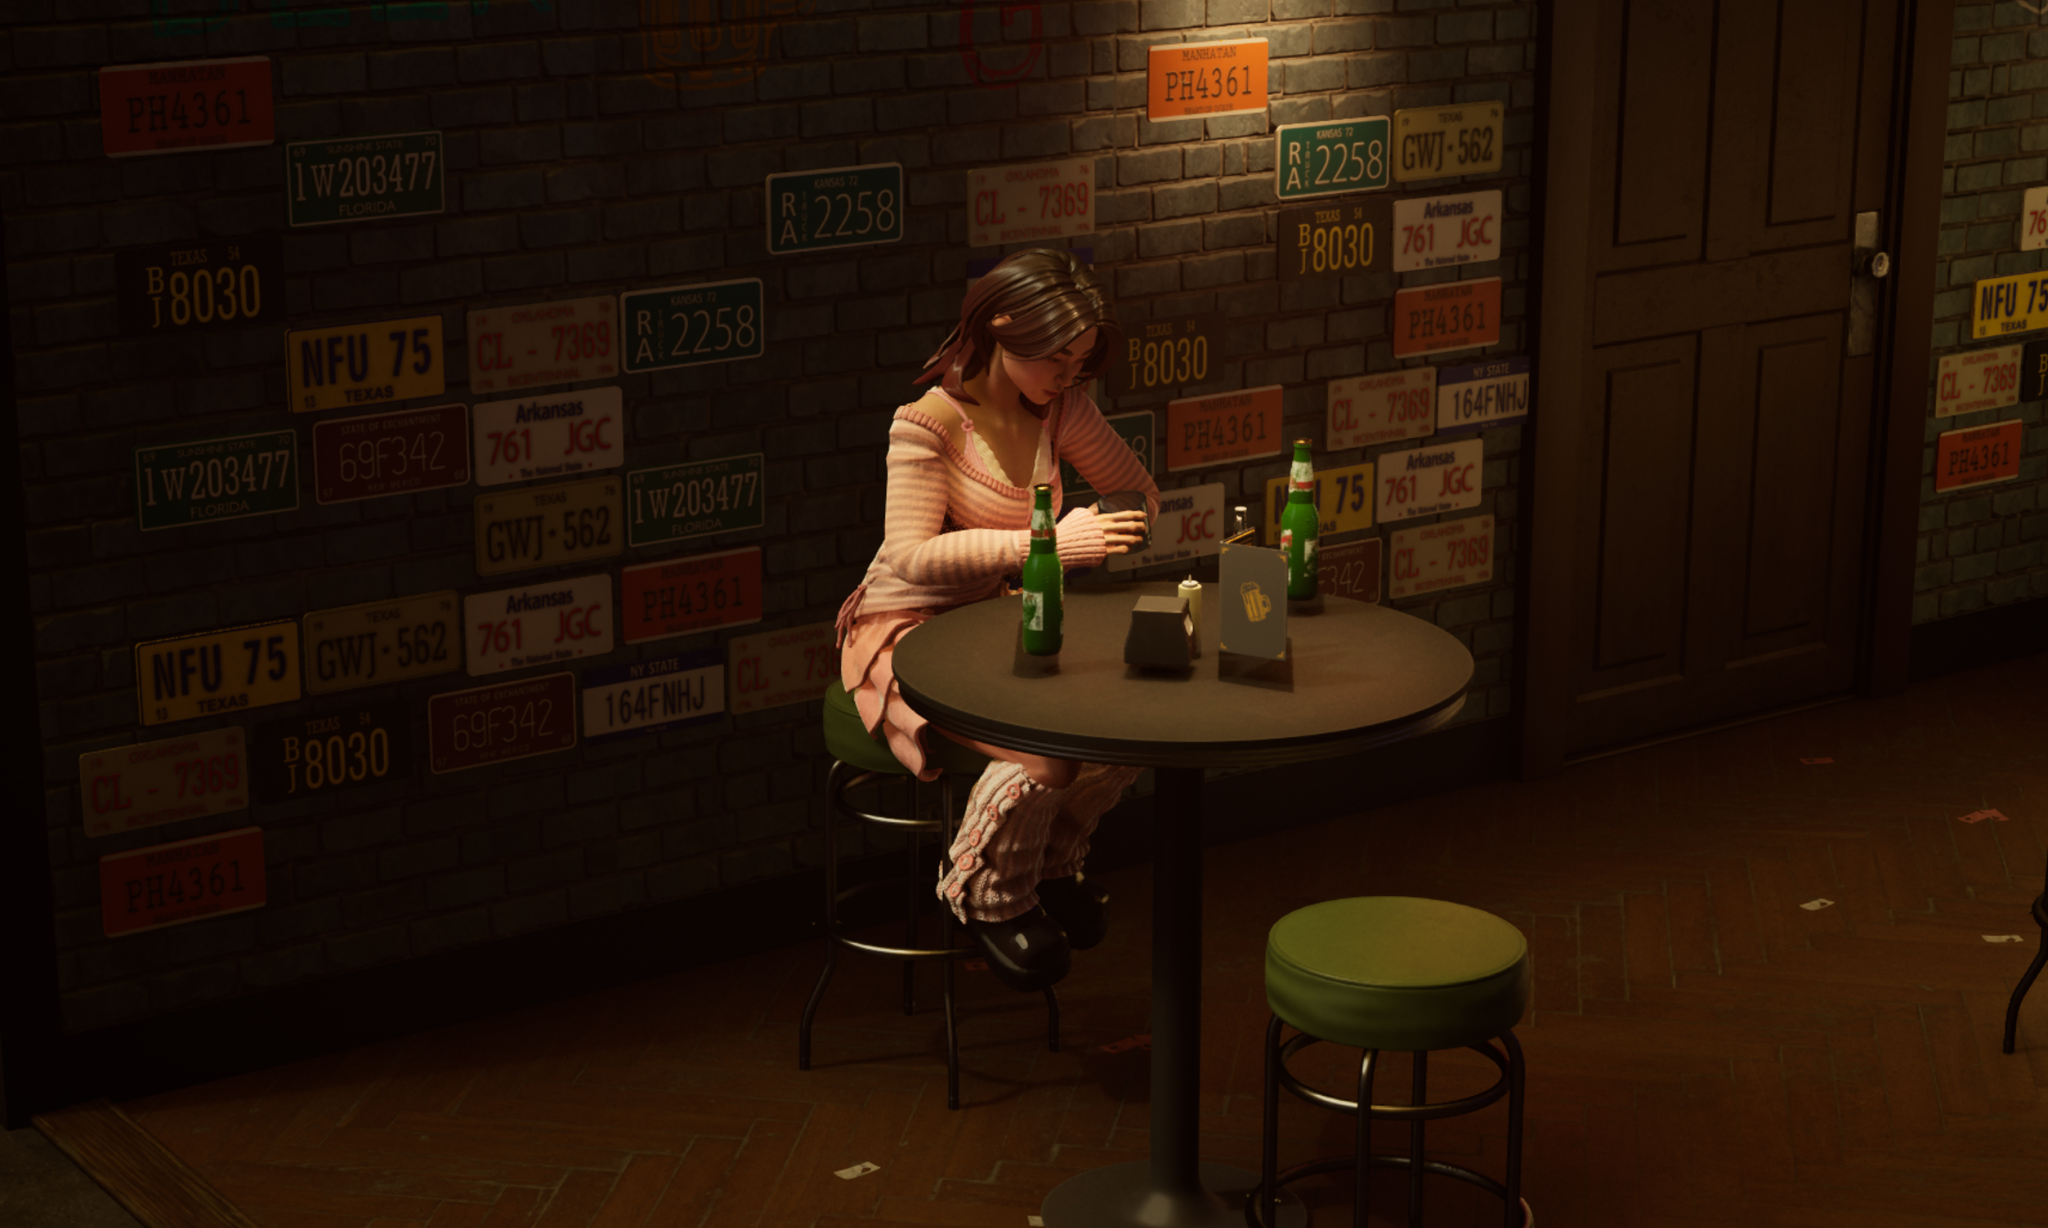
In order to support the next phase of our game, we needed to make a few themed sets of outfits. An office set, a police set, and a space-themed set. We treated our characters as if they were actors playing out parts in different series, which kept things fresh and fun after seeing them in one set of clothing for so long. Pipeline wise, we used this as an opportunity to improve our shaders, explore some new asset libraries, kitbash workflows, and test out some ideas we had without going right to R and D on our updated character look and customization system. Below are some shots of the development of these sets.


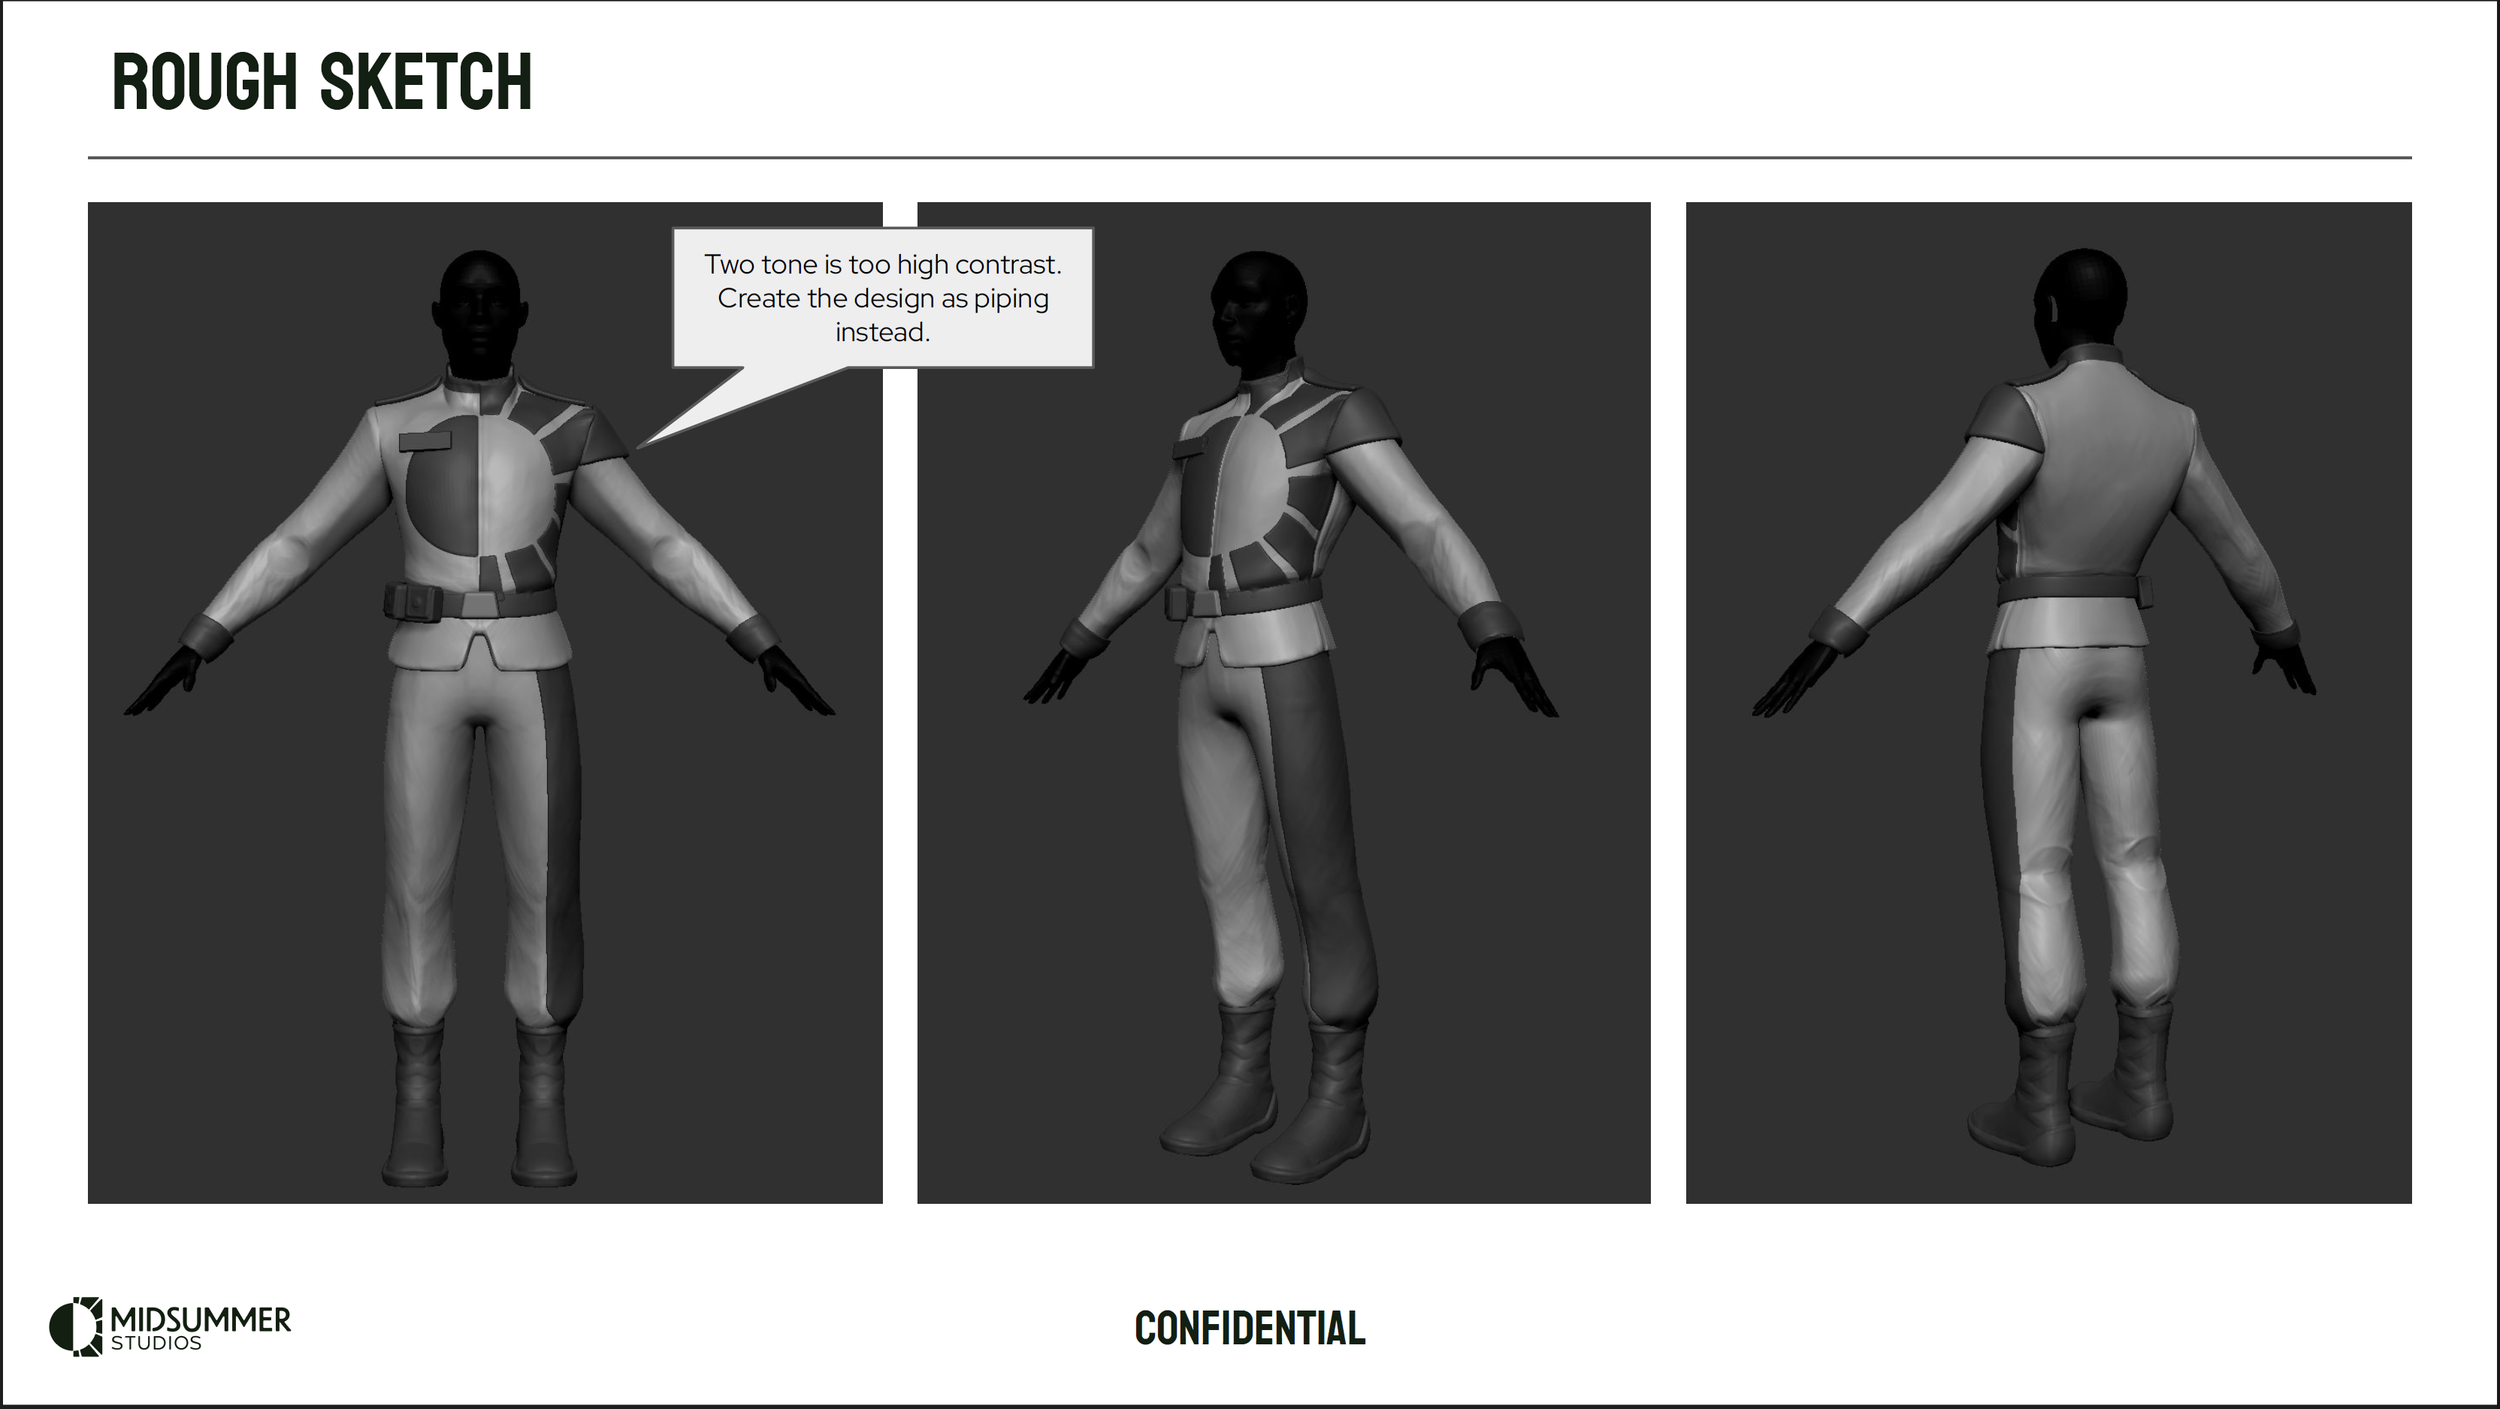
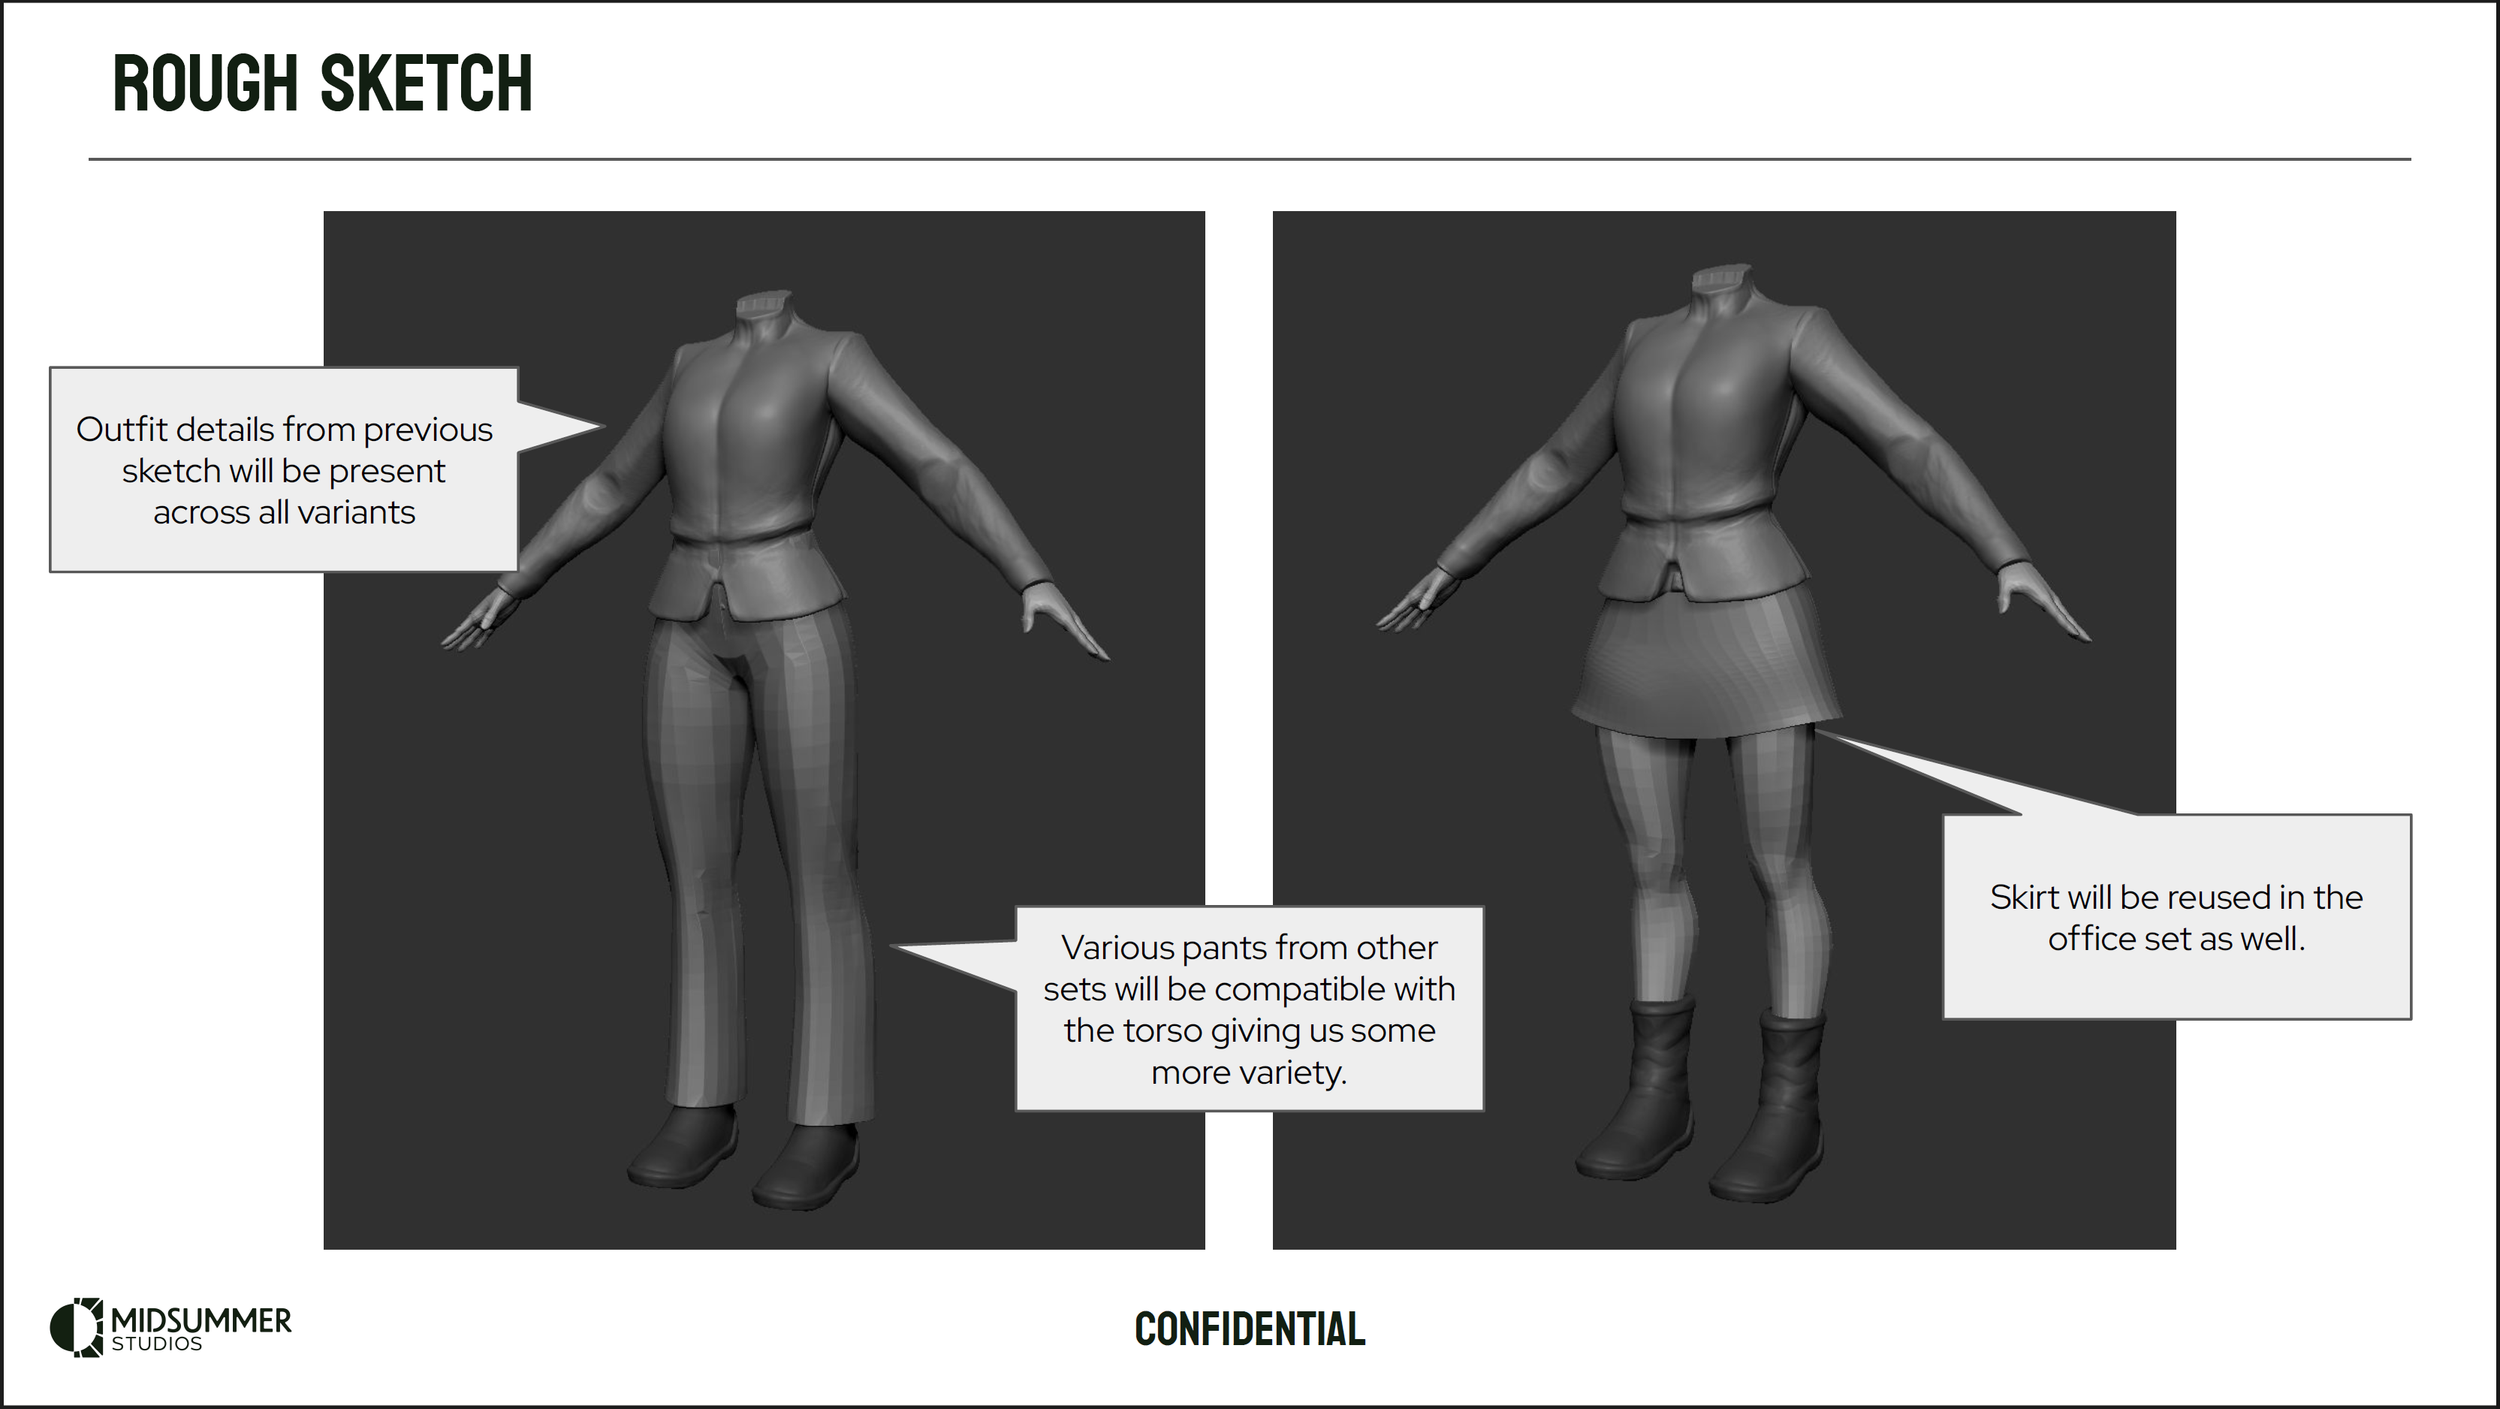
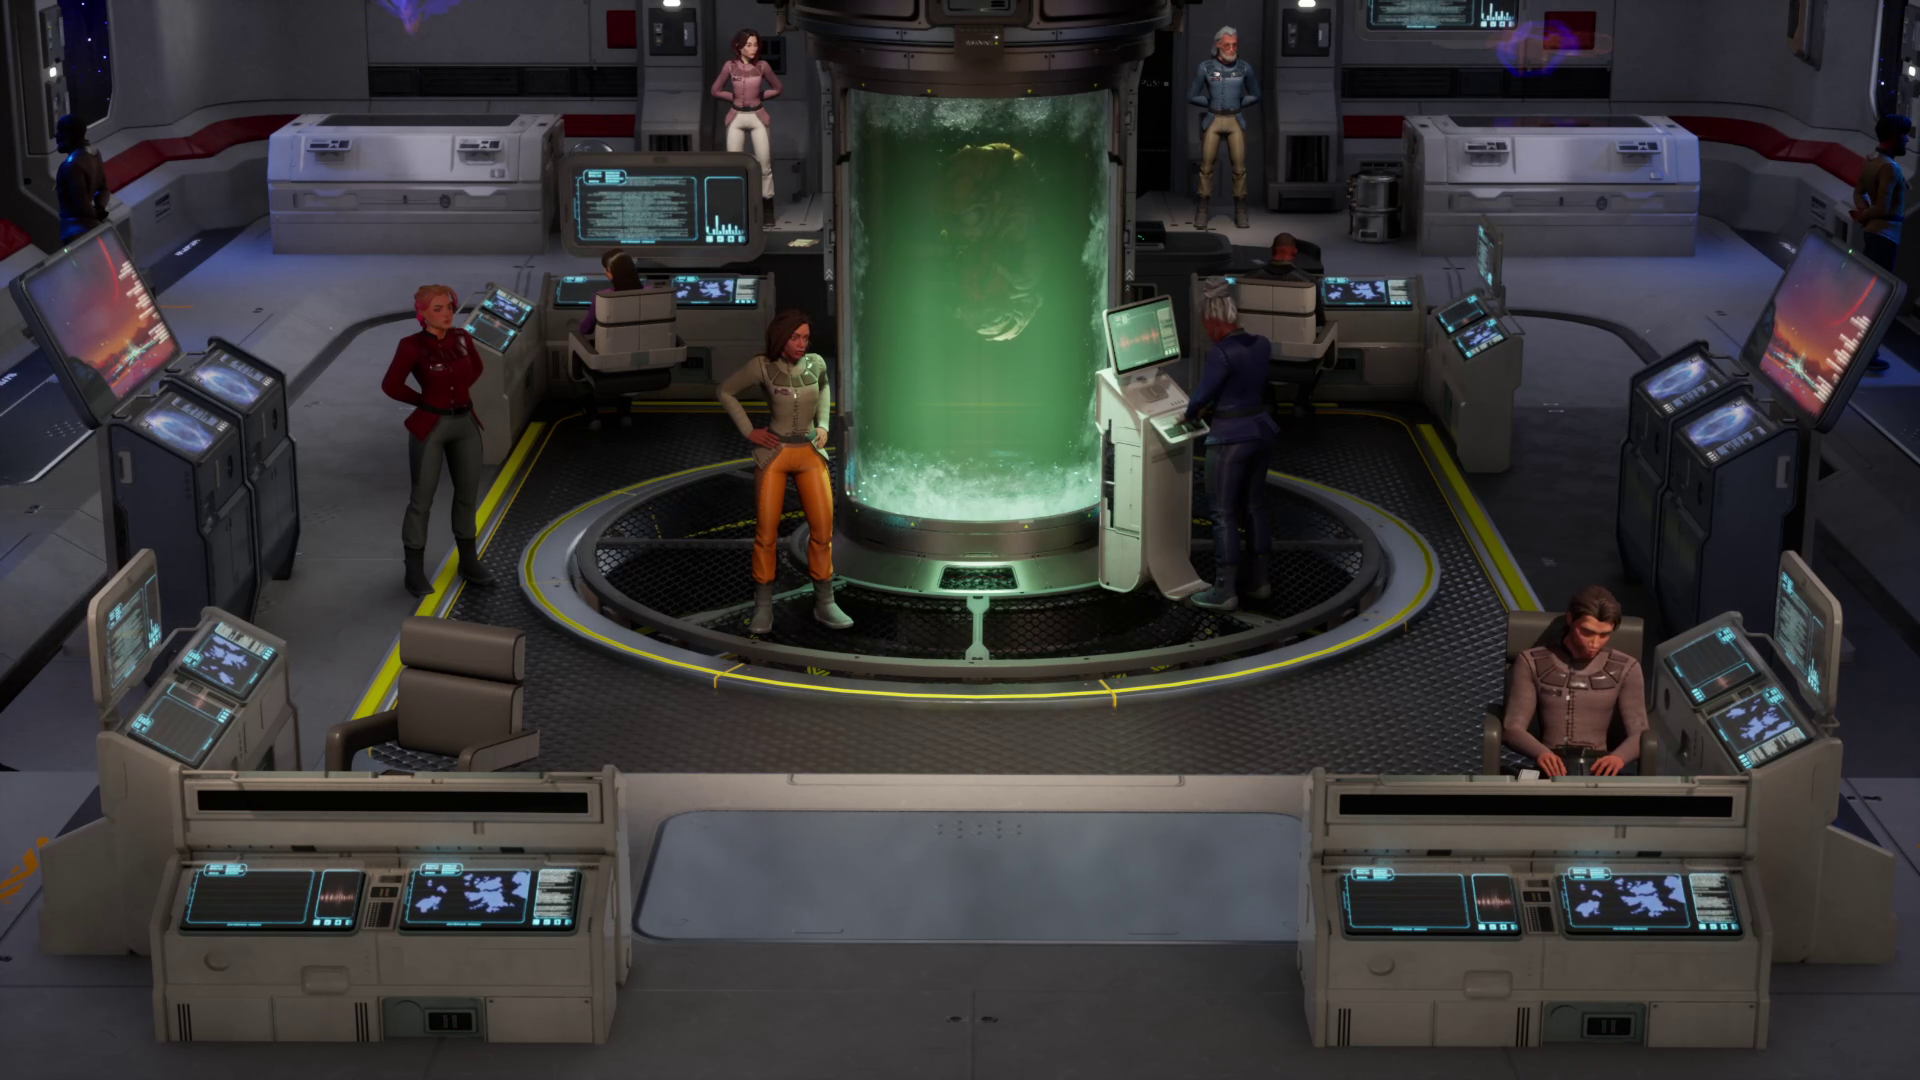
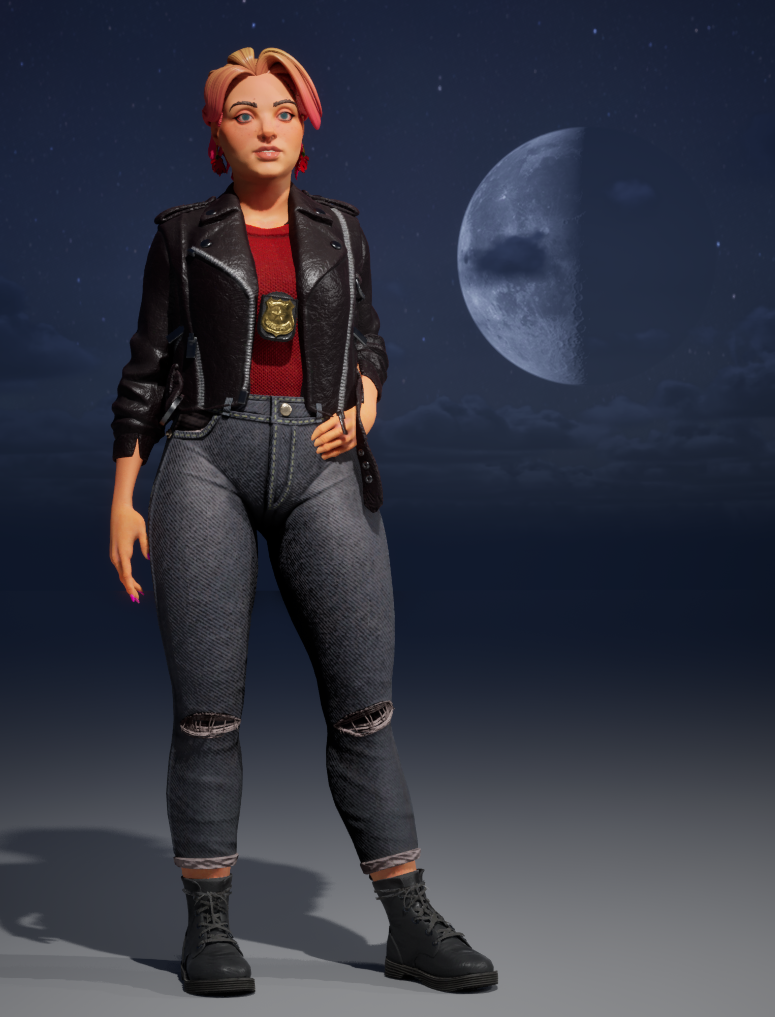
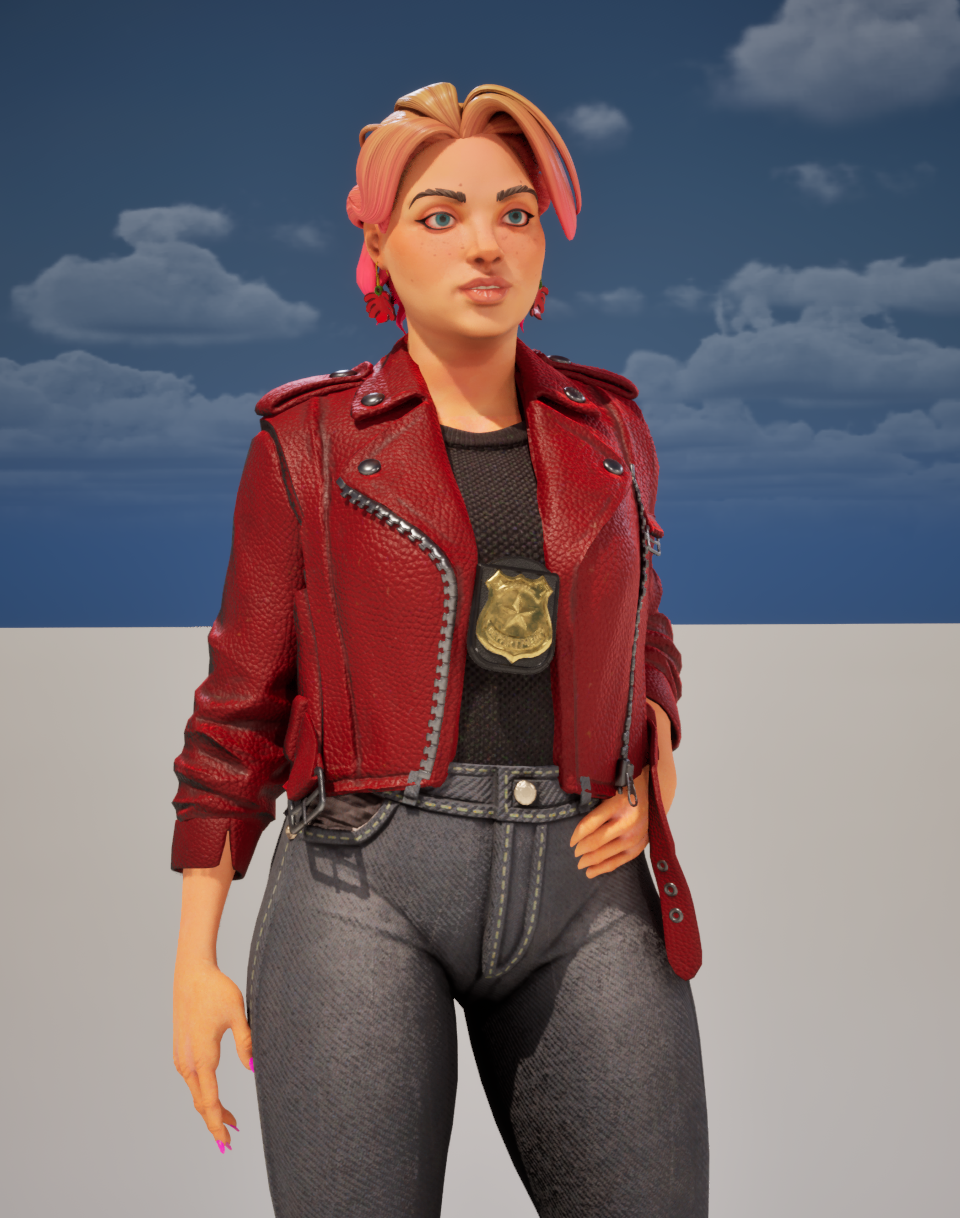
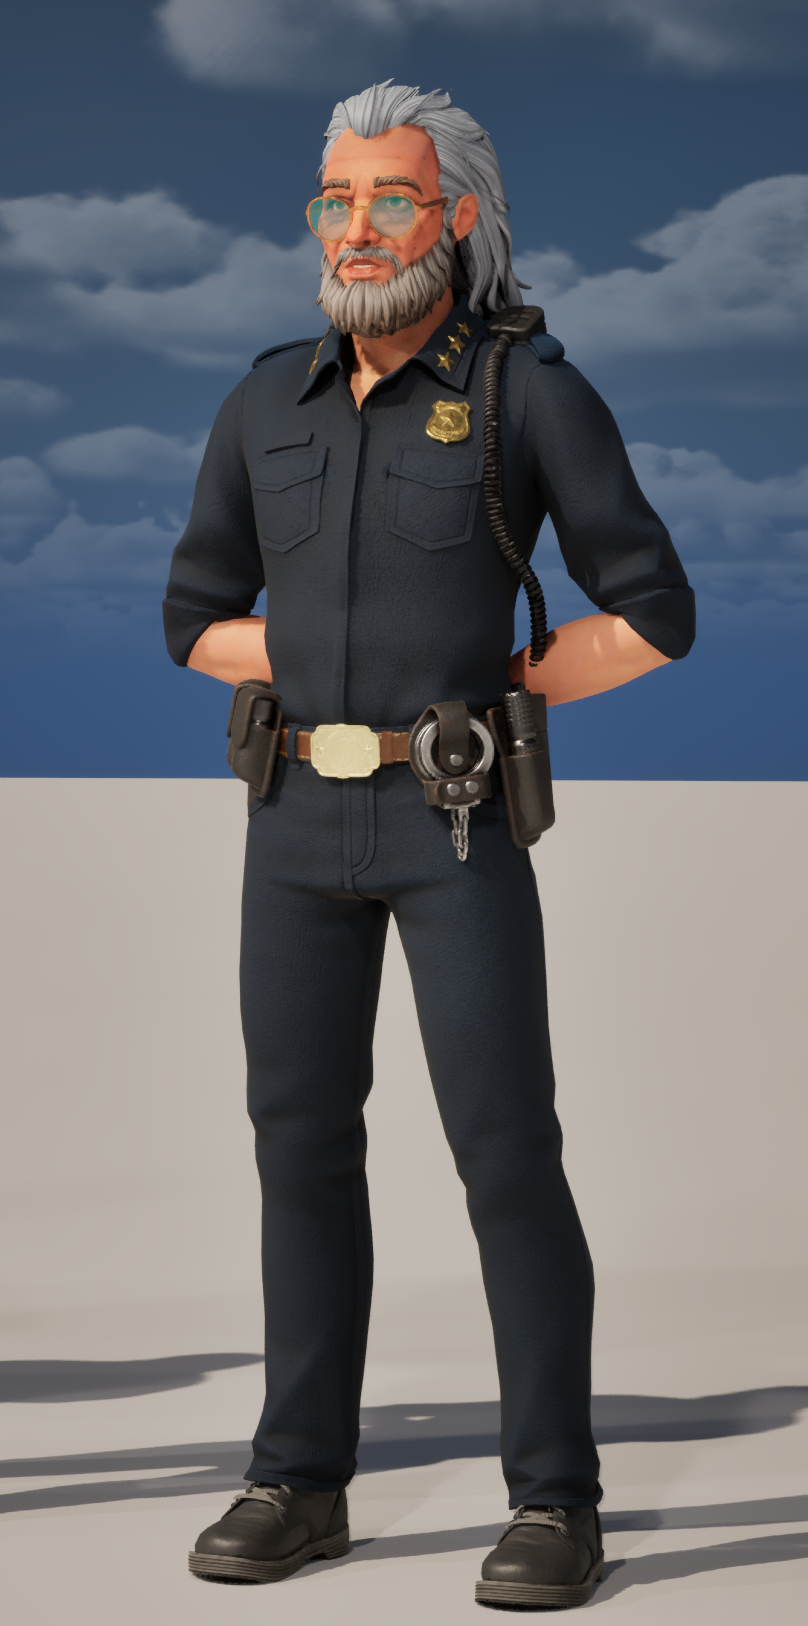

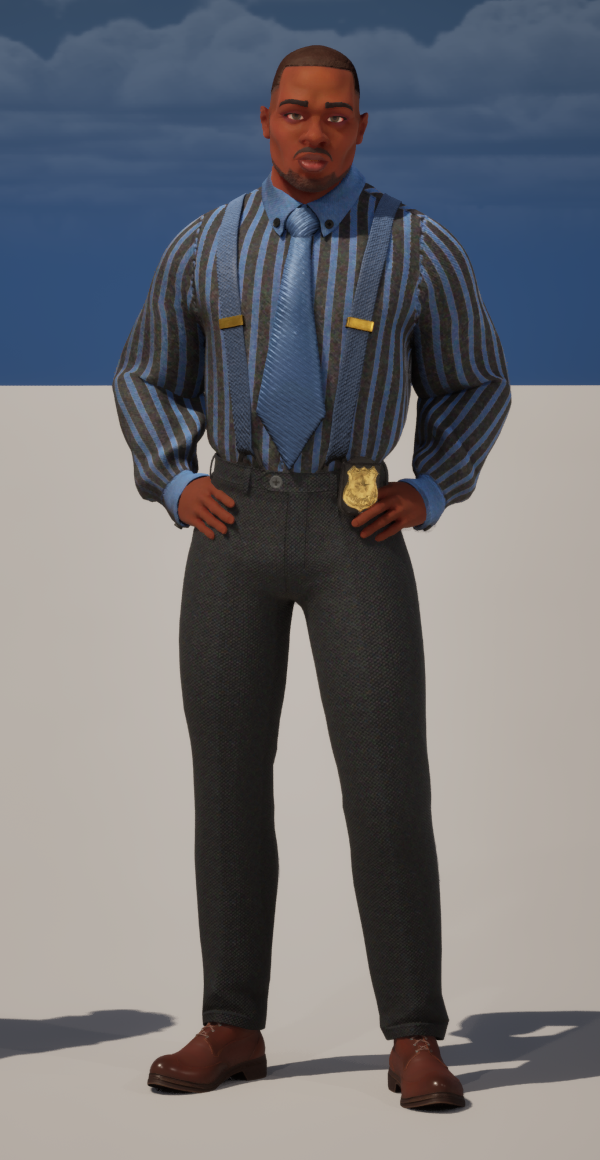


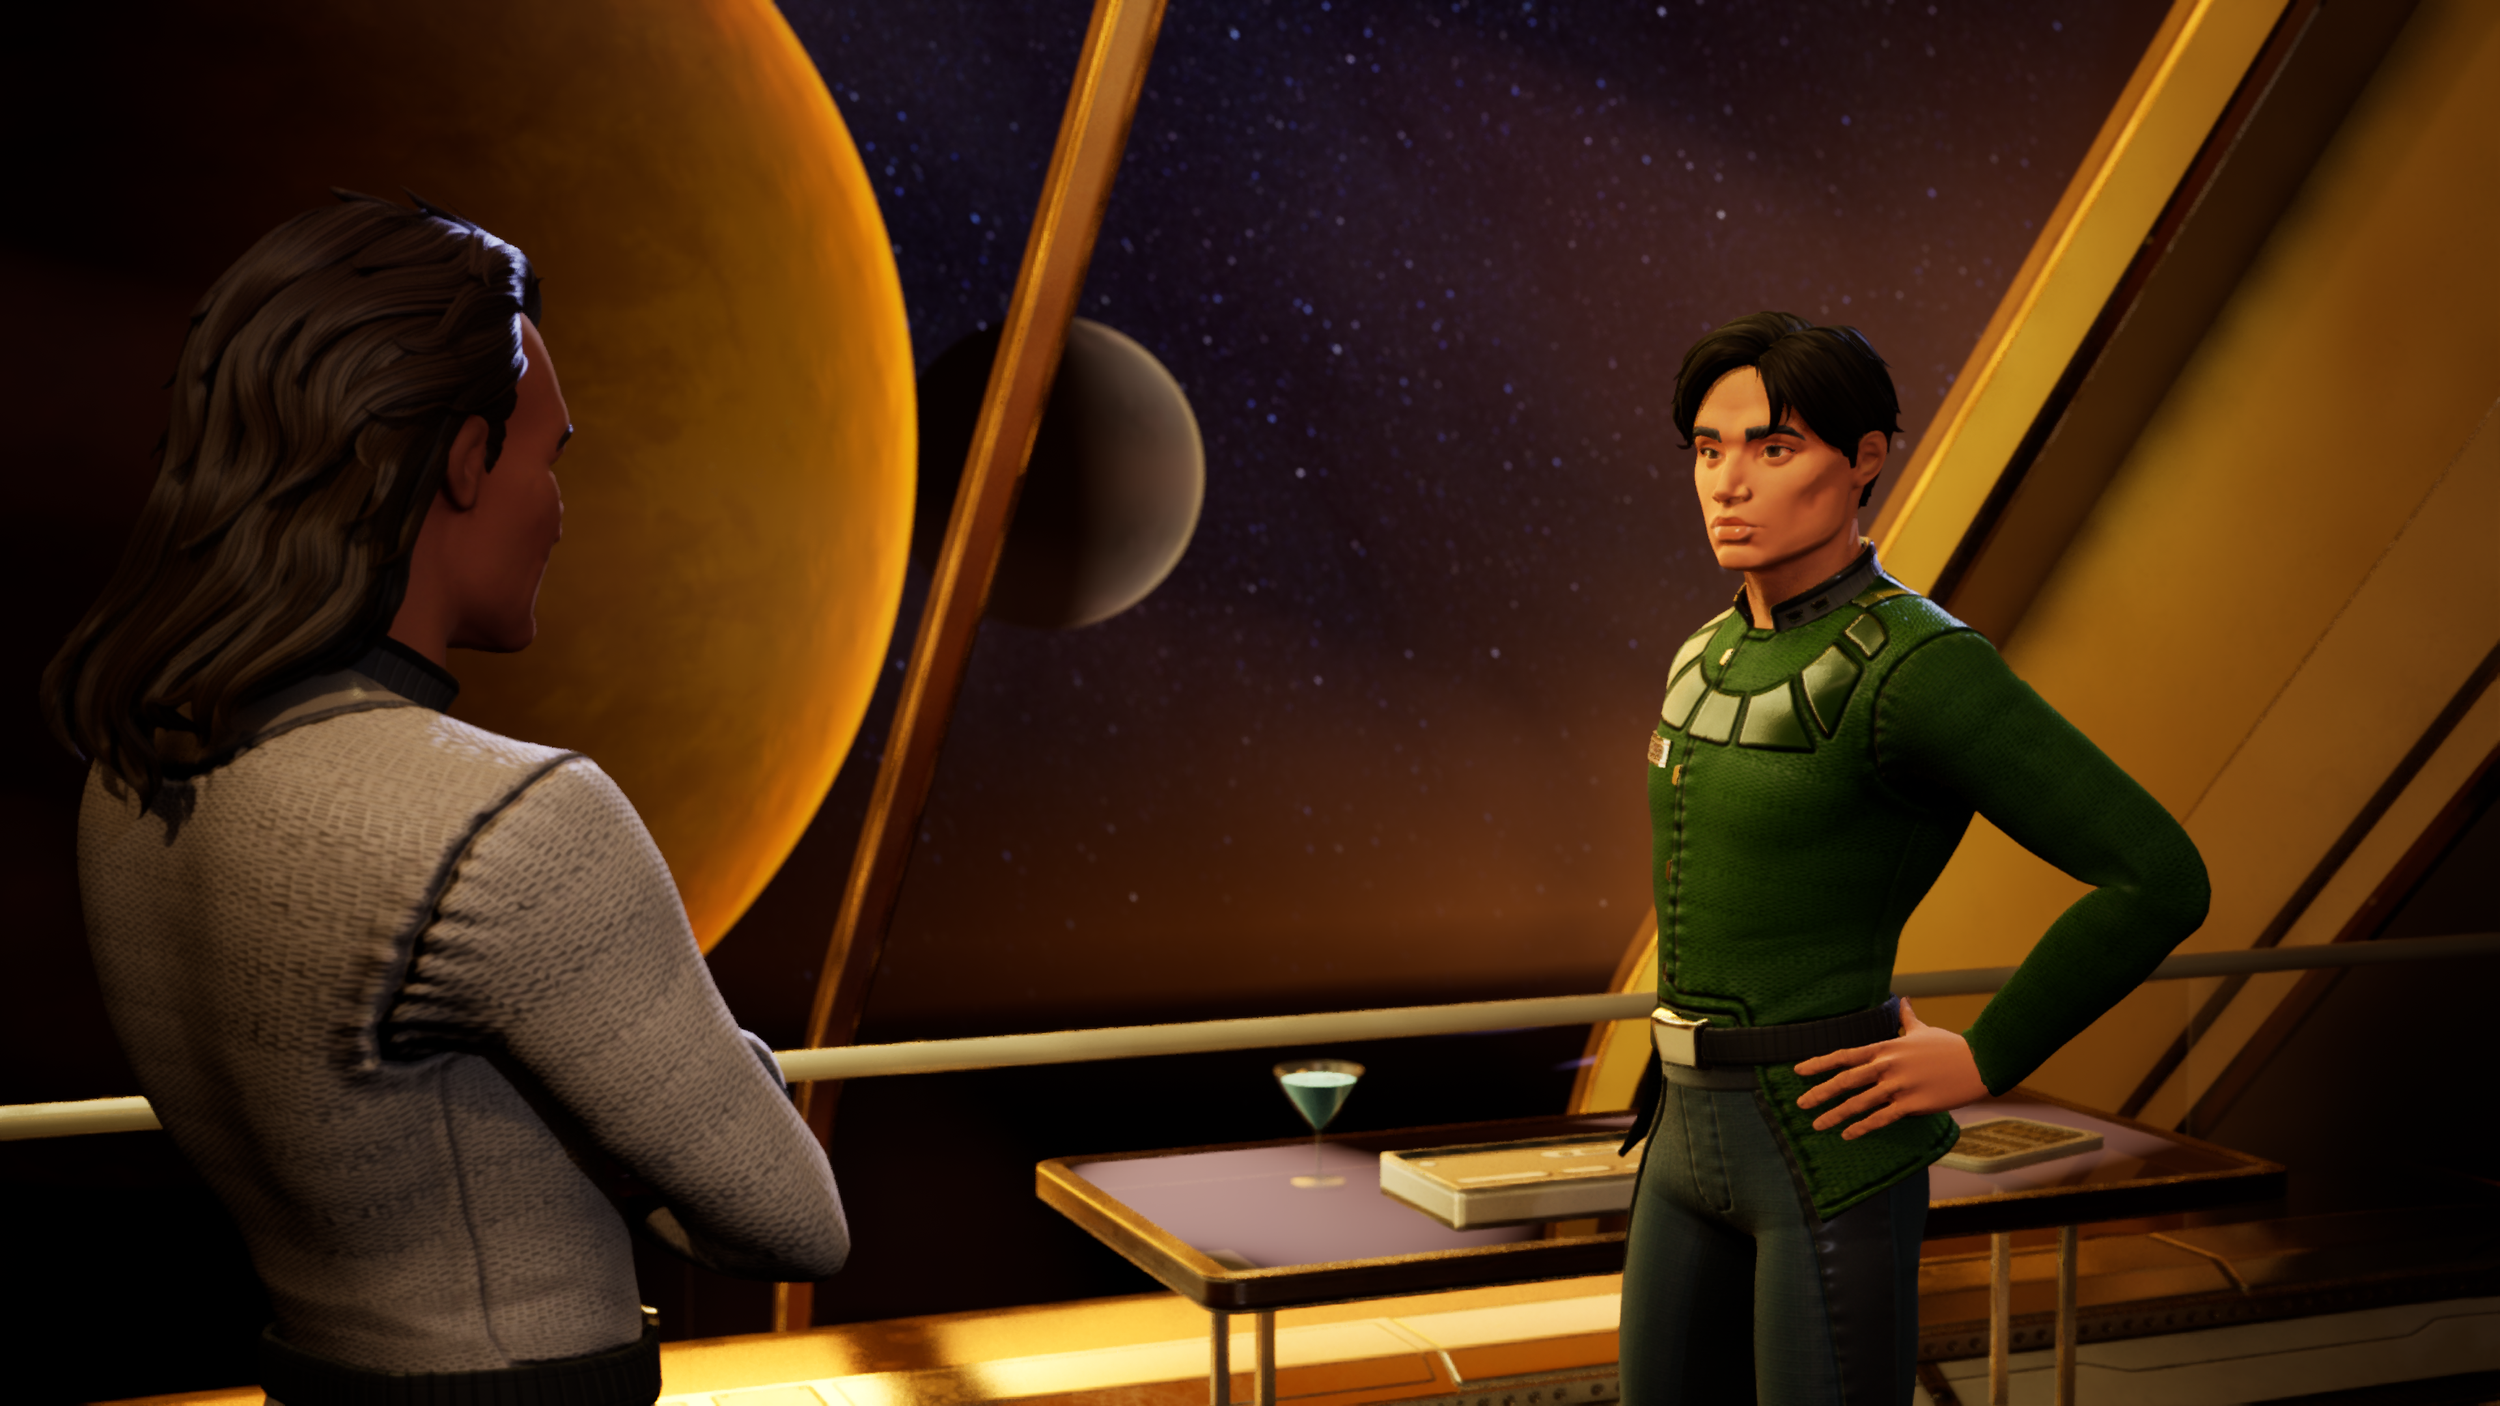
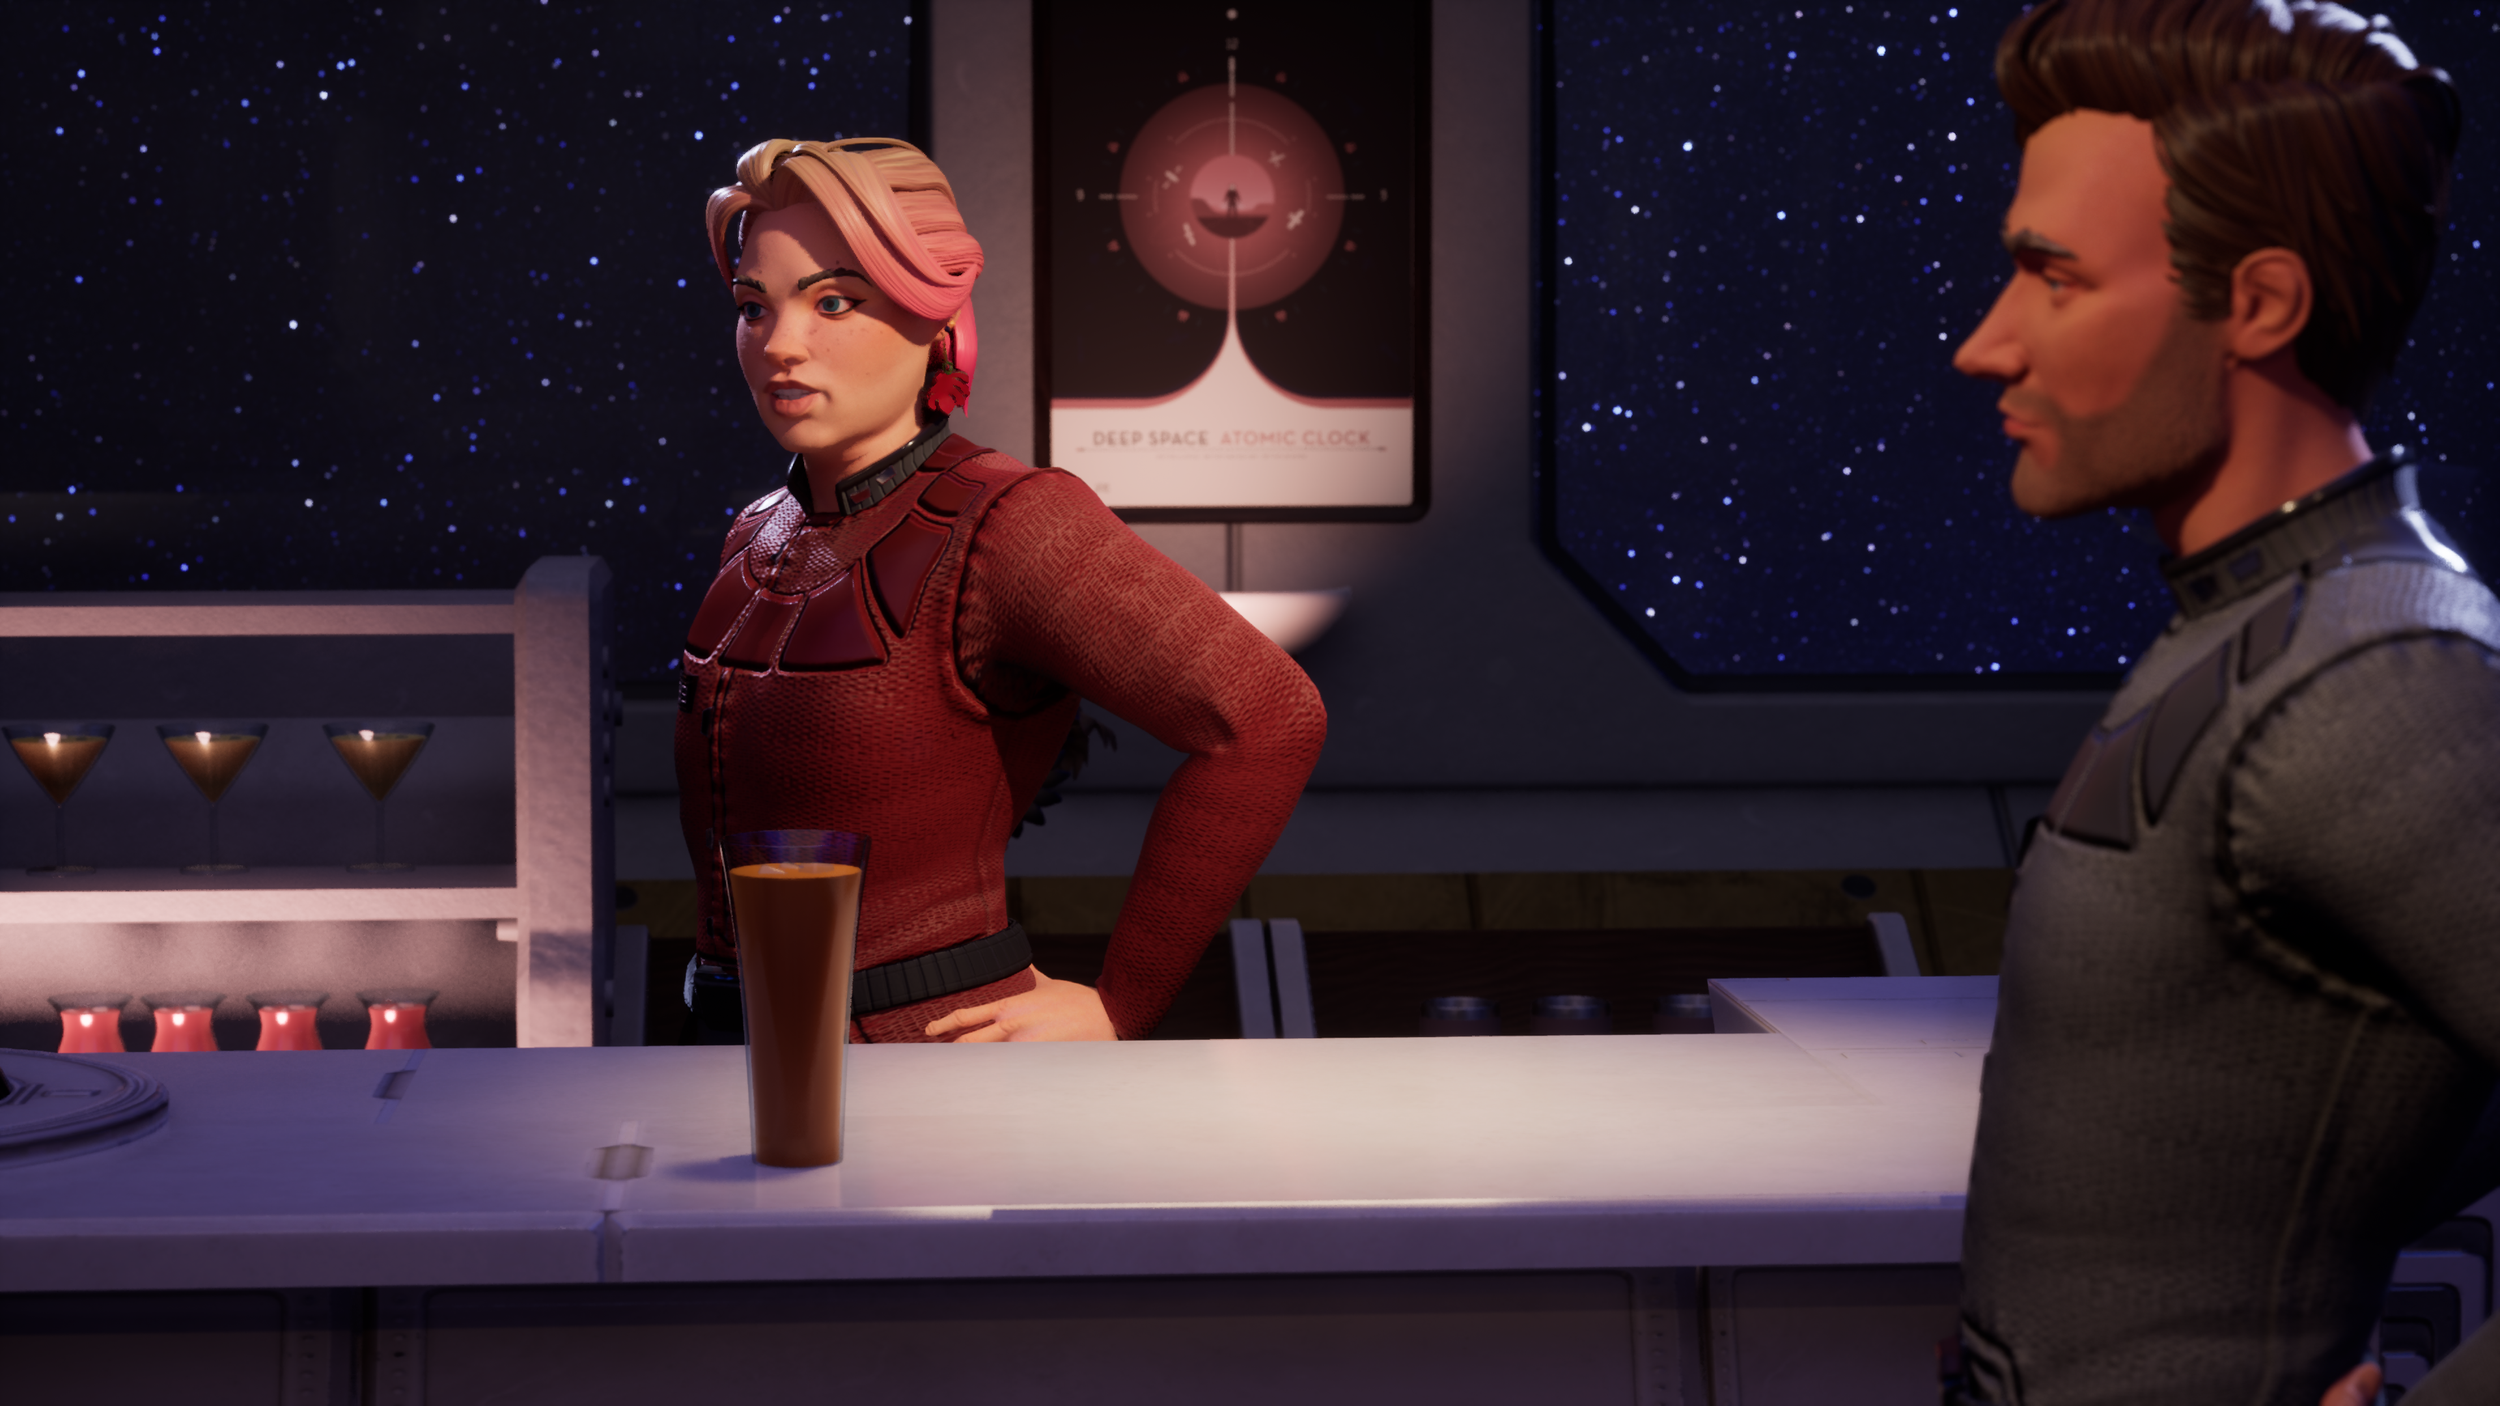
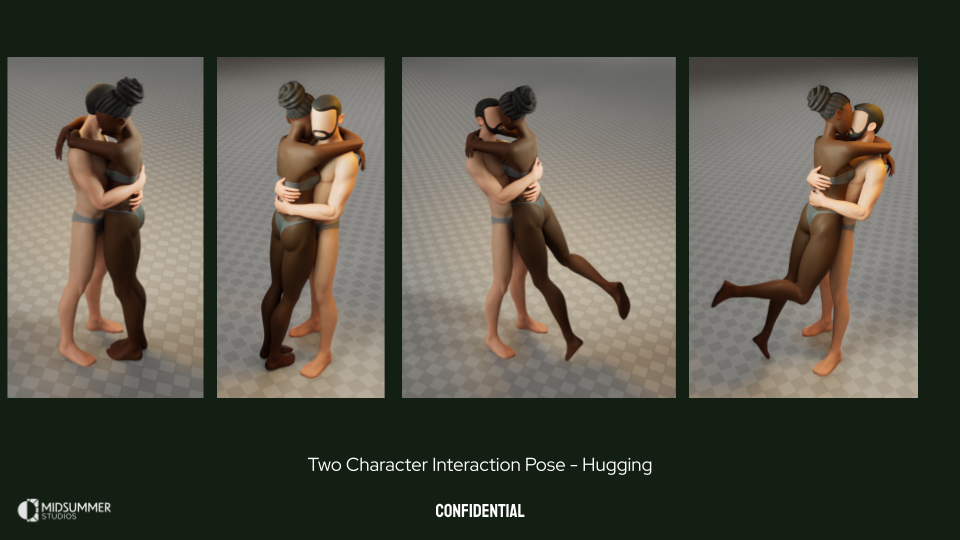
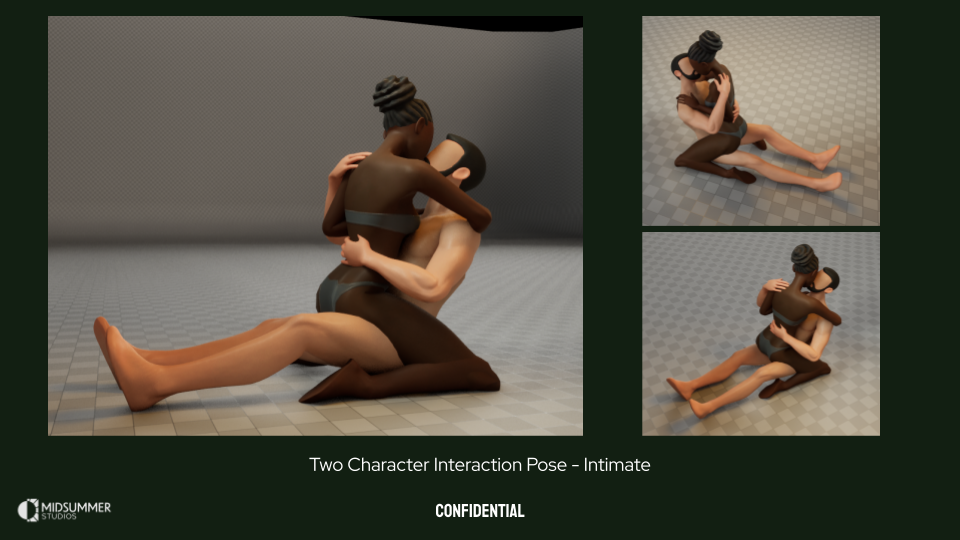
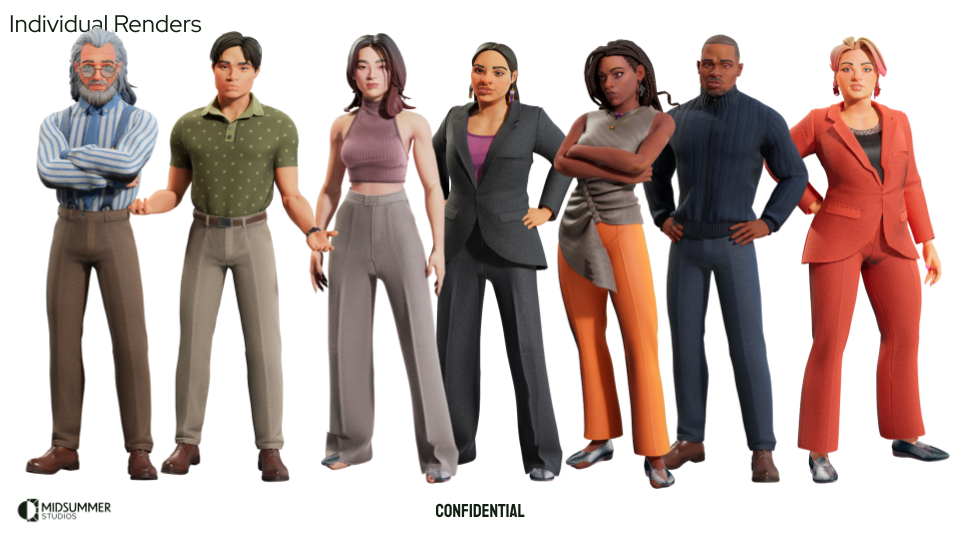
When we start the development of a new set, it starts with a pose. Kevin will make a pose or two and we’ll start developing costumes to that pose. I really like developing characters with this workflow because it starts with the vibe of the character and keeps it at the forefront throughout the whole development. Paired with a consistent camera in a level sequence, it also gives you a good template for A/B comparisons to see how changes and updates to the character change over time. You’ll that idea showcased a lot in this development gallery above.
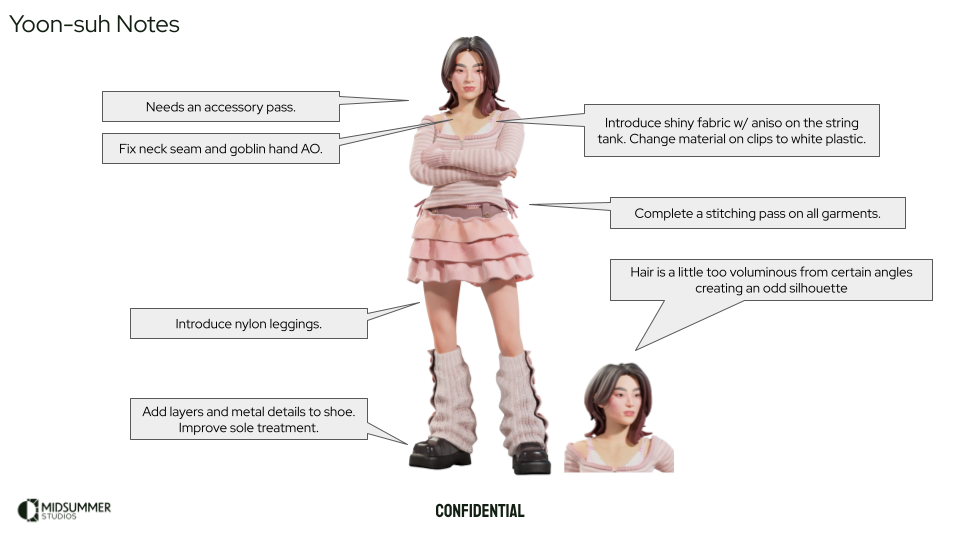
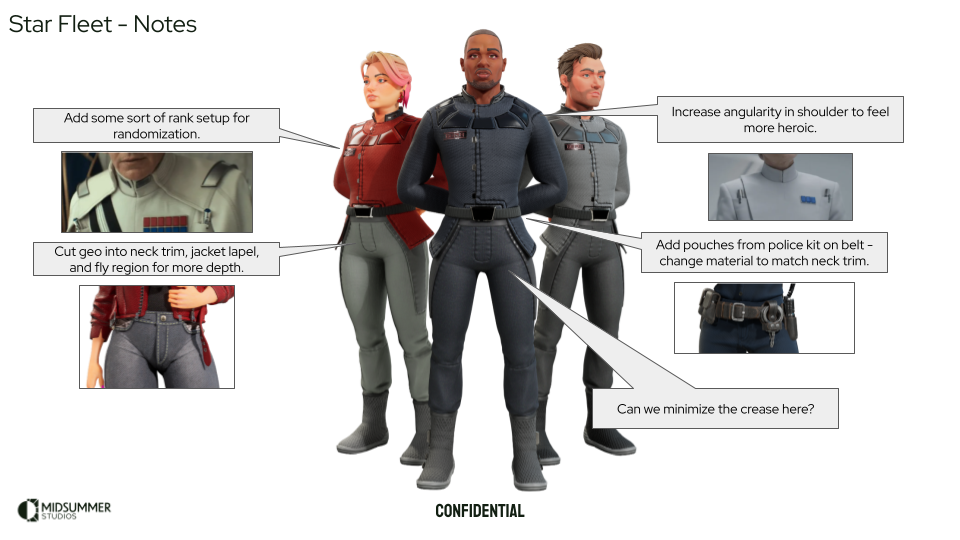
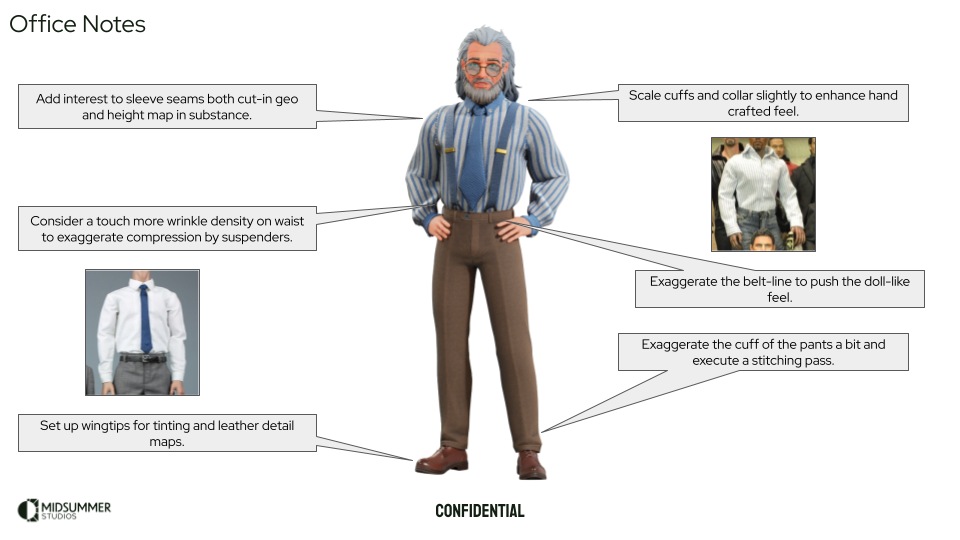
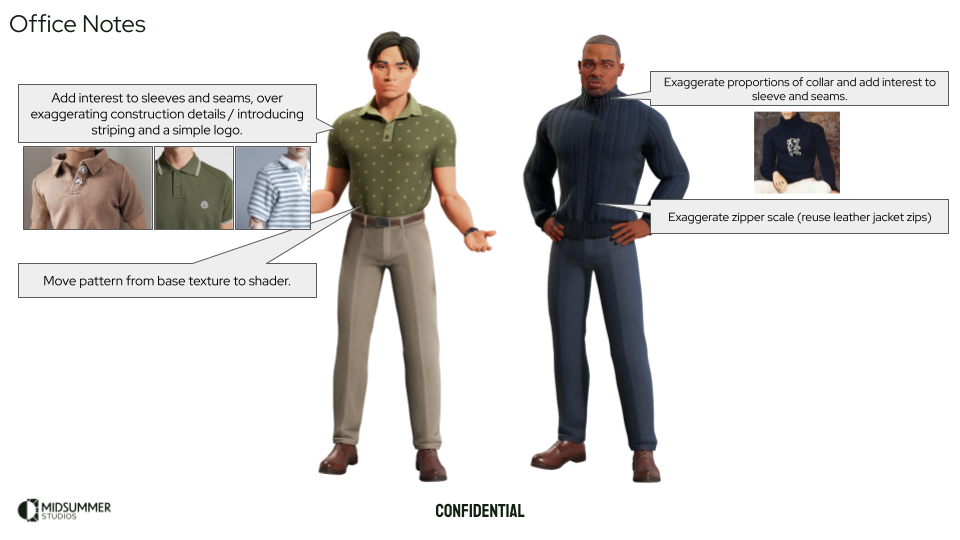
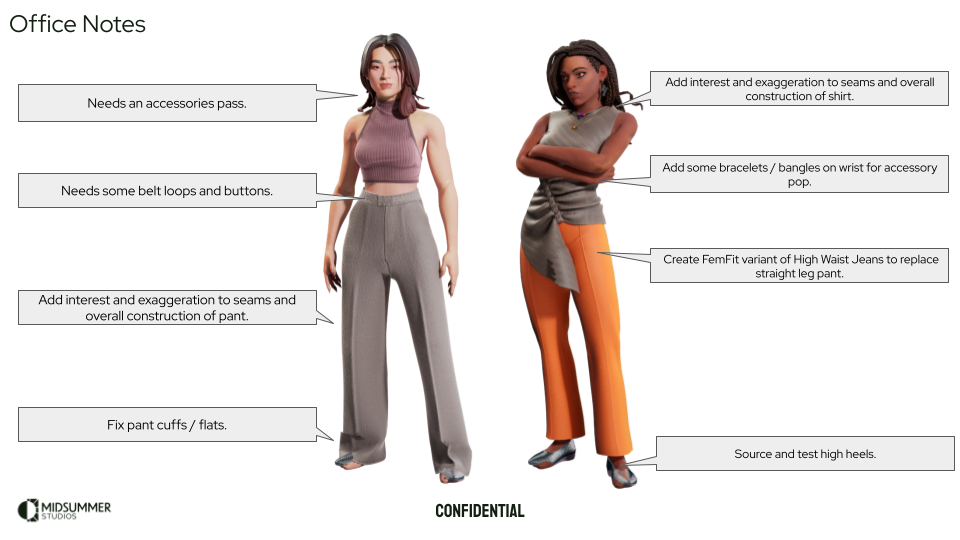
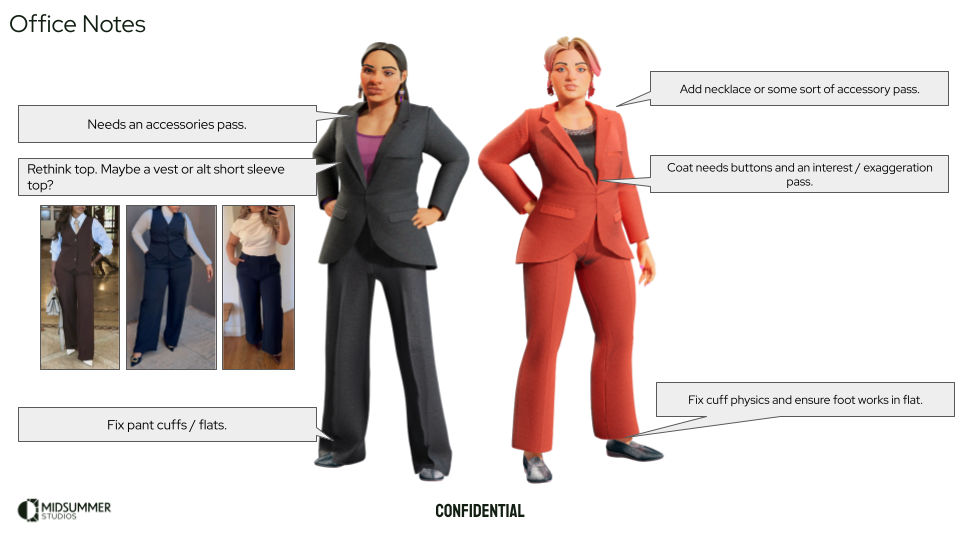
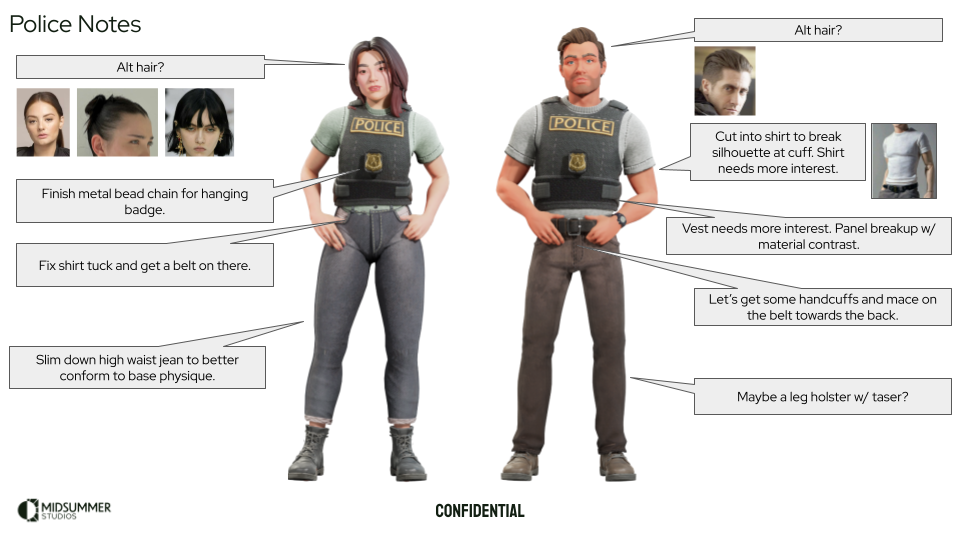
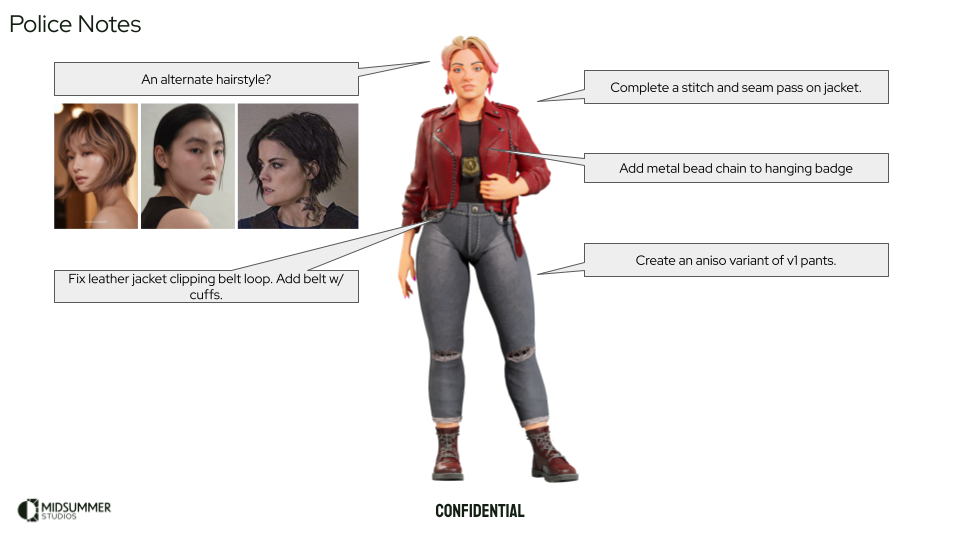
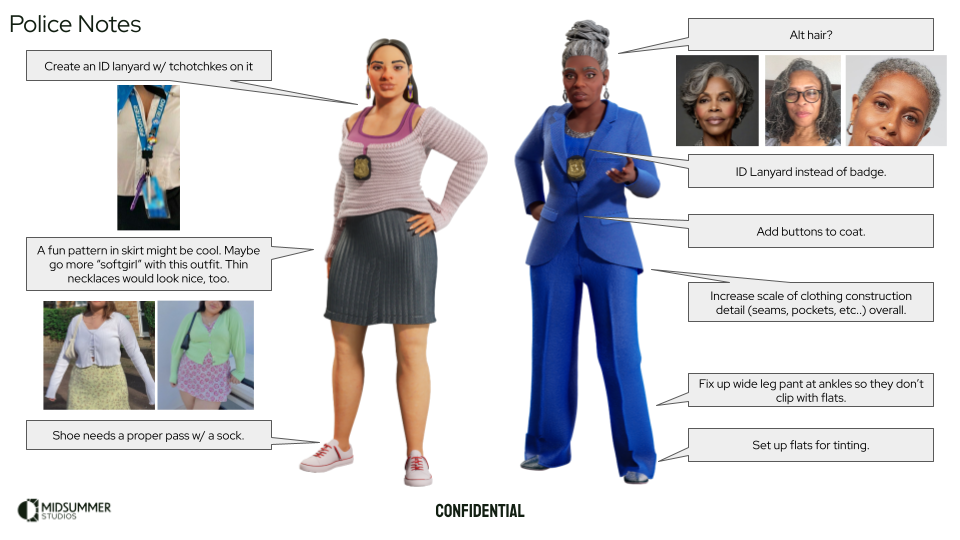
Critique and Polish Notes
It is important to look at the assets with a critical eye and to keep the pillars of character creation in mind. Because we moved so fast and had this 80/20 mentality throughout the development, it is important to take note of what will push the assets over the finish line to polish. It wasn’t important at the time to actually execute on the polish notes, but it was important to get them down on paper for when the time is right. The assets are fresh in my mind at this point and I have a good idea of what effort to put in to bring them to the level of polish we eventually wanted to ship with. Click the button below for an example of the critique notes I made for this set of assets.


Look Development Updates
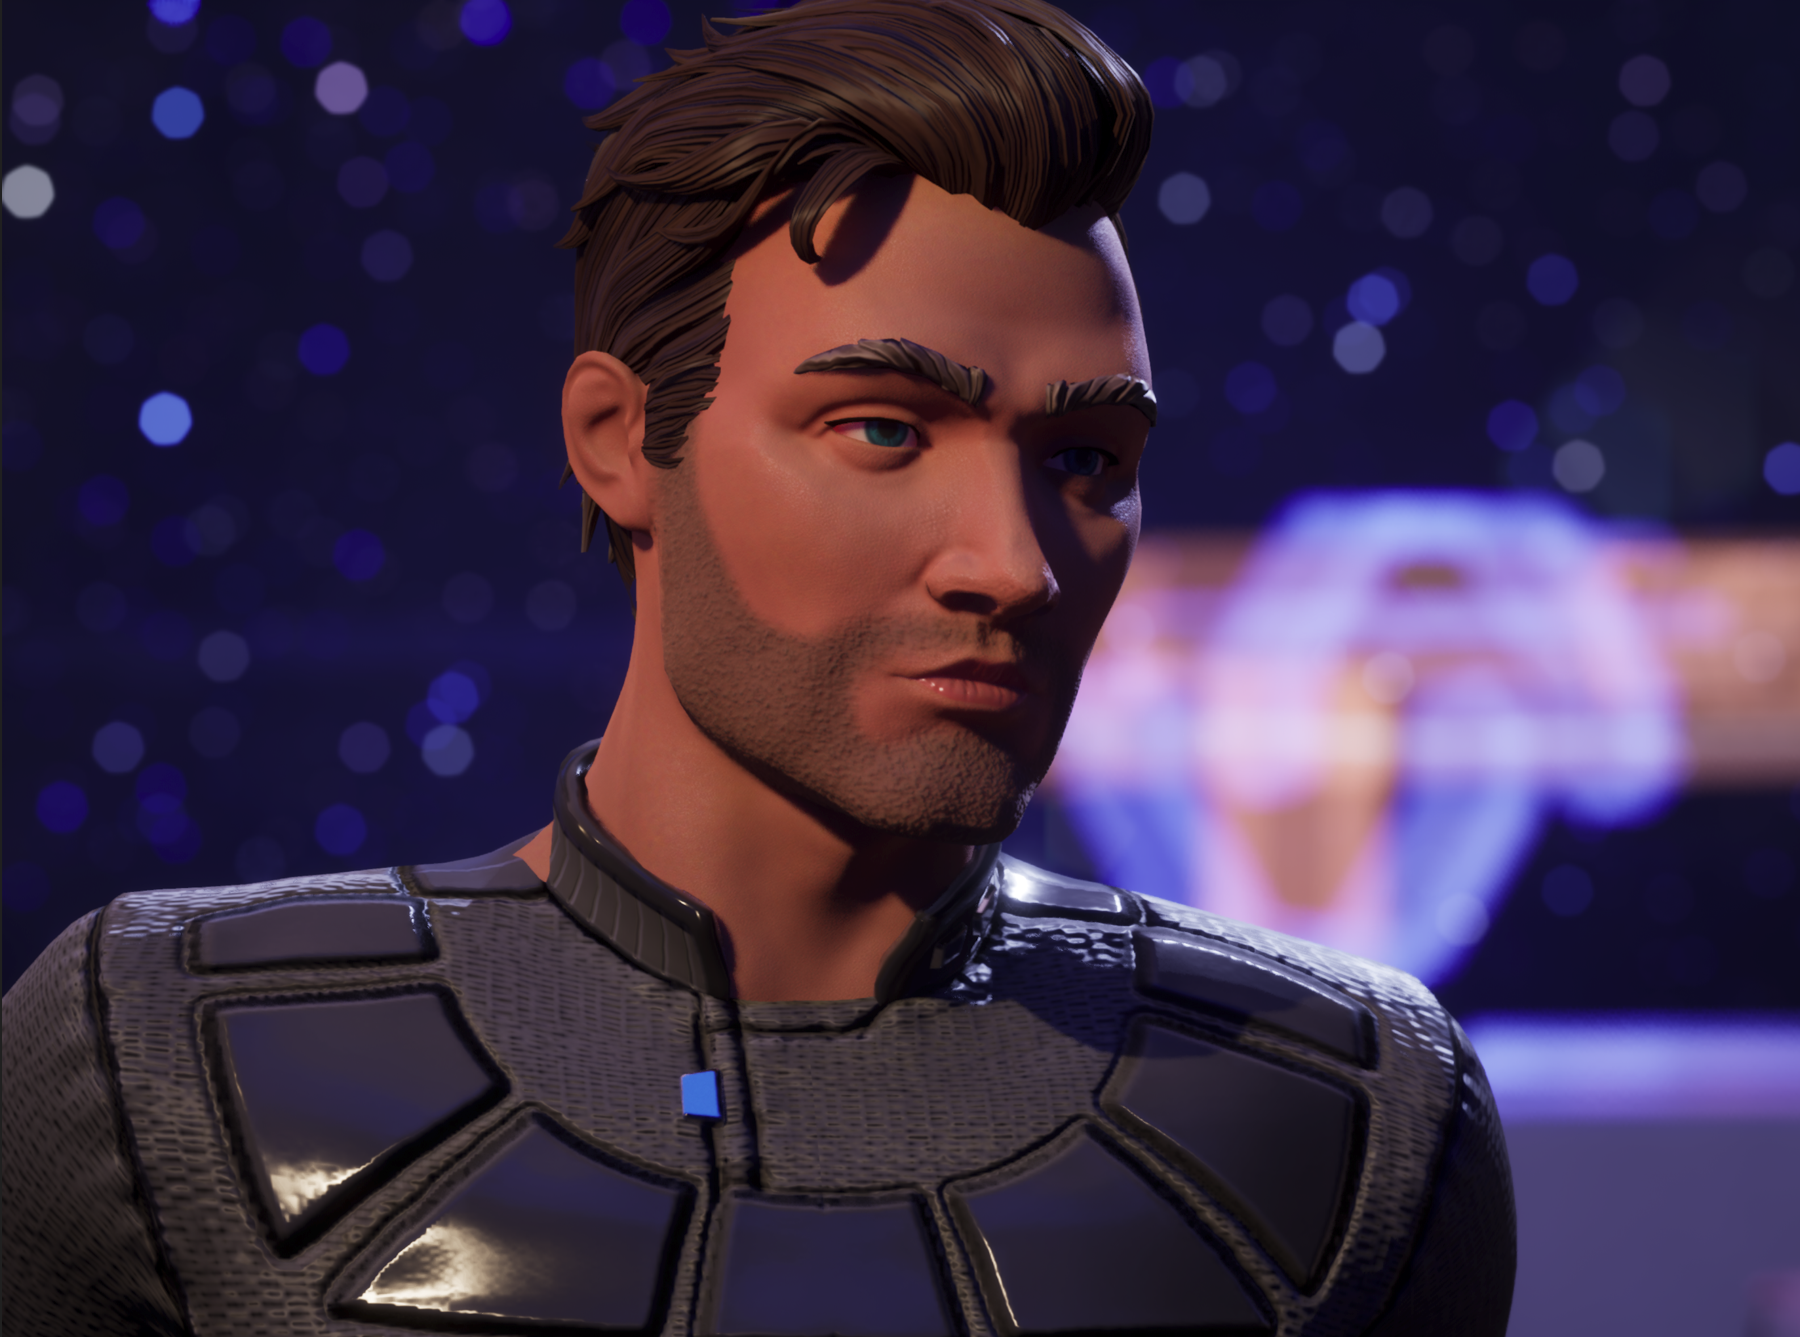
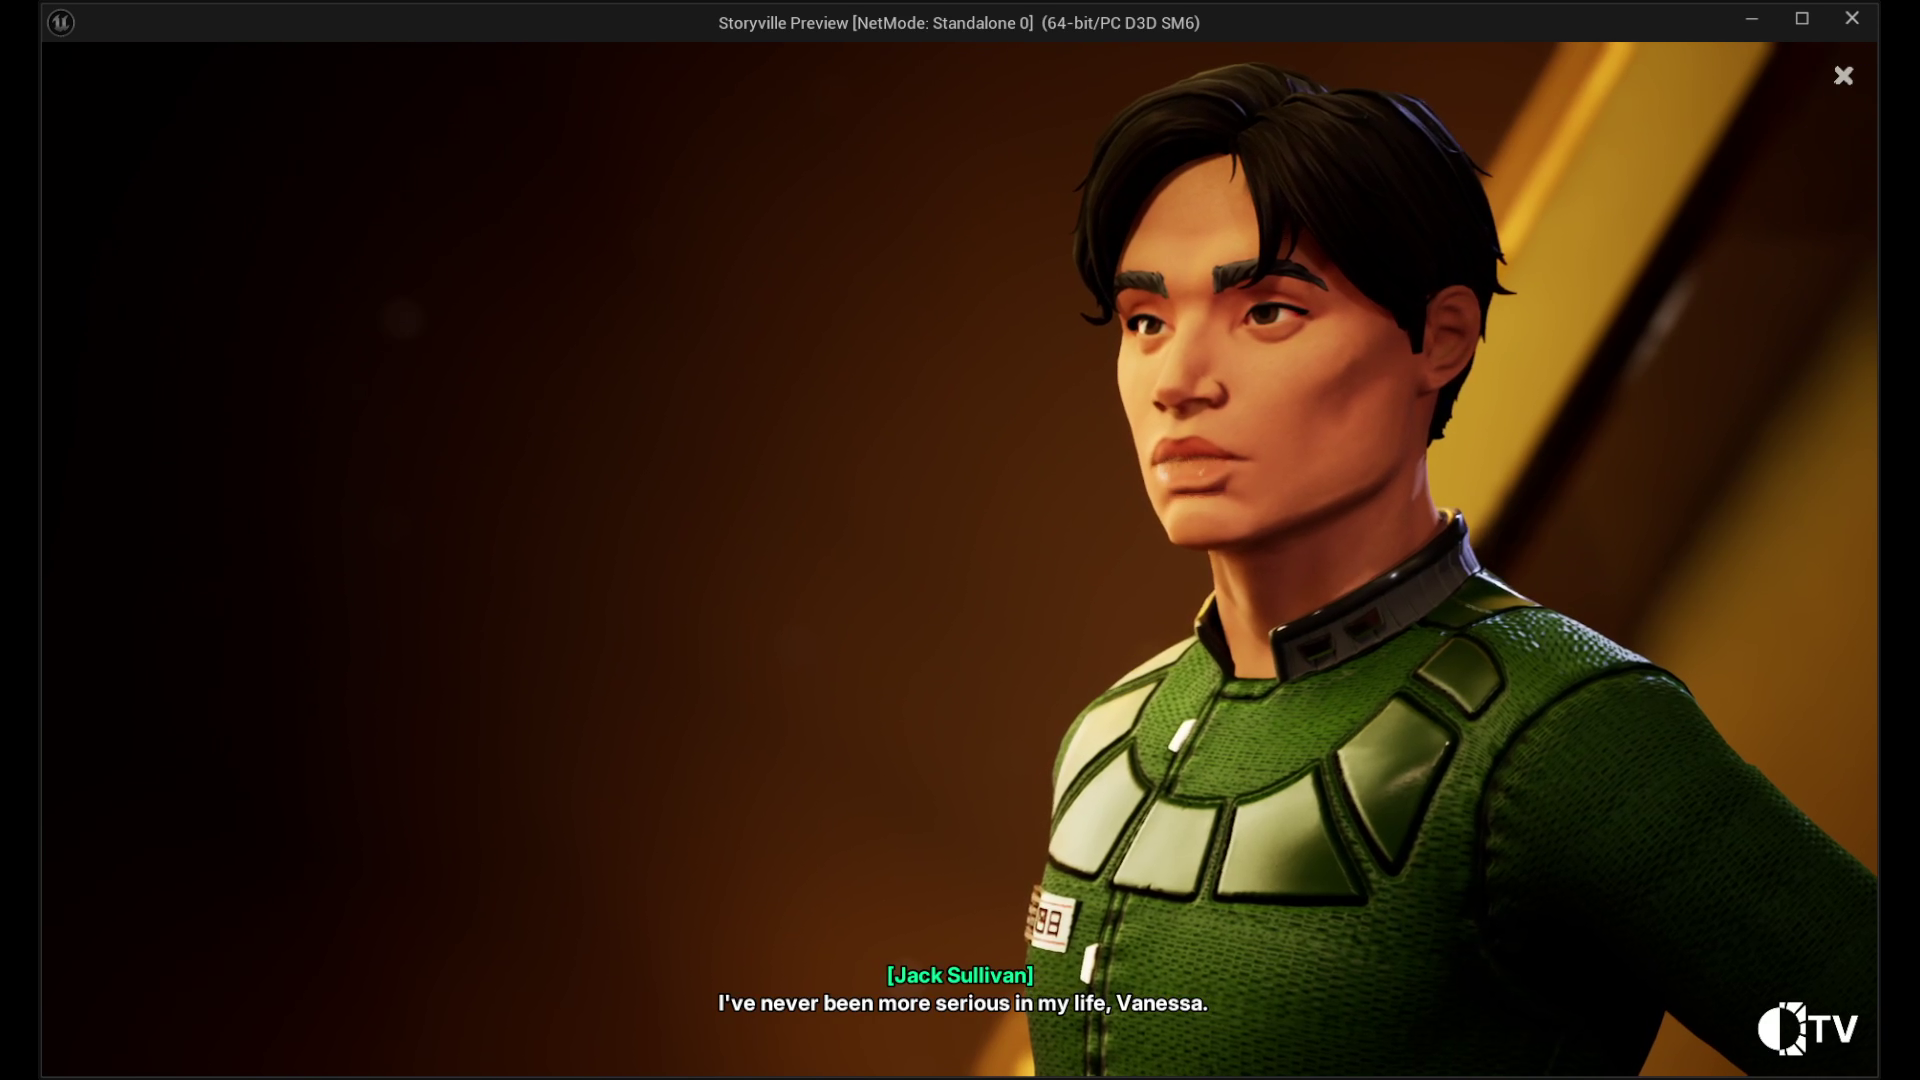
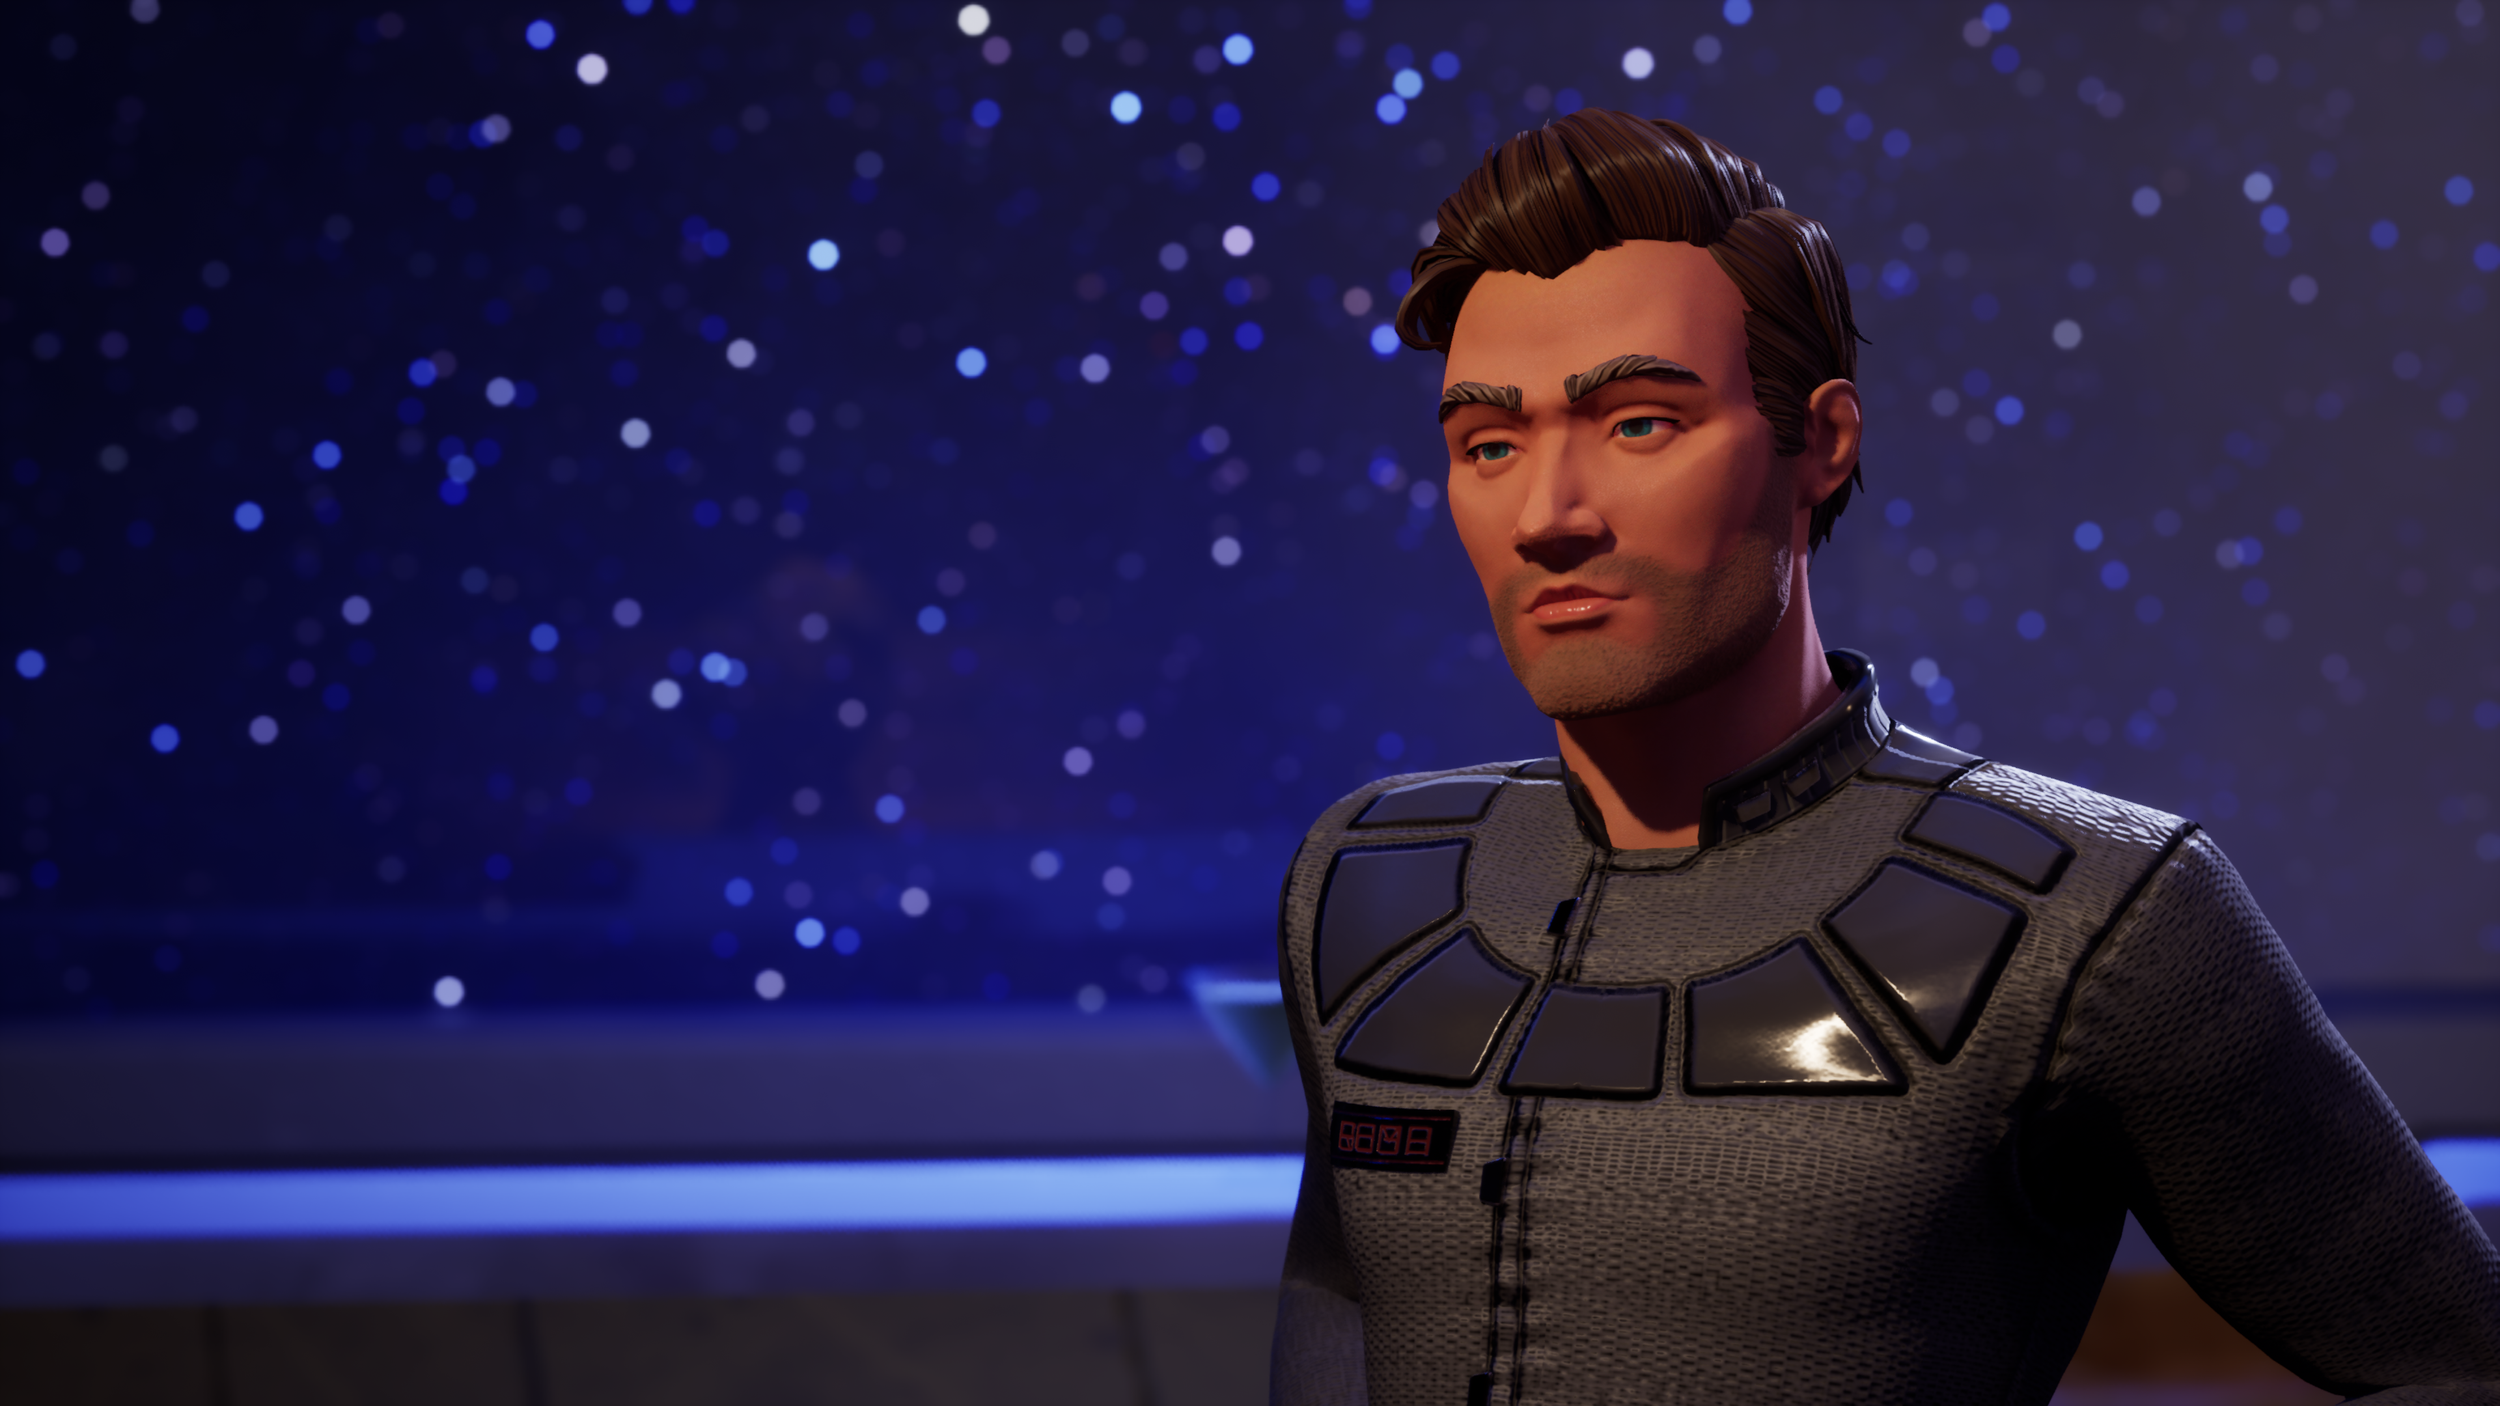
Once the themed sets were complete, we started to explore some new look development and pipeline ideas for our shipping characters. We really wanted an exaggerated, planar body and face that simplified the forms even more while still retaining the naturalistic proportion from our first alignment meeting. In this pass, we also unified the characters’ joint positions to Manny’s skeleton in order to simplify our animation pipeline, but ultimately determined this was not the direction we wanted to go with our skeleton.
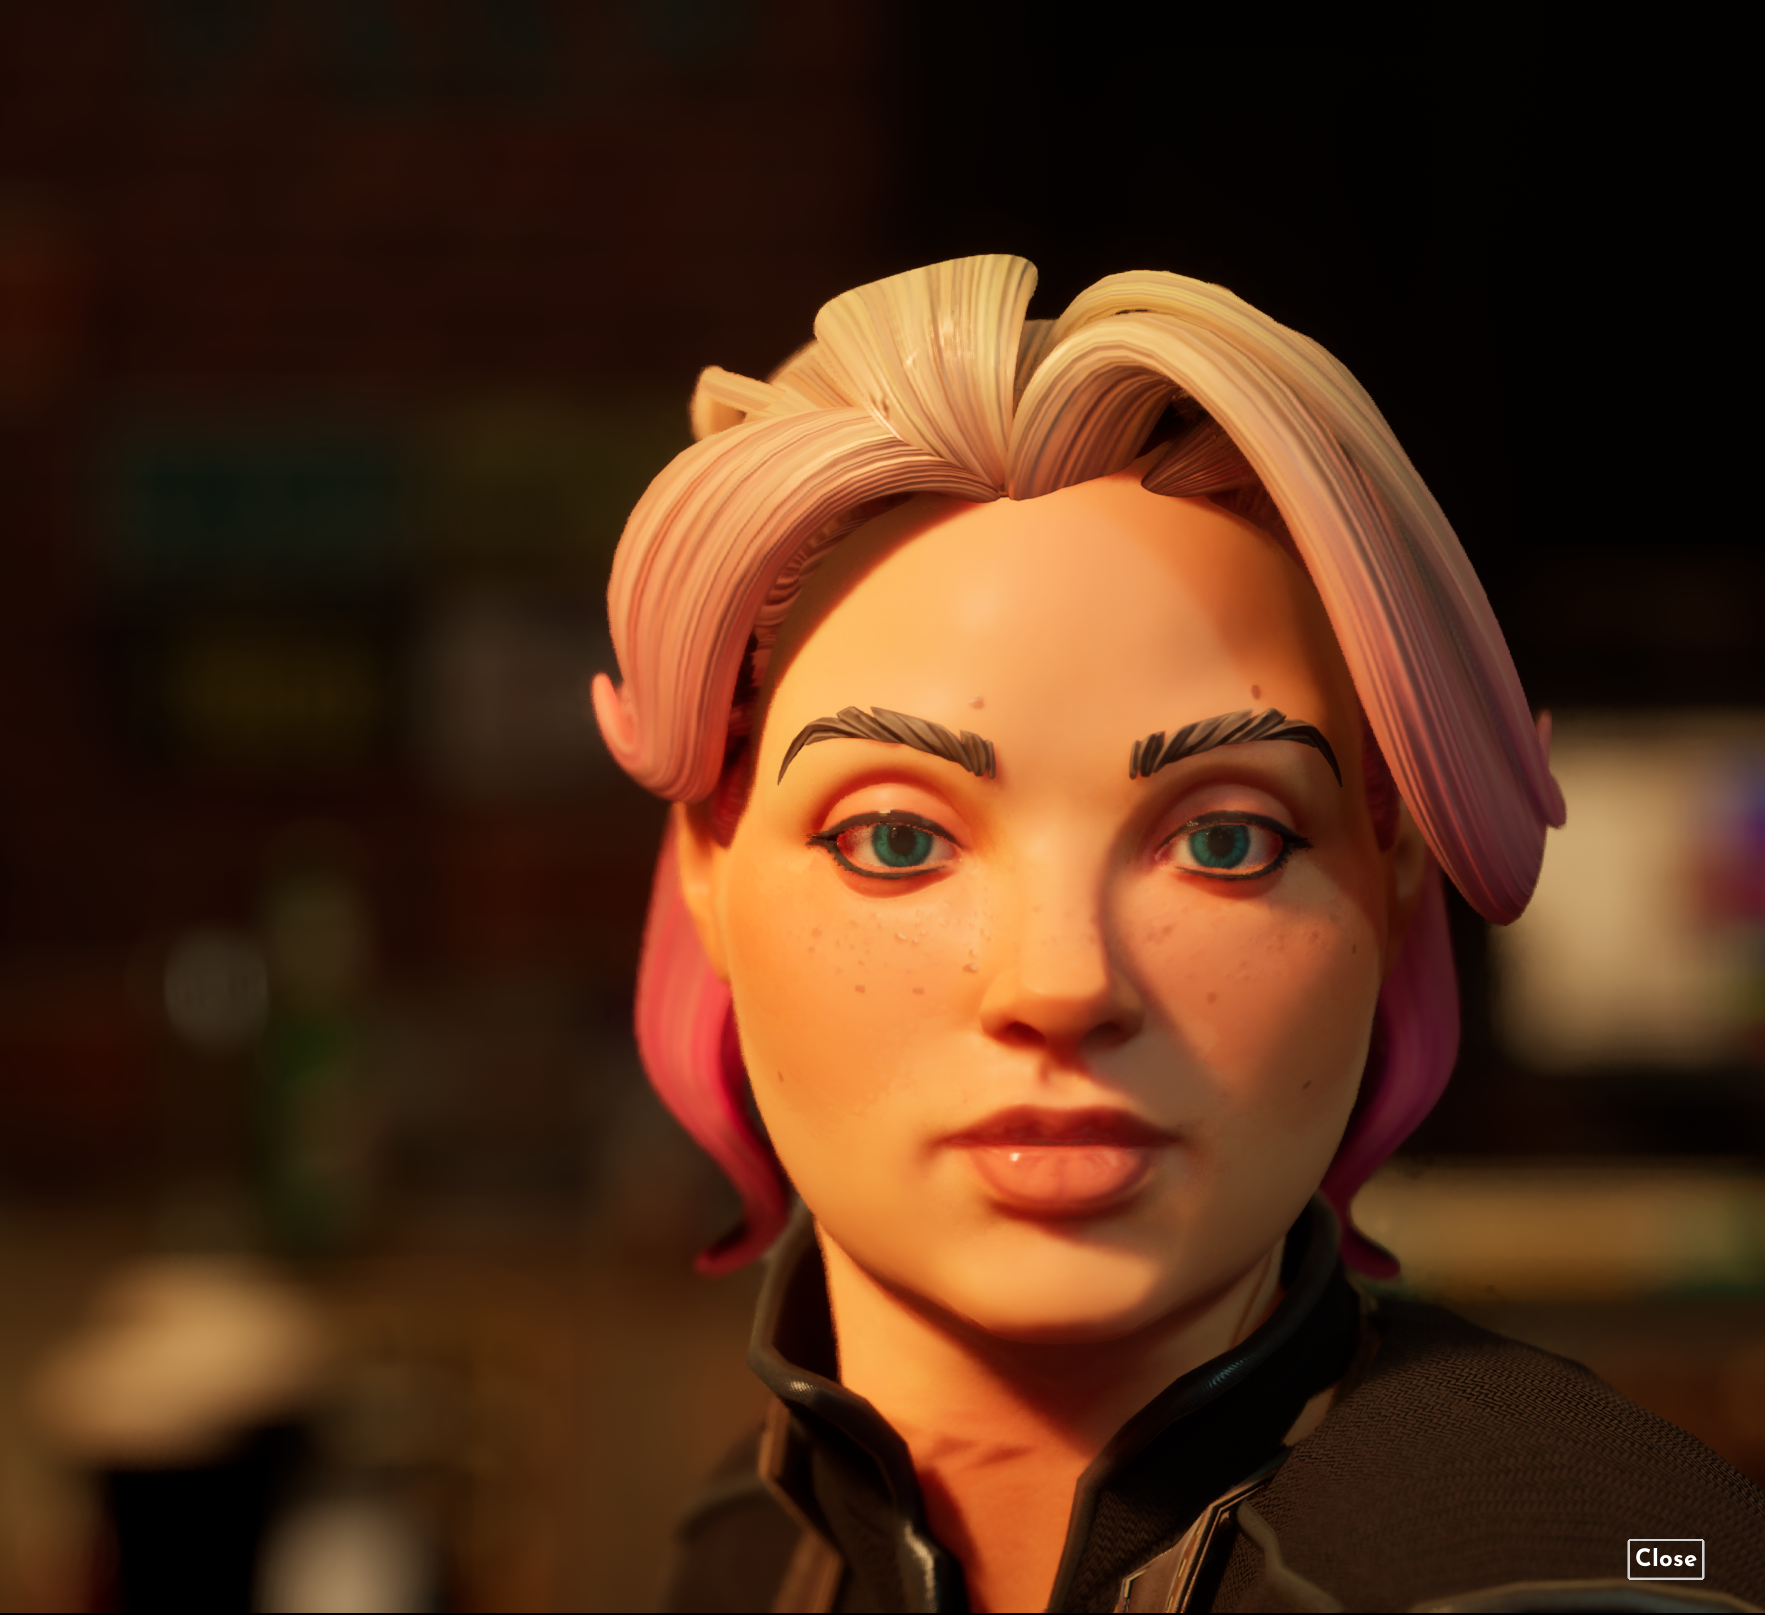
We were very happy with where this version of Jack was headed.
Mutable Character Customization
Alongside lookdev, I began R&D for our character customization system. Kevin and I established a timeline and tasks to set up final production meshes and rigging. I analyzed the Mutable Sample Project to understand their approach, defined our system's requirements, and categorized our character components as bespoke or systemic. I tested existing assets to evaluate setup complexity and maintenance needs for advanced operations like mesh cutting and deformation (e.g., tucking shirts into pants or pant legs into boots).
Mutable is a powerful tool! It is an awesome out of the box framework for setting up customizable objects and can be used for far more than character content.
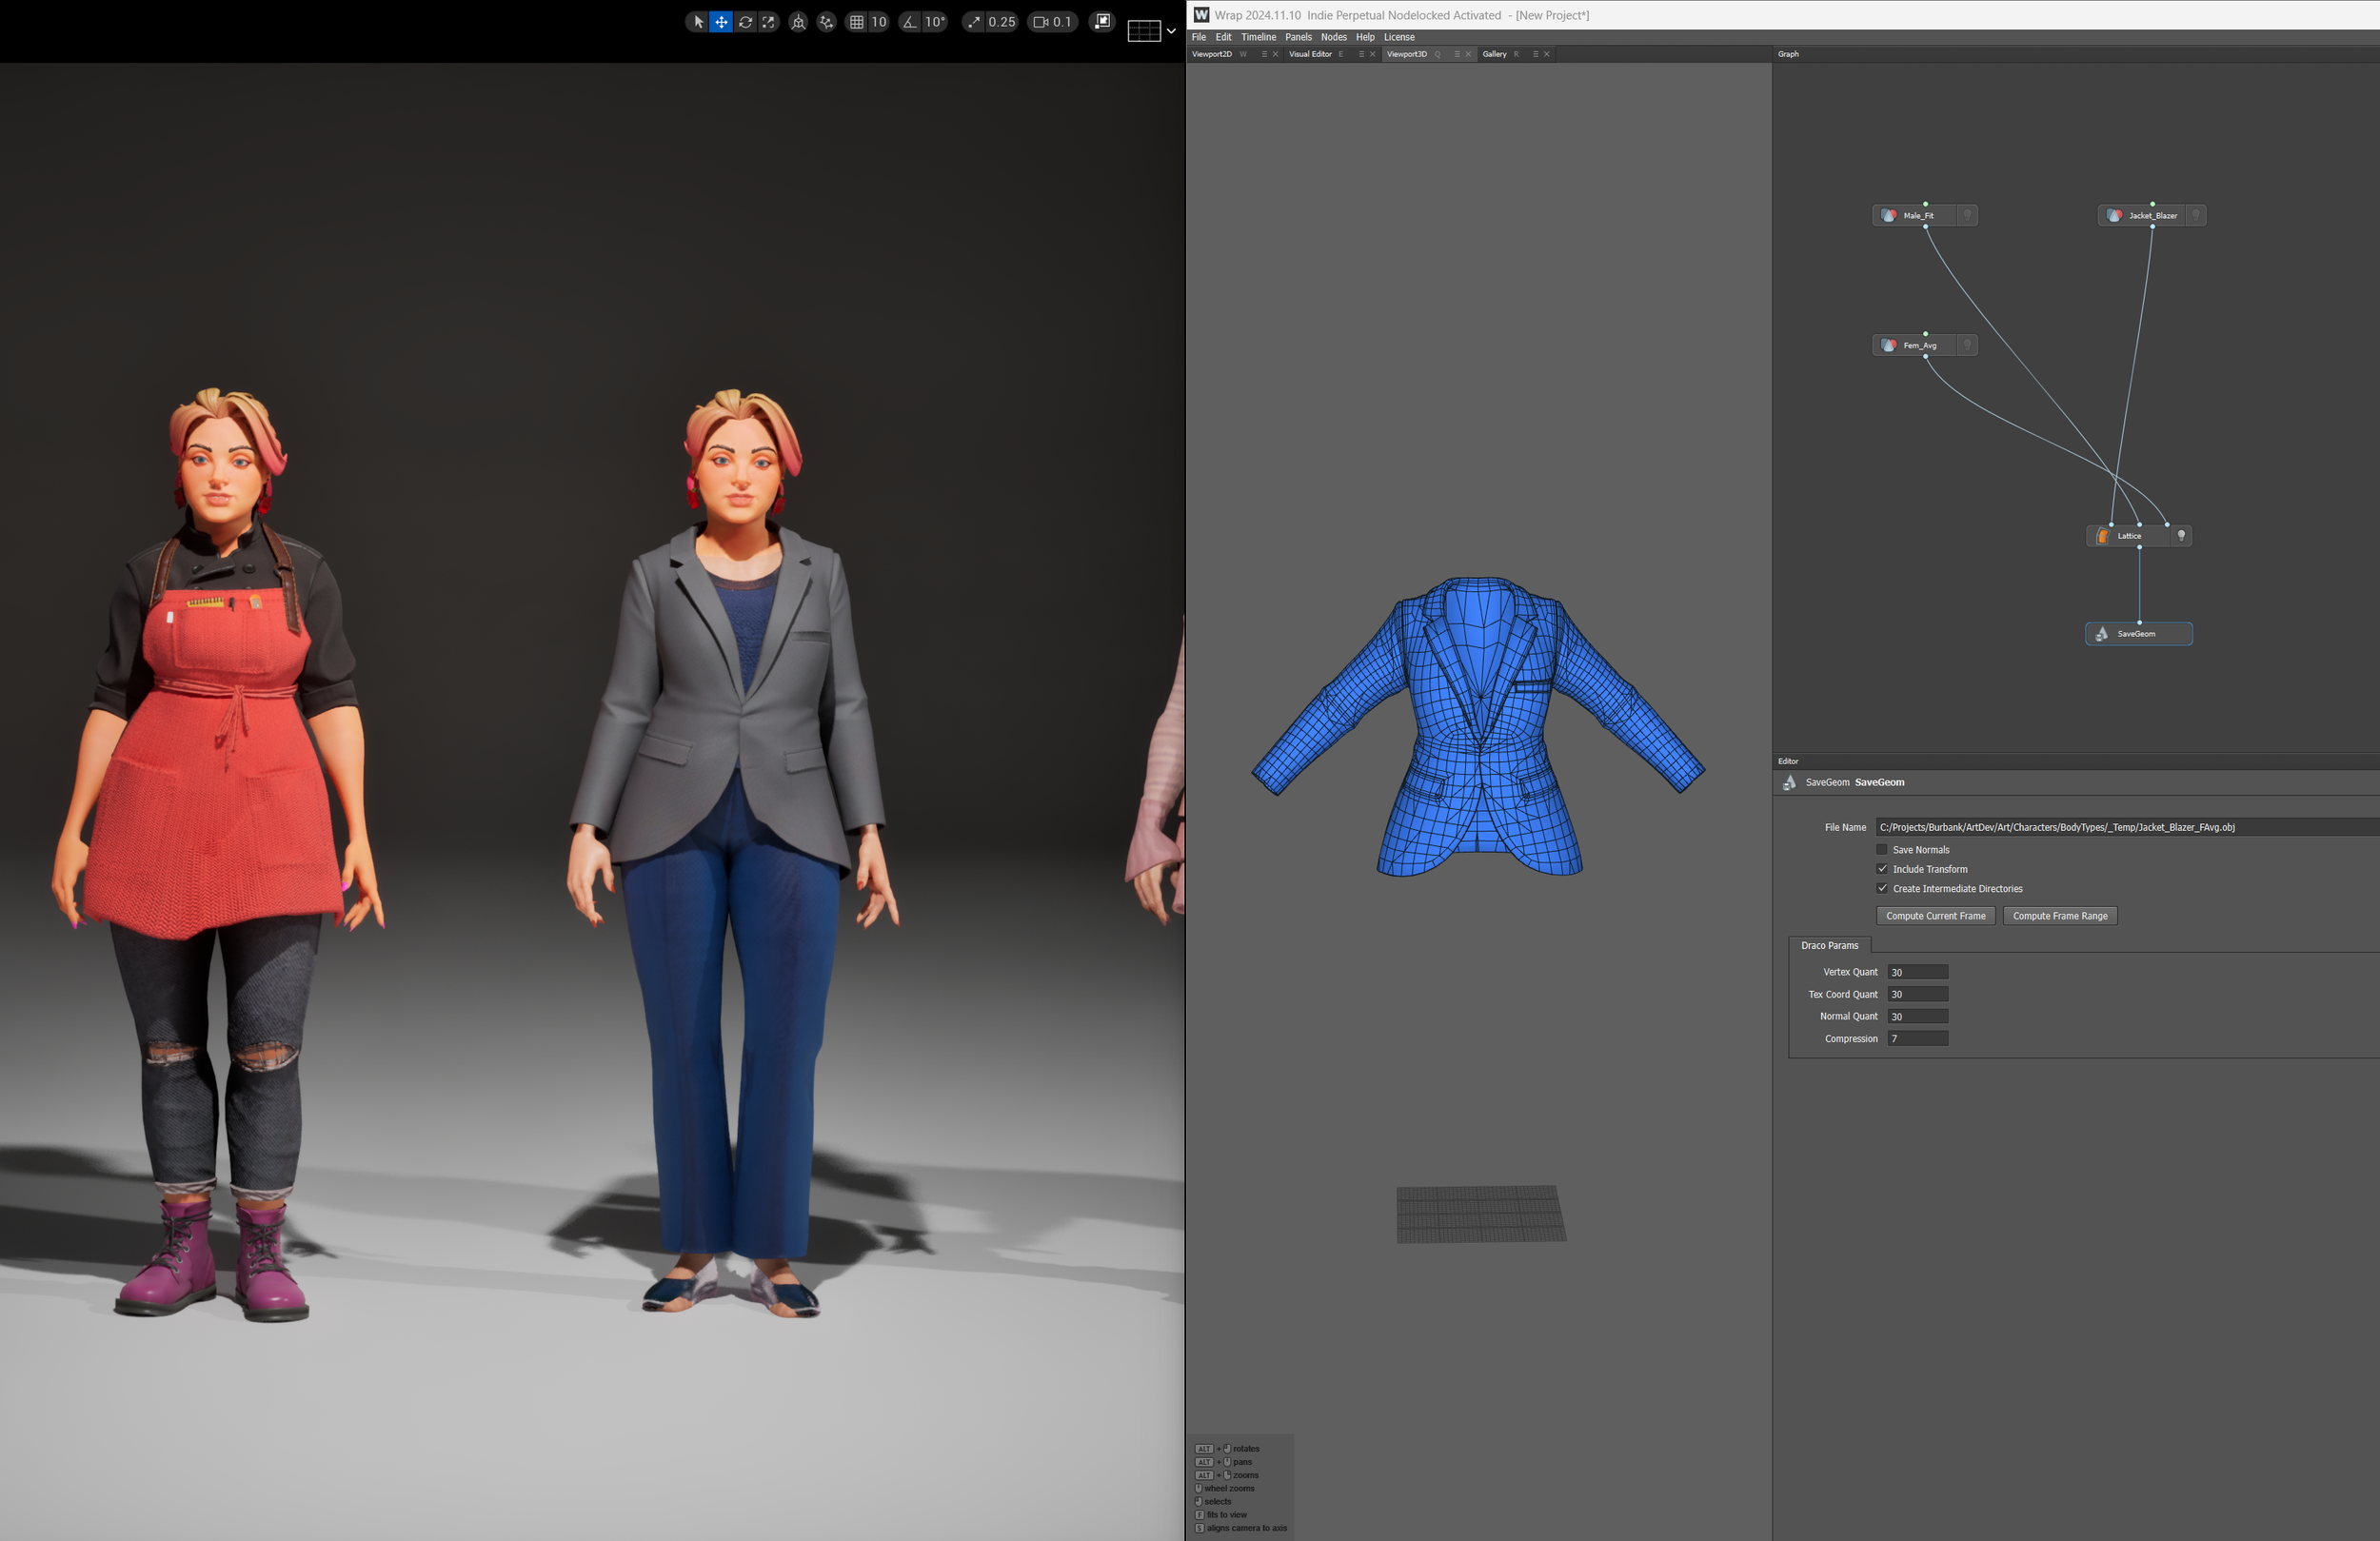
Our goal for testing Mutable to the fullest before beginning character production in earnest was to recreate Jack and Melinda in the same way we would approach the setup for production. This means I would create a neutral mesh that morphed between our masculine and feminine fit body types, wrap our existing clothing to the neutral mesh using Faceform’s Wrap, and take advantage of Mutable’s reshape node to help deform the clothing from the neutral mesh to the target body.
The neutral mesh is piped into Wrap where our clothing is morphed from the original source body (from the demo) and latticed to our target neutral mesh. They’re then exported and set up as Character Objects in Mutable so that they can be accessed by the main character object graph. The graph shown here is the morphable neutral mesh. It can blend between our Masculine and Feminine fit bodies as well as has a basic hook for skin tinting.
One note I do want to call out about the reshape mesh - I thought I was being clever and I gave our reshape mesh a little bit more fidelity to match closer to the source meshes it’s reshaping to. It turns out this just increases the visual artifacts in the resulting reshape as you can see in the image blow of the clipping between the breasts. If you ever end up using the reshape mesh, I found keeping it more generalized (at least at the time of this post) provided the best results.
Here is the comparison shot between the Reshape mesh from Epic’s sample project, and my higher fidelity reshape mesh. In this case, it proved better to use a simpler, more generalized mesh.
With meshes complete, I pivoted to building customization materials for skin and clothing. The demo clothing used multiple shaders due to iterative improvements during production, so I consolidated the best features into one streamlined material per asset type. This was designed around Mutable's mesh combining workflow: by unifying all clothing onto one material, skin onto another, and hair onto another, I could reduce character draw calls from 8-9 down to 3-4 once processed into Character Object Instances.
Before starting material work, I outlined goals and clarified this was a proof of concept requiring a technical artist to finalize. Anticipating extensive environment customization, I built most functionality using Material Functions to enable shared techniques across master materials and streamline feature updates. I prioritized content sharing between characters and environments—allowing patterns created for carpets or wallpaper to work on characters too. I created common functions for our material library, then assembled them into Master Materials to validate they met the game's customization requirements.
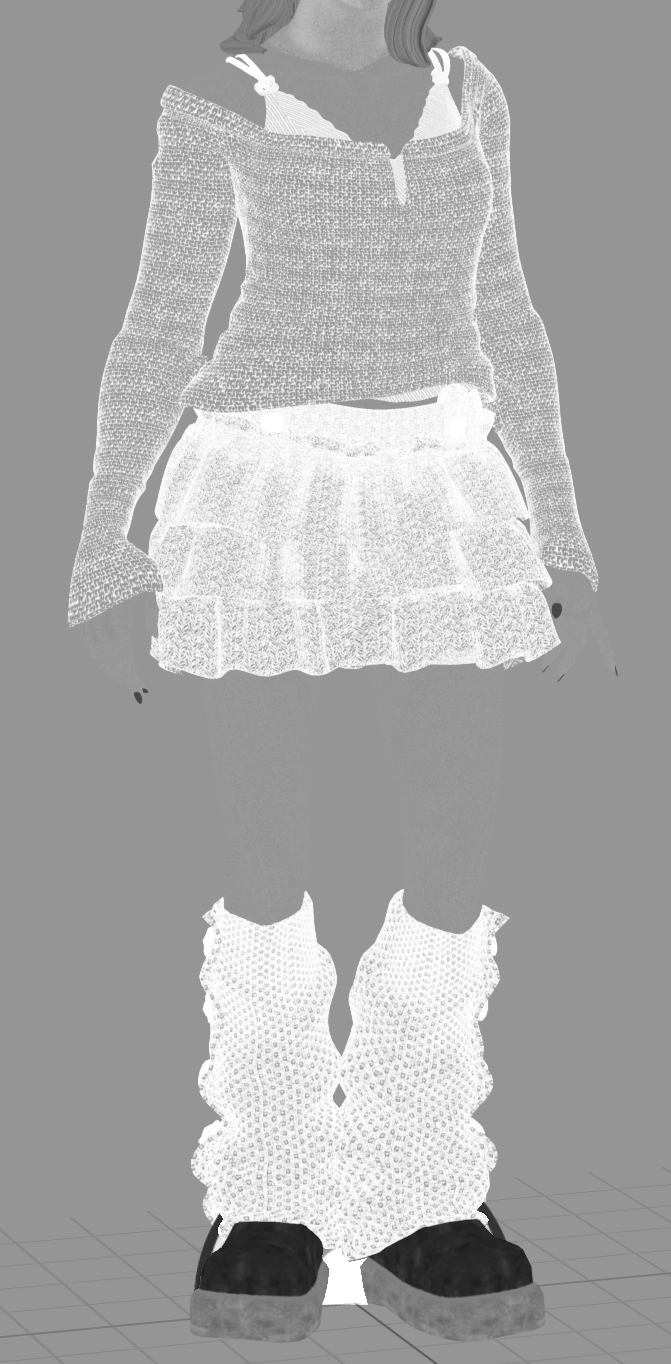
This is the start of the main customizable cloth shader. It had most of the functionality represented from tri color tinting, to patterning with tints, a tiling detail normal. I still need to add the cloth fuzz feel at this point but I wanted to start pivoting to the environment materials to ensure that everything came up at the same time.
Character / Environment Unification
I started to create a few Master Materials for Todd to use when setting up assets and found that I needed to rework the level kit a bit to better support the tiling workflows we wanted to use. I grabbed the level kit pieces and spent a couple days putting together the structure material, some additional functions, a couple glass materials, and reworked the geometry and UVs so that they tile nicely. I also added some debug parameters that he could enable when assembling levels to ensure everything is going together correctly.
Here are shots of some of the functionality for the structure shader. This uses the same functions that were set up for the characters and therefore the same export presets and tooling. I also use the glass shader made for the structures on the character’s glasses.
The other challenge we faced when working with the marketplace assets is that some of their texture sets didn’t follow the Unreal standard. I started to build out a tool that would allow us to swizzle textures utilizing a material and render targets, and then upon doing some further research I found that Unreal has a tool built in called the Texture Graph which has so much more functionality. This was a great find as I used it a bunch for additional lookdev outside of the environment unification. Even though we didn’t end up using it, I was proud of what I built for the Swizzler so I want to show it off a bit.
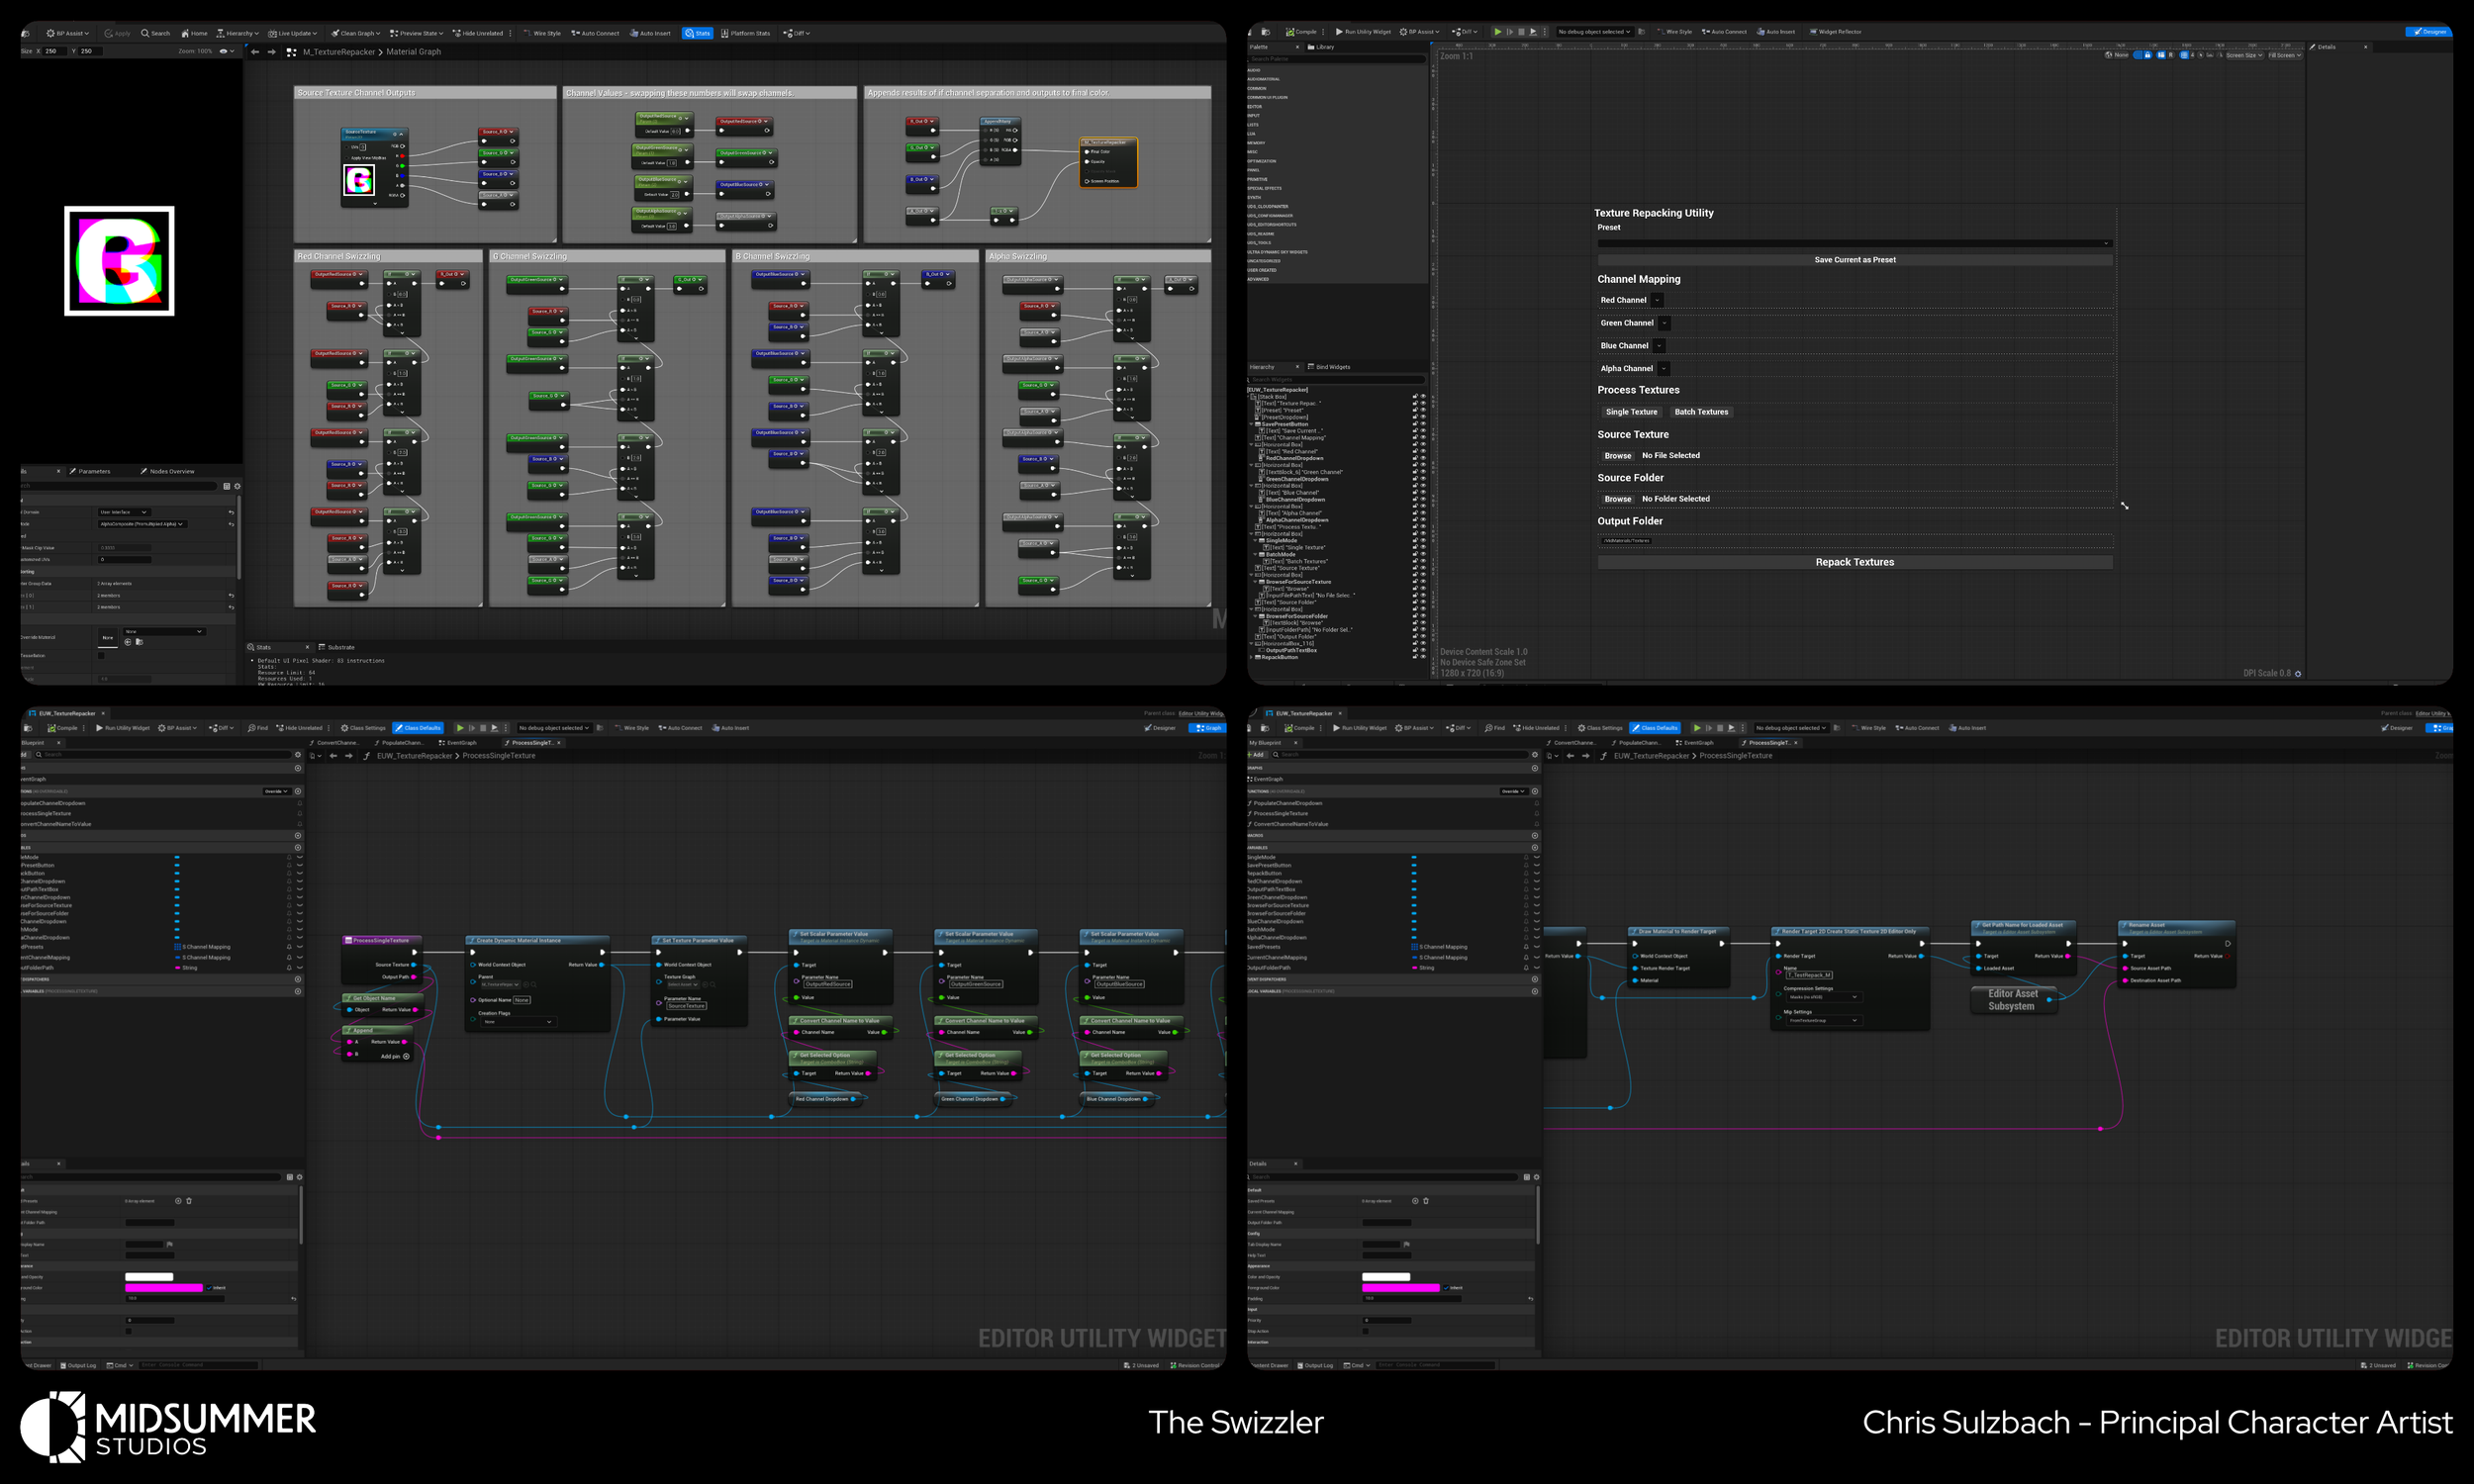
Big thanks to Ryan Meier for his help and advice with the Editor Utility Widget side of things.
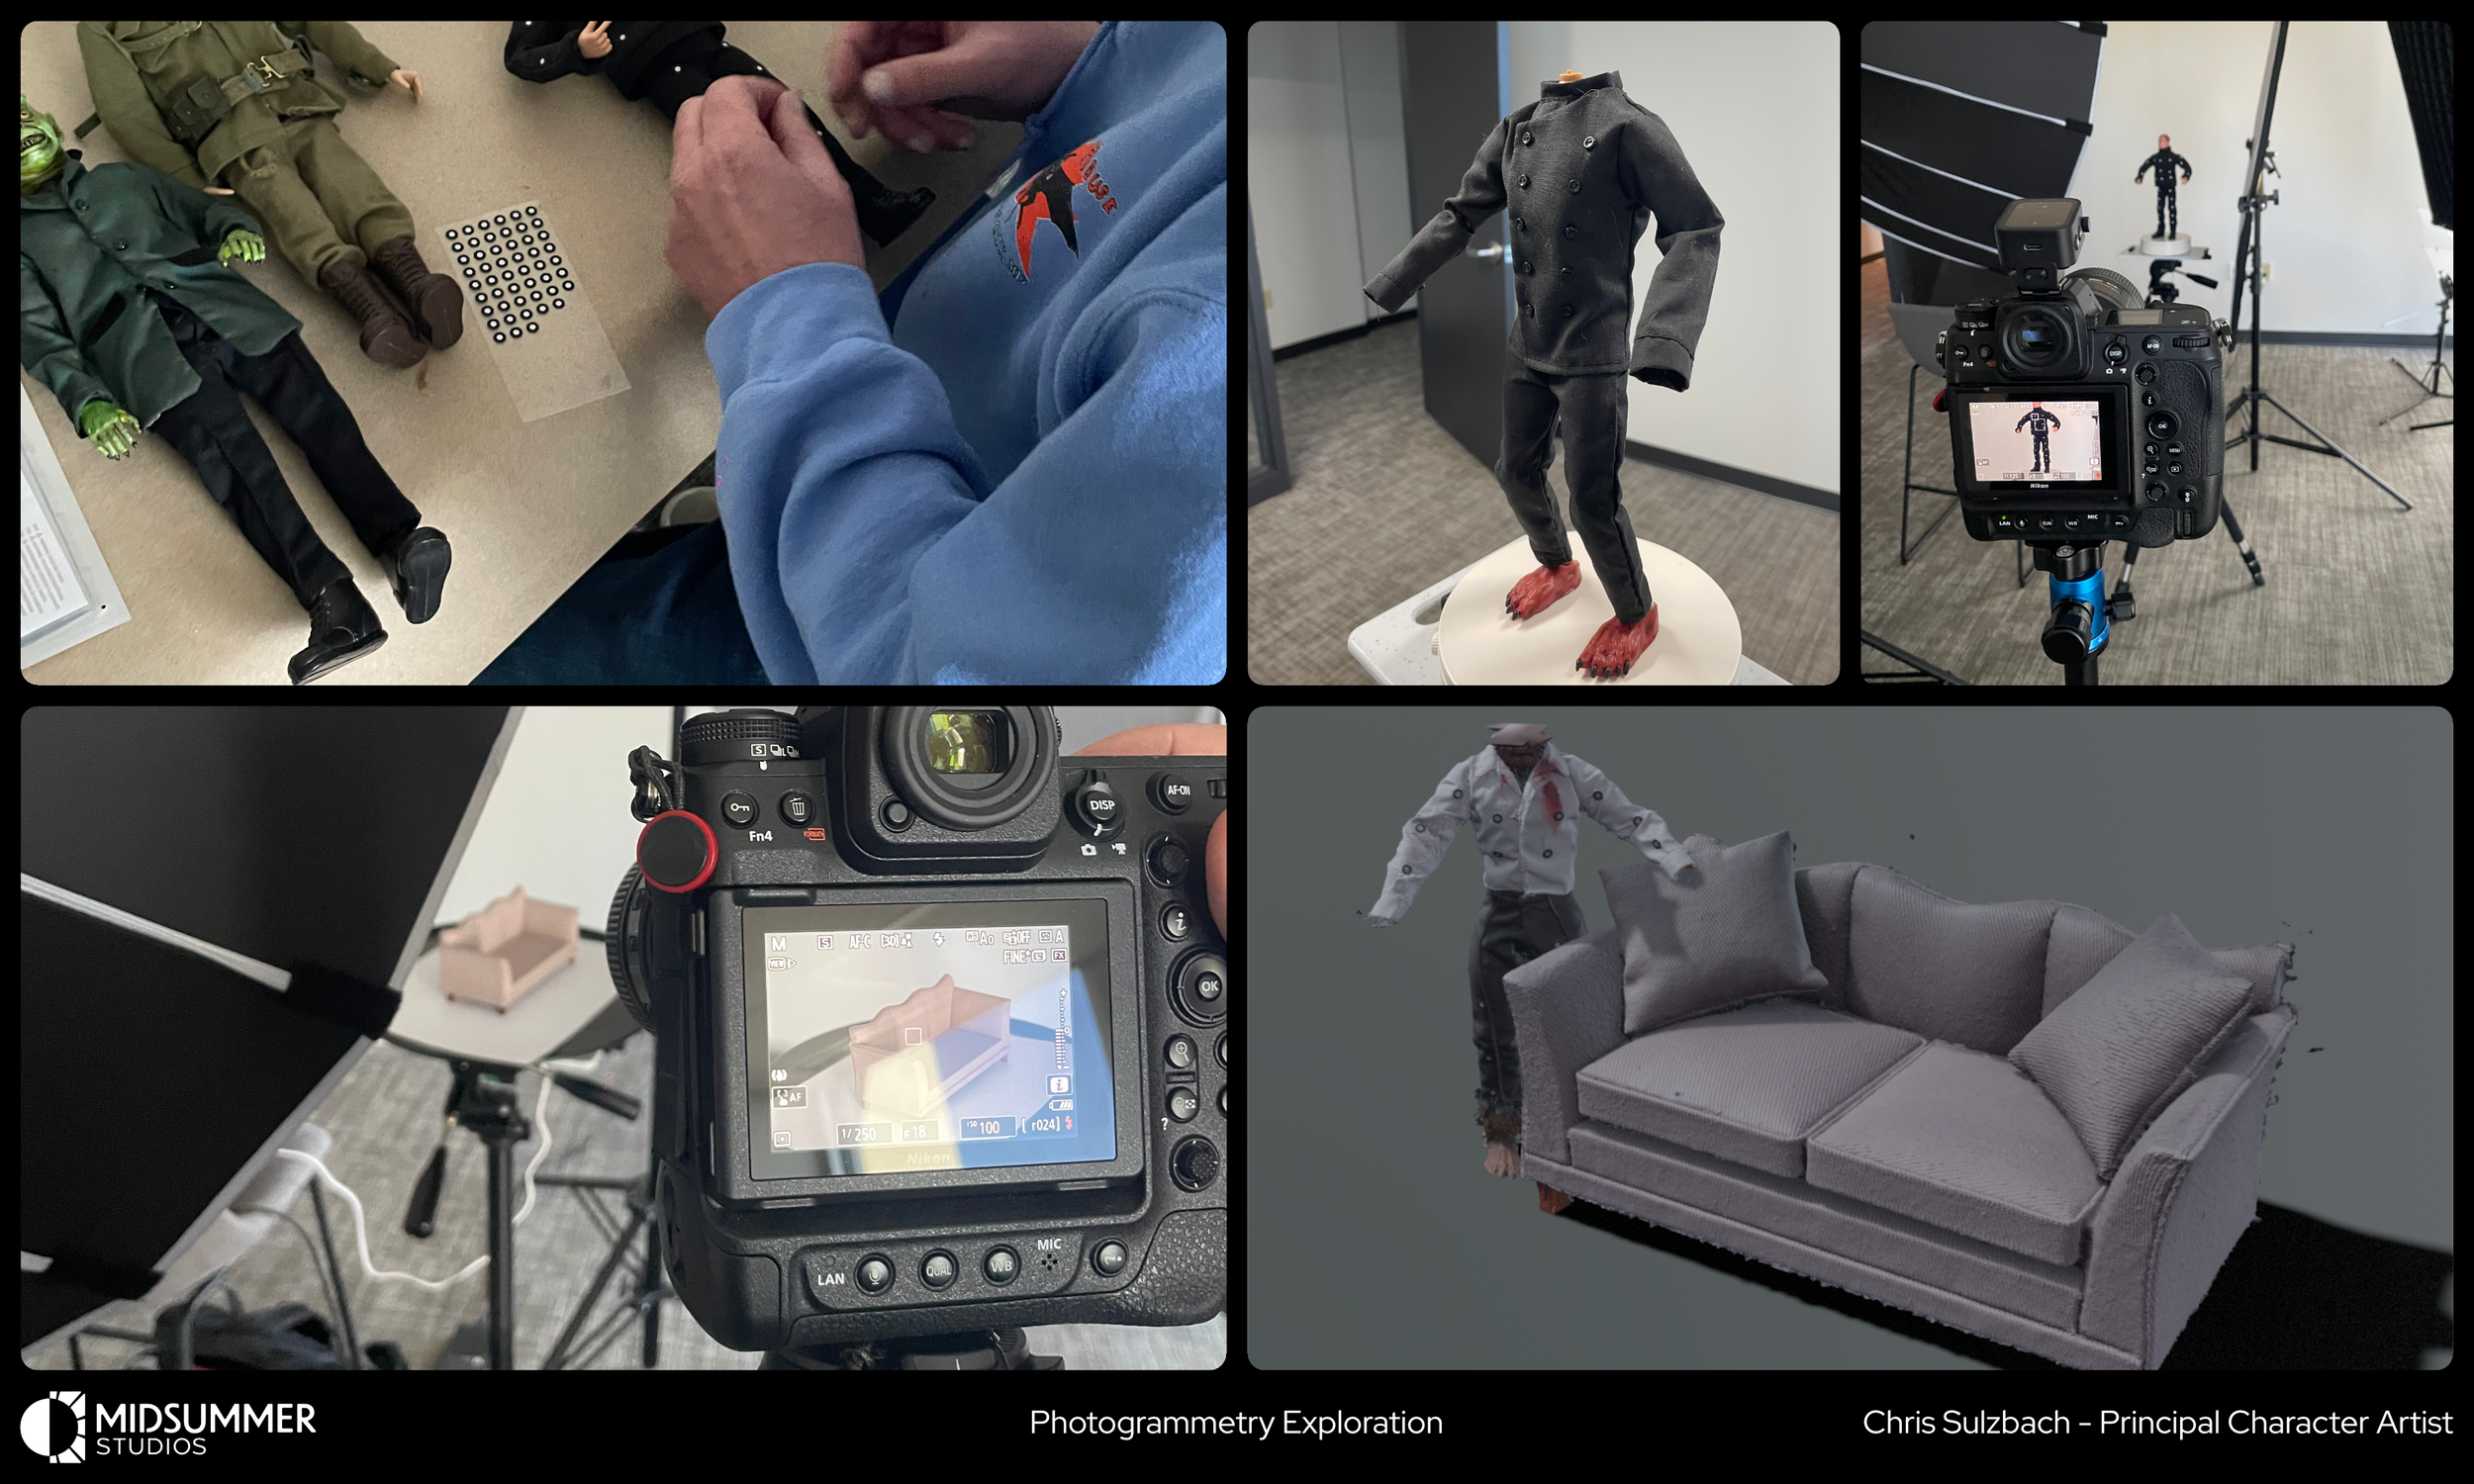
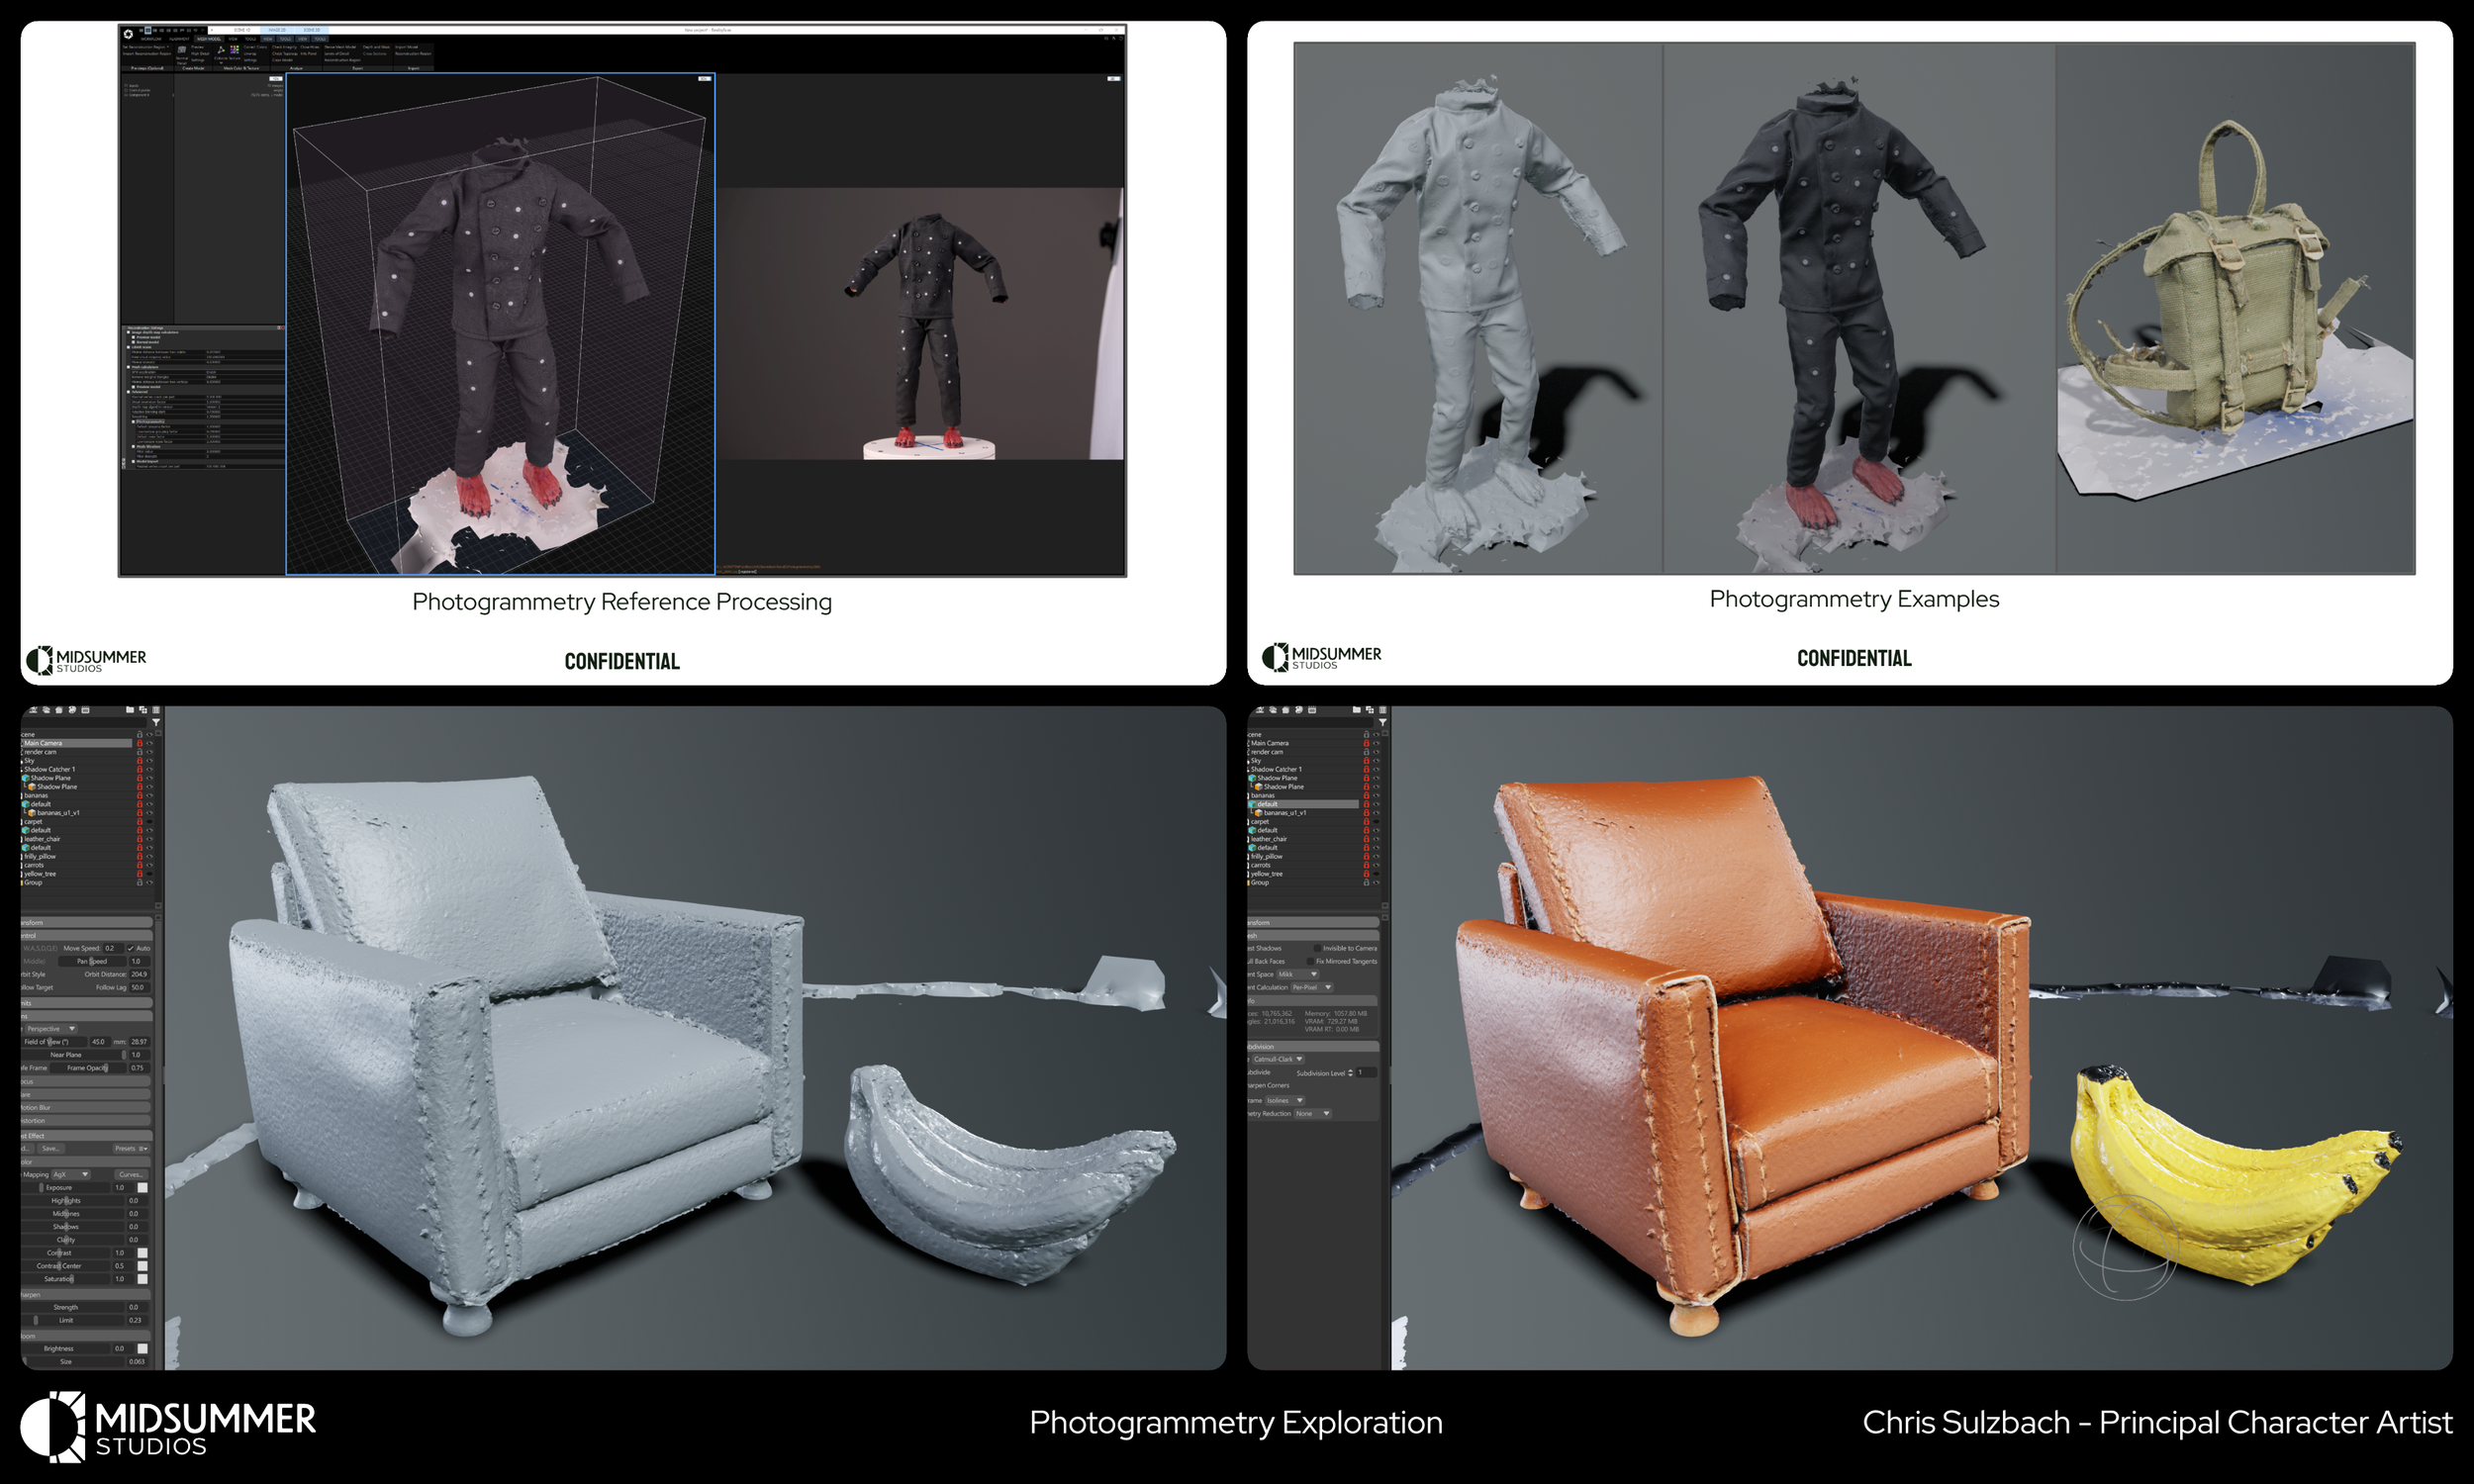
ADDITIONAL lOOKDEV - pHOTOGRAMMETRY
Todd has made custom action figures for years, including hand-sewn costumes and paintjobs. We utilized a technique called photogrammetry to scan his characters so we could gather reference for clothing construction, folds, seams, and miniature-scale detail. Using our CTO Will Miller's camera and lighting setup with a rotating Lazy Susan, Todd and I captured images and processed them using Epic’s RealityScan into models and textures. We scanned characters, dollhouse furniture, toy fruit, some fabrics, and even landscape models to build a test scene for our prop material and furniture customization pipelines.
Thank YOu!
If you made it this far, thank you for taking the time to read through this post and see a lot of what we were up to at Midsummer. This was an extremely rewarding experience. I’m incredibly proud of the work we were able to do as a small 3 person art team and I’m grateful that I was able to share so much with you about our process.